Trezor Suite documentation
This documentation provides technical information for Suite developers, third-party wallet developers integrating Trezor, and users interested in implementation details. It is available at docs.trezor.io/trezor-suite in an HTML version compiled using mdBook. More guidance on Suite development can be found in package READMEs of the trezor-suite monorepo.
Code Style Guide & Skills
name: skills-and-code-style-contribution description: How to contribute to the Trezor Suite code style guide, including issue proposals and pull request workflows. Use when proposing code style changes.
Skills and Code Style Contribution
How to Contribute
You have two options for contributing to the code style guide:
1. Create an Issue with a Proposal
Everyone is welcome to make contributions! Check the list of current proposals before you create a new one. These proposals shall later be discussed at the Code Improvements meetings with members of the Suite team. Once we agree on a preferred solution, the person who added the proposal is responsible for implementing any related changes to the codebase and/or documenting the decision in this guide.
2. Create a Pull Request
Create a pull request with the proposed code style change so we can have a discussion directly in the PR. This is a good option for smaller changes that don’t require much discussion and are not that controversial. For larger changes, we recommend creating an issue first to have a more focused discussion before implementation.
Packages
name: packages description: How to create and structure packages in the Trezor Suite monorepo, including scopes and sizing guidance. Use when creating new packages or resolving cyclic dependencies.
Packages
How to create packages
Use command yarn generate-package @scope/newPackageName. For example using name @suite-common/wallet will create package in /suite-common folder. Full list of scopes:
| Scope | Folder | Description | Imports from |
|---|---|---|---|
| @trezor | /packages | Public packages (Connect, etc…) and Suite web & desktop packages (that shall be moved to @suite soon) | @suite |
| @suite-common | /suite-common | code shared between @suite and @suite native | @trezor |
| @suite-native | /suite-native | mobile Suite | @trezor and @suite-common |
| @suite | /suite | desktop & web Suite | @trezor and @suite-common |
Packages size
Smaller is better.
Big packages usually lead to cyclic dependencies. Imagine this pattern:
- I have
packageAwhich has typeFormInputand there are multiple forms in this package that need this type - I have
packageBwhich also has a form that needs to useFormInputso you import it frompackageA - Now you want to add this form, alongside others into your main
packageAbut you can’t because it will cause cyclic dependency.
Now you have two options how to solve it:
- You can merge
packageBintopackageA, but it will only amplify this cyclic deps issue for other packages. More things you will have inpackageA, then more often you need to usepackageAin other packages, but that will prevent you from importing any of that packages back intopackageAbecause of cyclic dependency. That will force you to place everything intopackageAwhich will grow into a monolith (that’s the exact thing that happened in packages/suite). - You can create
packageCwhich will contain thisFormInputand bothpackageAandpackageBcan use it.
So creating smaller packages from start is always better, because you have much lower chances to run into issue with cyclic dependencies, but not only that. Smaller packages give you better control of what you will use in other packages, you can run smaller subsets of tests, lints etc which is faster.
Basic Syntax
name: basic-syntax description: If-else formatting, spacing, function parameters, and conditional rendering rules for the Trezor Suite codebase. Use when writing or reviewing TypeScript/React code.
Basic Syntax
If - else
// bad - we don't like inline-if with else branch, harder to read
if (condition) doSomething();
else doSomethingElse();

// good
if (condition) {
    doSomething();
} else {
    doSomethingElse();
}

// also good - inline if without else is fine
if (condition) doSomething();
Spacing
Try to use empty lines as a tool for structuring the code even better.
🔴 Hard to read function without spaces:
export const getPrerequisites = ({ router, device, transport }: PrerequisitesInput) => {
    const excluded = getExcludedPrerequisites(router);
    const prerequisite = getPrerequisiteName({ router, device, transport });
    if (typeof prerequisite === 'undefined') return;
    if (excluded.includes(prerequisite)) return;
    return prerequisite;
};
🟢 Well-arranged code:
export const getPrerequisites = ({ router, device, transport }: PrerequisitesInput) => {
    const excluded = getExcludedPrerequisites(router);
    const prerequisite = getPrerequisiteName({ router, device, transport });

    if (typeof prerequisite === 'undefined') {
        return;
    }

    if (excluded.includes(prerequisite)) {
        return;
    }

    return prerequisite;
};
As you can see, there is no line between excluded and prerequisite – that’s because in this context that separation adds little benefit, instead the constants become the group. Base the groups not only on type of code (method call, if-block, declaration) but on what that code does.
Function parameters
Functions accepting multiple parameters tend to be less readable and more error-prone. This can be solved by wrapping the params (all of them, or just some, i.e. “config” params) in an object, thus effectively naming the parameters. A rule of thumb is to use wrapping for functions with more than two params, but it depends on the specific case.
🔴 Confusing function call with many arguments:
const logAnimalNames = (cat: string, dog: string, guineaPig?: string, showHeading?: boolean) => {
    if (showHeading) {
        console.log('My Animals');
    }
    console.log(cat);
    console.log(dog);
    if (guineaPig) {
        console.log(guineaPig);
    }
};

logAnimalNames('Nancy', 'Rob', null, true);
What is the correct order? Why do I have to specify null for an optional param? What does true mean here?
🟢 Tidy function call with wrapped arguments:
interface LogAnimalParams {
    cat: string;
    dog: string;
    guineaPig?: string;
    showHeading?: boolean;
}

const logAnimalNames = ({ cat, dog, guineaPig, showHeading }: LogAnimalParams) => {
    if (showHeading) {
        console.log('My Animals');
    }
    console.log(cat);
    console.log(dog);
    if (guineaPig) {
        console.log(guineaPig);
    }
};

logAnimalNames({ cat: 'Nancy', dog: 'Rob', showHeading: true });
Conditional rendering
Make sure that a condition in JSX can only be true/false . If it could
be 0 or "" , -42 , [] etc. React can render some of those values. In React Native it can also cause text outside Text component!
🔴 Do not use random value as condition
// BAD
{
    value && <Component value={value} />;
}
🟢 Prefer
// typeof hasValue === 'boolean'
{
    hasValue && <Component value={value} />;
}
{
    !!value && <Component value={value} />;
}
if (!value) return null;

return <Component value={value} />;
TypeScript
name: typescript description: TypeScript-specific conventions including ts-expect-error usage, unknown vs any, const assertions, and type vs interface preferences. Use when writing TypeScript code.
TypeScript
Prefer @ts-expect-error to @ts-ignore
TypeScript allows you to suppress all errors on a line by placing a single-line comment or a comment block line starting with @ts-ignore immediately before the erroring line. While powerful, there is no way to know if a @ts-ignore is actually suppressing an error without manually investigating what happens when the @ts-ignore is removed.
This means it’s easy for @ts-ignores to be forgotten about and remain in code even after the error they were suppressing is fixed. This is dangerous, as if a new error arises on that line, it’ll be suppressed by the forgotten about @ts-ignore, and so be missed.
To address this, TS3.9 ships with a new single-line comment directive: // @ts-expect-error.
This directive operates in the same manner as @ts-ignore, but will error if the line it’s meant to be suppressing doesn’t actually contain an error, making it a lot safer.
💡 Sometimes in very rare cases you may still need
@ts-ignore. In that case you need to disable ESLint for that line first; otherwise, ESLint will automatically change it to@ts-expect-error.
Prefer unknown to any
Use unknown for situations where a function doesn’t know the incoming type and not when it doesn’t care about the type. With better type safety, unknown can help us catch possible errors early on.
🟢 Type guard using unknown:
const validateKey = (key: unknown): key is DictionaryKey => {
    if (['string', 'number'].includes(typeof key)) {
        return true;
    }

    return false;
};
If the above type guard marked key as any, calling key() would not throw.
Prefer direct type assignment to indirect
Prefer directly importing types used in a file rather than accessing them indirectly.
🔴 Indirect assignment:
const doSomething = (networkSymbol: Account['symbol']) => {};
🟢 Direct assignment:
import { NetworkSymbol } from '@suite-common/wallet-config';

const doSomething = (networkSymbol: NetworkSymbol) => {};
Direct assignment may add an import, but it prevents the need to refactor if the NetworkSymbol detaches from Account, is easier to read and makes it easier to navigate to the NetworkSymbol type definition in the editor.
Consider using const assertion on objects instead of TS enums
See https://www.youtube.com/watch?v=0fTdCSH_QEU. TypeScript enums are not native to JavaScript and sometimes behave unpredictably. The desired functionality can be achieved using plain objects. Follow the same naming conventions as you would with enums. Despite the object and the type having the same name, TypeScript is able to tell them apart.
// definition
const AuthMethod = {
    Push: 'Push',
    Sms: 'SMS',
} as const;

type AuthMethod = (typeof AuthMethod)[keyof typeof AuthMethod];

// usage
function doThing(authMethod: AuthMethod): void {
    console.log(authMethod);
}
doThing(AuthMethod.Sms);
doThing('SMS');
Prefer types to interfaces
Just to be consistent. Interfaces offer advanced functionality we don’t really use. Related video: https://www.youtube.com/watch?v=zM9UPcIyyhQ
Import/Export
name: import-export description: Named export conventions and barrel file usage rules for the Trezor Suite codebase. Use when writing imports, exports, or deciding on module structure.
Import/Export
Use named export only
-
Consistency. With named exports you can always be sure that the exported value will not be renamed at one point. It’s much easier to refactor with named exports because you can mass-replace and be more confident that it covered everything. Same goes for searching for a value.
-
Tree-shaking. With named exports, Webpack can recognize which exported values are unused and eliminate them. If you want to import all exports from a file and not use default exports, – use:
import * as colorUtils from './utils.js';
Barrel (index.ts) files
Use them in packages to define public interface.
Do not use them inside a module to export from directory. If you feel it shall be separated, create a new package. They can introduce accidental circular dependencies and may hurt tree-shaking.
Components
name: components description: React component file structure and patterns for Trezor Suite. Use when creating or reviewing React components, including prop passing and component organization.
Components
🟠 File structure
- ↕️ Imports
- 🎨 Styles
- 📜 Component constants
- 🛠 Component helpers
- 🆎 Component types
- 🎭 Component prop type
- 🍱 Component
🟠 Component structure
The following structure is just a recommendation, in fact it’s not even always possible to keep the same order inside a component. However, trying to be consistent really helps in the long run, especially when it comes to navigating larger components. It is also useful to group things within each category, e.g. the refs might not have empty lines between each other but if there is only one useDispatch better surround it with them.
- Redux selectors (aka global state)
useState(aka local state)- Non-effect hooks:
useRef,useForm,useDispatch, etc- This one is tricky. Consistency among the non-effect hook order is perhaps too redundant, although I would always put
useFormfirst, for example. Try to place them in the order of subjective importance.
- This one is tricky. Consistency among the non-effect hook order is perhaps too redundant, although I would always put
- Effects
- Functions / callbacks
- Values / components
- Render
Generally, it’s considered a good practice to not use optimisation techniques until you see that you need them. Also when it’s obvious from the start that something would require to be memo’ed – expensive calculation, frequent state updates, expensive re-renders.
Passing props to components
Whenever you pass props to a component, prefer passing only the parts that are necessary and avoid passing a whole large object of which only one or two properties are used.
It creates a clearer interface of the component (you can see right from the interface what is used). And it prevents unnecessary re-renders.
// good
const DeviceVersion = ({ version }) => <div>{version}</div>;

// bad
const DeviceVersion = device => <div>{device.version}</div>;
Spacing
The spacings and negativeSpacings objects exported from @trezor/theme are deprecated. Use numbers directly instead (backed by spacingsNew).
// bad - deprecated
margin-bottom: ${({ theme }) => theme.spacings.md}px;

// good
margin-bottom: 16px;
// bad - deprecated
<Divider margin={{ vertical: spacings.xs }} />

// good
<Divider margin={{ vertical: 8 }} />
Prop drilling and identifiers
Don’t pass entire objects which have an identifier of some sort around in components too much. In simpler terms, consider the Redux store as the primary source for components to retrieve complete data. For instance, if you have three components (C1 ⇒ C2 ⇒ C3) and C1 receives an account key, if both C1 and C3 need the full account, they should use the selectAccountById selector to access it. C1 and C2 should only pass the accountKey as a prop to their children. This principle also applies to selectors, where the parameters should ideally be as granular as possible, like selecting something by id . This minimalistic approach simplifies the identification of what’s necessary in components, helps avoid unnecessary re-renders, and slightly improves performance.
Redux
name: redux description: Redux Toolkit patterns including slices, selectors, thunks, and middleware conventions for Trezor Suite. Use when writing or reviewing Redux state management code.
Redux
Introduction
We use redux-toolkit for writing all of redux code. It has functions that build in suggested best practices, including setting up the store to catch mutations and enable the Redux DevTools Extension, simplifying immutable update logic with Immer, and more.
File structure
Single-(Folder/Package) Logic for features
Co-locating logic for a given feature in one place typically makes it easier to maintain that code. This is also known as the “ducks” pattern. While older Redux codebases often used a “file-by-type” approach with separate folders for “actions” and “reducers”, keeping related logic together makes it easier to find and update that code.
This Single-File approach is strongly recommended by official Redux Style Guide and offers many benefits over a “file-by-type” structure. In our case, in our monorepo, we do something similar but with packages and folders. Usually we have one package per feature or in some specific cases we have packages where you have multiple feature folders. Benefits of this approach:
- Co-locating logic makes maintenance easier - Redux code is usually closely tied-up. Are you changing an action? You probably need to update a reducer. Are you changing the state shape? You will need to update selectors.
- Faster setup and less file system noise - instead of creating two, three or maybe even four files (actions, reducers, selectors, thunks) in multiple folders you can quickly create all files you need in one folder.
Examples of file/folder structure
// good
myPackage / myPackageReducer.ts;
myPackageActions.ts;
myPackageThunks.ts;

// good
myPackage / myPackageReducer.ts;
myPackageActions.ts;
myPackageThunks.ts;
myPackageSelectors.ts;
Slice structure:
-
Slice name + action prefix - Name of a slice that will also be used as a reducer name. Prefix is name of the package + name of the slice.
import { name as packageName } from './package.json'; const sliceName = 'appSettings'; const actionPrefix = `${packageName}/${sliceName}`; -
Slice State type - this type is used to describe how state will look like and also serves as a simple documentation. Name follows pattern
${sliceName}State.export interface AppSettingsState { colorScheme: AppColorScheme; fiatCurrency: 'czk' | 'usd'; } -
Slice Root State type - type describing part of RootState which is accessible in this slice. Name follows pattern
${sliceName}RootState.type AppSettingsRootState = { appSettings: AppSettingsState; }; -
Extra actions - in some rare cases when you need to create an action manually using
createActioninstead of usingcreateSlicegenerated actions, you should place them here.export const doSomeMagic = createAction(`${actionPrefix}/doSomeMagic`); -
Slice - slice created using RTK
createSlicefunction.const appSettingsSlice = createSlice({ name: 'appSettings', initialState, reducers: { setColorScheme: (state, action: PayloadAction<AppColorScheme>) => { state.colorScheme = action.payload; }, }, }); -
Selectors and lookups
-
Exports of actions and reducers
Slice exports
Keep the slice object private. Export its actions and reducer as named values. For slices created
with createSliceWithExtraDeps, export prepareReducer instead of the prepared reducer. Define
selectors as standalone exported functions so their declarations do not expose generated slice or
Reselect implementation types.
Explicitly type the state parameter of every case reducer. This keeps generated declaration files
from exposing Redux Toolkit’s inferred slice implementation types.
const appSettingsSlice = createSlice({
    name: 'appSettings',
    initialState,
    reducers: {
        setColorScheme(state: AppSettingsState, action: PayloadAction<AppColorScheme>) {
            state.colorScheme = action.payload;
        },
    },
});

export const appSettingsActions = appSettingsSlice.actions;
export const appSettingsReducer = appSettingsSlice.reducer;
export const selectColorScheme = (state: AppSettingsRootState) => state.appSettings.colorScheme;
Do not export appSettingsSlice. Consumers should not depend on the complete inferred slice API.
Sources:
- https://livebook.manning.com/book/redux-in-action/chapter-11/
- Redux Style Guide - https://redux.js.org/style-guide/
Selectors
Do not access state directly
Prefer using predefined selectors to access state. Doing this simplifies refactoring in future. Inline selectors are ok for less used properties - so that we do not have to write helpers for every existing property.
// bad
const transactions = useSelector(state => state.wallet.transactions[accountKey]);
const language = useSelector(state => state.settings.language);

// good
const transactions = useSelector(state => selectTransactions(state, accountKey));
const language = useSelector(selectLanguage);

// Thunks
const myThunk = createThunk('myThunk', ({ accountKey }, { getState }) => {
    // bad
    const transactions = getState().wallet.transactions[accountKey];

    // good
    const transactions = selectTransactions(getState(), accountKey);
});
If you decide to refactor, for example, the whole transaction data structure in the reducer state, you won’t need to make changes in every place where it’s accessed. The only place where you will need to make changes is that selector. You won’t need to go over all components where you are accessing transactions. That’s a huge benefit 🎉
Using selectors in components
Try to step back from making useSelector hooks return an object. It has no benefits and might cause performance issues. Use one useSelector per value.
// bad
const { myValue, myAnotherValue } = useSelector(state => ({
	myValue: state.something.myValue,
	myAnotherValue: state.something.myAnotherValue
});

// good
const myValue = useSelector(selectMyValue);
const myAnotherValue = useSelector(selectMyAnotherValue);
Naming of selectors
Always prefix selectors with select and when you use them drop select. When selecting by a parameter, suffix the name like this: selectAccountById .
// bad
const getAccount = ...;
const findAccount = ...;
const getAccountByKey ...;

// good
const selectAccount = ...;
const selectAccountByKey = ...;

// bad
const userAccount = useSelector(selectAccount);
const oldAccount = useSelector(selectAccount);
const foundAccount = useSelector(selectAccountByKey(key));

// good
const account = useSelector(selectAccount);
const account = useSelector(selectAccountByKey(key));
Actions
- Use
createActionfor creating actions related to reducers which have not been converted to slices yet. - For new reducers use slices and export actions from there
Thunks
- For both synchronous and asynchronous thunks use the
createThunk()method - Use the
Thunkpostfix, e.g.connectInitThunk() - Use
npm-module-or-app/reducer/ACTION_TYPEfor naming a thunk. Each slice should have anactionPrefixdefined inconstants.ts
export const actionPrefix = '@common/wallet-core/accounts'

const disableAccountsThunk = createThunk(
    `${actionPrefix}/disableAccountsThunk`, ......
- Never use
const state = getState()causing bugs because it will use an old snapshot of the state, use getState() directly when needed, e.g.
await TrezorConnect.init({
    ...connectInitSettings,
    pendingTransportEvent: selectIsPendingTransportEvent(getState()),
});
- For async thunks, try to make use of the lifecycle actions whenever it makes sense. For example, when you have an async thunk that fetches something and saves in state. If fetching was not successful, you can explicitly modify the slice state in a relevant way: add an error message, change some status or reset the state (if business logic deems no data better than not-up-to-date data)
- When using async thunks in effects, cancel the action by calling the abort() method in effect cleanup.
Middlewares
Avoid usage of const state = getState() because assigning result of getState() to variable will create snapshot of state at a given moment and could lead to unintentionally accessing some old version of state. For example:
createMiddleware((action, { next }) => {
    const state = getState();
    next(action); // this will dispatch action and change state
    // you are still accessing old version of state before change
    console.log(state);
    // this will always access current version of state
    console.log(getState());
});
This is something that could lead to hard-to-debug bugs, but sometimes you want to preserve previous version of state on purpose. In that case, avoid naming it just state but prefer something like prevState which will prevent anyone from thinking that it has an actual state.
Middlewares should be read-only - they should not dispatch actions or modify state. Otherwise, they produce code that is hard to read and test that leads to nasty bugs.
Naming
name: naming description: Naming conventions for variables, functions, booleans, components, and domain-specific terms in Trezor Suite. Use when naming anything in the codebase.
Naming
Obscure naming
Avoid using weirdly shortened words and especially single letter variables. It’s not that obvious why there is a device located in object s.
Generic vs lengthy naming
Often picking a generic name clashes with picking a long name. Code benefits from clarity of intent, treating every block like it’s unique helps dive into the context and pick a name specific to that context. Also, don’t be afraid of long names, it doesn’t have to be < 8 characters all the time. If you think that a variable is better described by that 25 character-long abomination and nothing could describe it with the same clarity - go with it.
Values = nouns, functions = verbs
That should be pretty self-explanatory. Try to prefix functions returning a value that you need with a verb like get or calculate. It also concerns the component names, which should always be nouns.
Boolean values = questions
Yes or no, true or false, ask a question, get an answer. If that’s not applicable to the data you are trying to describe, perhaps it would be better to pick another data type, like an enum.
- 🛑
const disabled = true→ ✅const isDisabled = true - 🛑
const finished = true→ ✅const hasFinished = true
Component interface
Should be named in the form of ${componentName}Props
Abbreviations in names
It is a matter of taste but we aim for consistency, so we voted and using all capital letters for abbreviations won. Consistency is important so we don’t need to think about it anymore.
// bad
const someFaqConstant;
function enterThpPairingCode;

// also bad
const someTHPFAQConstant;
// avoid
const FAQConstant;
const someNotVeryObviousAbbreviationLikeSNVOA;

// 🟢 good
const someFAQConstant;
function enterTHPPairingCode;
Suite specific naming
Recommended naming for some Suite specific stuff.
Crypto currencies symbols/networks
// bad
const coin = networks['btc'];
const currency = networks['btc'];

// good
const network = networks['btc'];
// bad
const coin = networks['btc'].symbol;
const currency = networks['btc'].symbol;
const currencySymbol = networks['btc'].symbol;
const coinSymbol = networks['btc'].symbol;

// good
const networkSymbol = networks['btc'].symbol;
Fiat currencies
Always prefix names related to fiat currencies with fiat.
// bad
const currency = 'usd';
const selectCurrency = () => 'usd';
const formatCurrency = value => value;

// good
const fiatCurrency = 'usd';
const selectFiatCurrency = () => 'usd';
const formatFiatCurrency = value => value;
Assets
Assets are currently only a mobile-related thing (requested by product), but this will probably go into desktop suite too in future. Asset is just different name for group of accounts for the same network.
// We want to show all accounts of given network type

// bad
// Asset is not single account but all account of given type grouped
const AccountsListScreen = () => <Screen />;

// fine
const AccountsForNetworkScreen = () => <Screen />;

// best (preferred)
const AssetsAccountsListScreen = () => <Screen />;
// We want to show Account Detail

// bad
// Asset is not single account but all accounts of given type
const AssetDetailScreen = () => <Screen />;

// good
const AccountDetailScreen = () => <Screen />;
// We want to show overview of balances (or anything) per network

// bad
// Accounts are grouped and hidden under single item per network for assets
// so it's not list of individual accounts.
const AccountsList = () => <... />;

// good
const AssetsList = () => <... />;
Tests
name: tests description: Test style guidelines including naming conventions, mock organization, translation handling, and file structure. Use when writing or organizing tests in the Trezor Suite codebase.
Tests
Reading
- Avoid testing implementation details: https://kentcdodds.com/blog/testing-implementation-details
Translations in tests
Text in the app may change as translators and copywriters update strings in Crowdin, independently of developers. To avoid failing tests in Crowdin sync PRs, get the string by its translation ID instead of using the literal text.
// bad
expect(
    screen.getByText('This can change with a Crowdin sync and someone will have to fix the test.'),
).toBeTruthy();

// good
expect(screen.getByText(getTranslation('path.to.translation'))).toBeTruthy();

// In case there is some string that must not be changed:
expect(screen.getByText(getTranslation('path.to.translation'))).toBe(
    'I want a developer to check this important text if it is changed in Crowdin.',
);
Naming conventions
- Tests are placed in
__tests__folders and have.test.tsextension. - Test folder is placed in the same directory as an actual implementation.
- When testing types, suffix should be
.type-test.ts, to prevent from being executed by jest. (For example:packages/utils/tests/typedObjectFromEntries.type-test.ts) - Fixtures are placed in
mocksfolders and havemockprefix. mocksfolder is placed in the root of the package, not insrc.
Example:
my-module/
├── mocks/
│   └── mockMyComponent.ts
└── src/
    ├── __tests__/
    │   └── utils.test.ts
    └── utils.ts
Reusability
To keep things simple, avoid creating complex mocks to be shared between multiple test suites. In case you do reuse a mock, keep it generic and non-opinionated.
Simple test: change in shared mock SHALL NOT break existing tests (or make fixes trivial).
Type tests
Keep type-test assertions module-local. Do not export test-only values or types, because exports
pollute the generated declaration files. Use void statements to mark assertion values as used:
const valid: ExpectedType = value;

// @ts-expect-error The value must not accept an incompatible type.
const invalid: ExpectedType = incompatibleValue;

void valid;
void invalid;
Mocks (& Fixtures)
Typing
All fixtures and mocks shall be typed and declaratively defined; using as to cast an incomplete object is only a last
resort. This may add boilerplate, but it ensures type changes surface as type errors instead of hard-to-fix failing
tests.
Organization & Naming Convention
- Mock/fixture files shall be placed in the same package where the subject being mocked resides.
- Putting them in a types package is OK. A mock for
Deviceshall be in the same package where the type declaration is located. - Use
mockprefix to distinguish it from type or original implementation.Device=>mockDevice. - Prefer factories to static objects. A factory is better because it can provide an API to create a mock with desired
changes. (
mockDevice(data: Partial<Device>): Device => ({ ... })) - Put mocks into a
mocksdirectory within the same package. - Export them from the package via a separate file. In this example:
import { mockDevice } from '@common/device-types/mocks'device-types - mocks - mockDevice.ts - index.ts // If you need to export them in `package.json` - src - device.ts - Name the file the same as the exported mock.
Comments
name: comments description: Comment formatting conventions for the Trezor Suite codebase. Use when writing or reviewing code comments.
Comments
Start with uppercase letter and end with a period
// This is a comment that will help you understand what is happening in the
// code below.
const someFunction = () => null;
Defensive Programming
name: defensive-programming description: Type safety practices including exhaustive checks, explicit return types, and Result-based error handling. Use when writing TypeScript logic that handles multiple cases or error conditions.
Defensive Programming
Do not fall back to default
Whenever possible, cover all cases. If a new case is added in the future, TypeScript should force the developer to set behavior for it.
Force explicit return types
Makes sure all cases are covered in a function.
// TS Error: Function lacks ending return statement and return type does not include 'undefined'
export const isEnabled = (status: 'a' | 'b' | 'c'): boolean => {
    if (status === 'a') {
        return true;
    }

    if (status === 'b') {
        return false;
    }
};
Use exhaustive switch
Makes sure all cases are covered in a switch statement.
// TS Error: Argument of type '"c"' is not assignable to parameter of type 'never'
export const isEnabled = (status: 'a' | 'b' | 'c') => {
    switch (status) {
        case 'a':
            return true;
        case 'b':
            return false;
        default:
            return exhaustive(status);
    }
};
Use type-mapping technique
Alternative to an exhaustive switch statement.
type Schema = {
    a: number;
    b: number;
};

// TS Error: Property 'b' is missing in type '{ a: () => string; }' but required in type '{ a: () => void; b: () => void; }'.
const result: { [K in keyof Schema]: () => void } = {
    a: () => console.log('This is A'),
};
Do not use exceptions
Unless failures are unpredictable, pass errors via return and do not throw. Throwing exceptions is not type-safe. There is a Result type that shall be used.
Bad:
try {
    const result = await action();
} catch (error) {
    // Possible errors cannot be typed
    // ...
}
Good:
const result = await action();

if (result.error) {
    const { type } = result.error;

    switch (type) {
        case 'ErrorA':
        // ... do stuff
        case 'ErrorB':
        // ... do different stuff

        default:
            return exhaustive(type);
    }
}
Data Analytics
Anonymous1 data volunteered by Trezor users directly contributes to improved performance across all the platforms you use Trezor Suite on.
Participation is easy and completely optional. Enable or disable usage data sharing with one click at any time in Trezor Suite Settings. With full control over what you contribute, you can safely take part in making Bitcoin more secure.
TL;DR
- Data is only collected with explicit permission.
- Your sensitive data is not collected.
- We use AWS logging for data analytics and Sentry for error tracking.
- We store the data concerning errors for the period of 90 days.
- Only limited amount of users is able to access the data.
What data is collected?
When enabled, purely functional data about how the app is used will be collected and analyzed to find defects and inefficiencies. With explicit consent, both web and desktop applications may collect anonymous data such as user interactions with app functions, errors, hardware specifications and app response times.
If usage data is disabled only the decision not to share any data is recorded. This means we do not collect any data, automated Sentry reports (see below) or any other data. An exception is when a user specifically chooses to submit feedback or bug reports through Trezor Suite.
How are the data processed?
Data are logged in the form of HTTPS requests to an AWS S3 bucket. Those data logs are then transformed into sets which can be analyzed to give meaningful information. See AWS for more detailed info about the particular events which are tracked.
Error tracking using Sentry
To catch errors quickly and deliver you the best experience with your Trezor, we use Sentry.io, a tool for error tracking and performance monitoring. Data is only available to Sentry when usage data tracking is enabled. See our page about Sentry for more information on how it works.
Retention period
By principle, the logs collected are destroyed without delay once the purpose of use is met. However, the minimum retention period equals to 90 days when the data is processed to improve Trezor Suite. The 90 days are related to the data concerning any errors occurring in Trezor Suite. Performance related data may be stored for longer periods of time. When the retention period ends, all event data and most metadata is eradicated from the storage and from the servers without additional archiving in order to prevent the threat of intrusion.
Security of data
Access to the data is limited strictly to the members of the development, security and IT team. All users are provided access on the need-to-know basis and the accesses are regularly reviewed. Users accessing the data log in using a strong combination of username and password and use two-factor authentication (where provided by a service provider).
Contents
-
“Anonymous” means that we do not collect any sensitive personal information. AWS and Sentry are able to view IP addresses but they are not tracked or collected by Trezor and Trezor removes such information from the logs automatically. Enable Tor to mask your IP address from third parties when using Trezor Suite. ↩
AWS Analytics: Info
For a deeper technical writeup of analytics processes intended for developers, please see README.md.
Trezor Suite can be set to collect real-world data to improve the performance of both web and desktop apps. This anonymous data is only shared by users who have usage data tracking enabled.
During the first run Trezor Suite prompts the user whether they wish to participate in the data collection and such setting can be changed later on in Settings at any time.
Anonymous data
Collected data are anonymous. This means that Suite does not track personal information and can not be used to view particular users’ balances.
Among the data not collected by analytics:
- Device IDs
- Public keys
- Particular amounts
- Transaction IDs
When data tracking is enabled, Trezor Suite collects functional information that can be used to directly improve the app, such as:
- Events triggered by a user during a session
- Hardware, operating system and setup of the connected device
- Errors encountered during a session
Data process
- User with enabled analytics interacts with the application
- Events are sent to specific endpoints
- Collected data are parsed and analysed (can be seen in Keboola)
- Charts and metrics are created (in Tableau)
- We know how to improve the application
Sentry
Trezor Suite uses Sentry.io to track errors and monitor app performance on the machines of users who have enabled anonymous data collection. This allows us to optimize Trezor Suite and fix compatibility issues across many different usage environments.
No data is shared with Sentry if users have disabled usage data tracking 1.
What is being tracked
General data
Browser (User Agent), System and HW specifications, Suite version, instance id shared with analytics.
Breadcrumbs
timestamps, clicks, navigation, analytics, network requests from Suite.
Extra data:
- Enabled-coins e.g.:
[btc, ltc, eth, xrp, doge] - Wallet discovery e.g.:
[
  {
    bundleSize: 0,
    deviceState: [redacted],
    failed: [],
    index: 0,
    loaded: 14,
    networks: [btc, btc, btc, ltc, ltc, ltc, eth, xrp, doge],
    running: [undefined],
    status: 4,
    total: 14,
  },
]
- Device information (slightly redacted):
{
  available: False,
  buttonRequests: [],
  connected: False,
  features:
    {
      auto_lock_delay_ms: 600000,
      backup_type: Bip39,
      bootloader_hash: None,
      bootloader_mode: None,
      capabilities:
        [
          Capability_Bitcoin,
          Capability_Bitcoin_like,
          Capability_Binance,
          Capability_Cardano,
          Capability_Crypto,
          Capability_EOS,
          Capability_Ethereum,
          Capability_Monero,
          Capability_NEM,
          Capability_Ripple,
          Capability_Stellar,
          Capability_Tezos,
          Capability_U2F,
          Capability_Shamir,
          Capability_ShamirGroups,
          [Filtered],
        ],
      device_id: [redacted],
      display_rotation: 0,
      experimental_features: False,
      firmware_present: None,
      flags: 0,
      fw_major: None,
      fw_minor: None,
      fw_patch: None,
      fw_vendor: None,
      fw_vendor_keys: None,
      imported: None,
      initialized: True,
      label: [redacted],
      language: en-US,
      major_version: 2,
      minor_version: 4,
      model: T,
      backup_availability: 0,
      no_backup: False,
      passphrase_always_on_device: False,
      passphrase_protection: True,
      patch_version: 2,
      pin_protection: True,
      recovery_status: 0,
      revision: 9276b1702361f70e094286e2f89e919d8a230d5c,
      safety_checks: Strict,
      sd_card_present: False,
      sd_protection: False,
      session_id: [redacted],
      unfinished_backup: False,
      unlocked: True,
      vendor: trezor.io,
      wipe_code_protection: False,
    },
  firmware: valid,
  firmwareReleaseConfigInfo:
    {
      changelog: [],
      isNewer: False,
      isRequired: None,
      release: {},
    },
  id: [redacted],
  instance: 1,
  label: [redacted],
  metadata: { status: disabled },
  mode: normal,
  passphraseOnDevice: False,
  path,
  remember: True,
  state: [redacted],
  status: used,
  ts: 1632094494156,
  type: acquired,
  unavailableCapabilities: {},
  useEmptyPassphrase: False,
  walletNumber: 1,
}
- Action logs:
[
  { time: 1634644852099, type: @suite/online-status },
  { action: {}, time: 1634644852104, type: @suite/init },
  { time: 1634644852966, type: @message-system/save-valid-messages },
  { time: 1634644852967, type: @suite/tor-status },
  { time: 1634644853131, type: @resize/update-window-size },
  { time: 1634644853306, type: @desktop-update/enable },
  { time: 1634644853361, type: @desktop-update/checking },
  { time: 1634644853449, type: @message-system/save-valid-messages },
  { action: {}, time: 1634644853453, type: @suite/set-language },
  { time: 1634644853455, type: @storage/loaded },
  { time: 1634644853717, type: @message-system/fetch-config-success },
  { time: 1634644853744, type: @analytics/init },
  { time: 1634644854072, type: @desktop-update/not-available },
  { time: 1634644854166, type: iframe-loaded },
  { time: 1634644854168, type: @suite/trezor-connect-initialized },
  { time: 1634644854187, type: @blockchain/update-fee },
  { action: {}, time: 1634644854188, type: @suite/app-changed },
  { time: 1634644854189, type: @router/location-change },
  { time: 1634644854191, type: @suite/ready },
  { time: 1634644854192, type: @wallet-settings/clear-tor-blockbook-urls },
  { time: 1634644854192, type: @blockchain/ready },
]
-
In rare cases where an error would occur before Suite loading its internal storage an error to Sentry might be sent, because Suite is not yet informed whether analytics are enabled or not. As the storage is not yet loaded no private data can be sent. ↩
Releases
This chapter contains information about the release process.
Bundling new firmware
-
Complete the firmware release process including firmware signing.
-
After the signing FW has been tested by QA in Test Signed environment.
-
Add new firmwares along with each firmware release JSON file from repository trezor/data to
packages/connect-data/files/firmware/*and remove the current ones -
Remove older binaries so they are not bundled in the desktop app any more, but always keep:
- the intermediary FW for T1B1 packages/connect-data/files/firmware/t1b1/trezor-inter-v{1 | 2 | 3}.bin
- and 2.1.1 for T2T1 packages/connect-data/files/firmware/t2t1/trezor-2.1.1.bin
-
Once new firmwares and releases JSON are added and old firmwares are removed you can proceed with running script
yarn tsx packages/connect-data/scripts/generate-firmware-index.tsthat will update the filepackages/connect-data/src/map-releases.ts. -
Update
packages/connect-data/files/firmware/release/releases.v1.jsonto be mapped to the latest FW. Make sure the sequence is higher than the one inhttps://github.com/trezor/trezor-suite-firmware-release/blob/main/releases/production/releases.v1.jsonif you want it to be used. -
If you have completed the points above you should have something like 19be9a7.
-
Test it locally by running
yarn suite:devand/oryarn suite:dev:desktop -
Freeze Suite. At this moment you are all good to Freeze and forward to QA. They should be able to test Suite in its wholeness along with the new firmwares.
Desktop Updates
The desktop build of Trezor Suite uses an auto-updating feature to keep the application up to date with our latest published release.
Internals
The package electron-updater (part of electron-builder) is used to manage updates. Information about updates is displayed in our UI and the user can perform actions related to them (trigger update, skip, etc…).
In addition of what electron-updater provides us, we check signatures of downloaded files. For this to work, all files uploaded on Github need to have a signature attached with them. The signature will be checked against the SL signing key which is included in the application at build time. The key is located in packages/suite-desktop-core/build/app-key.asc and should be updated if the private key is changed.
Development
How to mock app update configuration for Suite desktop DEV build:
- In any folder, run:
curl https://data.trezor.io/suite/releases/desktop/latest/latest.yml > latest.yml
curl https://data.trezor.io/suite/releases/desktop/latest/latest-mac.yml > latest-mac.yml
curl https://data.trezor.io/suite/releases/desktop/latest/latest-linux.yml > latest-linux.yml
npm i -g http-server
http-server -p 8989
- Edit the files any way you want them. Note that “latest” without suffix is for Windows.
- Go to
packages/suite-desktop-core/src/modules/auto-updater.tsand replace this constant:
const defaultFeedURL = {
    latest: 'http://localhost:8989',
    preRelease: 'http://localhost:8989',
};
- Change this line in the same file to turn on the updater (by default disabled in dev build):
autoUpdater.forceDevUpdateConfig = true;
- Run
yarn suite:dev:desktop
Environments
Staging
Staging is available at staging-suite.trezor.io and is only accessible within SatoshiLabs internal IP range (office + VPN).
Before releasing publicly we deploy to so-called staging environment which should be 1:1 with production. QA tests the release there.
Production (suite.trezor.io)
Stable version is hosted on suite.trezor.io.
| route | source | assetPrefix |
|---|---|---|
| /web | @trezor/suite-web | /web |
Signing binaries win
The desktop build of Trezor Suite uses electron-builder for signing the package and the binaries inside.
In order to be able to sign all the binaries for windows in other operating systems [electron-builder] uses osslsigncode.
Check if binaries are signed for windows in Linux
The installer .exe can be unpacked with 7za x Trezor-Suite-22.2.1-win-x64.exe on Linux. The chktrust is from mono-develop package (Ubuntu LTS, other distros will have it under similar name).
7za x Trezor-Suite-22.2.1-win-x64.exe
After unpacked, test signatures:
for I in **/*.exe **/*.dll; do echo "---Checking $I"---; chktrust "$I"; done
CI signing details for windows
Certificate file is with extension: .pfx
Env variables for signing: WIN_CSC_KEY_PASSWORD WIN_CSC_LINK.
Creating Self-signed .pfx and .cer certificates with OpenSSL
Generate directly the pem:
openssl req -x509 -days 365 -newkey rsa:2048 -keyout cert.pem -out cert.pem
The pem cannot be used with Microsoft products, so we need to convert it to PKCS#12/PFX Format which is what Microsoft uses.
openssl pkcs12 -export -in cert.pem -inkey cert.pem -out cert.pfx
Use like so in the electron-builder sign-windows script, providing your own PATH_TO_CERTIFICATE.pfx and the pfx password, if used.
`java -jar ../suite-desktop-core/scripts/jsign-6.0.jar --keystore PATH_TO_CERTIFICATE.pfx --storepass PASSWORD --storetype PKCS12 --tsaurl http://timestamp.digicert.com "${configuration.path}"`
Versioning
This repo contains a mix of packages with 3 different versioning schemes and schedules.
Private Packages
That is, all packages that have private: true in their package.json and are not consumed by third parties nor published to NPM. Because they get only consumed by other packages in this repo (eg. @trezor/suite-data or @trezor/suite) by the Yarn’s workspace resolution or are distributed in other forms like, for example, bundled applications (eg. @trezor/suite-desktop) we do not version them. That is, their version is kept at 1.0.0 all the time.
Public Packages
That is, packages published to NPM consumed by third parties. At the moment of writing this there is one public package: blockchain-link. They follow the SemVer scheme on irregular schedule.
Suite App
The version of the Suite App itself is tracked in the suiteVersion field of the suite package.json. This version is a way to communicate the steps in evolution of the Suite app between our product, marketing, support teams and the users.
We are using so-called calendar versioning in the format YY.MM.PATCH where
YYstands for the current year.MMstands for the current month.PATCHis increased on every release in the given month.
For example:
20.10.1first release in Oct 202020.10.3third release in Oct 202019.12.1first release in Dec 2019
Beta versions
We version beta in a similar way as production versions but we always set PATCH to 0 and increase the MM.
That means that every release on beta has 0 as the patch version. This has a drawback that you can’t distinguish beta deployments by a version number, but beta testers should be able to read and report the commit hash.
Only stable releases have patch version >1 and this increases with each stable release: 1, 2, 3, 4.
Beta also has +1 MM version when compared to stable indicating this is upcoming release which will be deployed on stable next month.
For example:
20.10.1first release on Oct 15th to stable20.10.2second release on Oct 22nd to stable20.11.0release on Oct 29th 2020 to beta20.11.0another release on Nov 5th to beta20.11.1public release on Nov 14th to stable
Development versions
We use the same scheme as beta. That is, develop branch has always YY.MM.0 version where MM is the upcoming month’s release.
When we fork develop to release/20YY-MM branch, we bump the release branch version to YY.MM.1 and
increase the develop version to YY.(MM+1).0 indicating we are already brewing next release in the develop.
Packages
This directory contains description of various Trezor Suite packages.
Trezor javascript SDK
Most of Trezor Connect documentation has been moved to Connect Explorer.
This page contains some remaining documentation useful for developers or internal purposes.
check connect data
@trezor/connect check data for device Authenticity
This is an automatically created PR.
- Sanity check t2b1 https://github.com/trezor/data/blob/master/firmware/t2b1/authenticity.json
- Sanity check t3b1 https://github.com/trezor/data/blob/master/firmware/t3b1/authenticity.json
- Sanity check t3t1 https://github.com/trezor/data/blob/master/firmware/t3t1/authenticity.json
- Merge this PR into develop
Dependencies
Webpack:
Since webpack@5 auto polyfills for nodejs are not provided.
see https://webpack.js.org/blog/2020-10-10-webpack-5-release/#automatic-nodejs-polyfills-removed
List of essential libraries to produce build:
assert(polyfill)crypto-browserify(polyfill)html-webpack-pluginprocess(polyfill)stream-browserify(polyfill)style-loaderminimizer-webpack-pluginutil(polyfill)webpack-*worker-loader
From Protobuf to TypeScript and Flow
This document was moved to @trezor/transport
Supported coins
Ownership
The coin definitions live in @trezor/connect-data and are owned there. The files are:
packages/connect-data/files/coins.json— Bitcoin-like and miscellaneous coins.packages/connect-data/files/coins-eth.json— Ethereum networks.
These files are the source of truth. They are committed to this repository and edited directly here; there is no generation step and no automatic sync from an upstream source.
Historically these files were regenerated from the trezor-firmware definitions via the
trezor-commonsubmodule and acointool.pypipeline. That sync has been retired —@trezor/connect-datanow owns the definitions outright, so edit the JSON files directly instead of regenerating them. Upstream coin-definition changes are no longer pulled in automatically; if a relevant upstream change lands, port it by hand into the JSON files.
Editing the definitions
Edit the relevant file directly: packages/connect-data/files/coins.json for Bitcoin-like and miscellaneous coins, or packages/connect-data/files/coins-eth.json for Ethereum networks.
Warning: the retired pipeline used to drop any coin whose
supportmap wasfalsefor every device model. Nothing filters those out anymore, so a coin present in the JSON is parsed bypackages/connect/src/data/coinInfo.tsand surfaces ingetAllNetworks()regardless of itssupportvalues. When adding a coin, make sure itssupportmap reflects reality — a coin unsupported on all models should not be added.
Note: the
submodules/trezor-commonsubmodule is still required for other purposes (e2e test vectors andyarn update-models) and is unaffected by coin-definition edits.
Events
Note: In version 10 the event API (
on,off,removeAllListeners) is available only in the@trezor/connectpackage (in-process Core, used by Trezor Suite). The thin packages@trezor/connect-web,@trezor/connect-webextensionand@trezor/connect-mobiledo not expose it — the host Core does not forward events to them.
Handling events
Once user grants permission for hosting page to communicate with API TrezorConnect will emits events about device state. Events can be distinguished by “type” field of event object (TODO structure) Constants of all types can be imported from package
ES6
import TrezorConnect, { DEVICE_EVENT, DEVICE } from '@trezor/connect';

TrezorConnect.on(DEVICE_EVENT, event => {
    if (event.type === DEVICE.CONNECT) {
    } else if (event.type === DEVICE.DISCONNECT) {
    }
});
List of published events
Full list of events is unfortunately beyond the scope of this documentation but you may refer to the source code for:
Login with Trezor
Trezor Connect enables an easy integration of Login with Trezor into websites or applications. It allows a password-less login immune to keyloggers or phishing that provides a simple fluid interface for users with basic computer skills.
Note See requestLogin method for technical documentation.
How it works
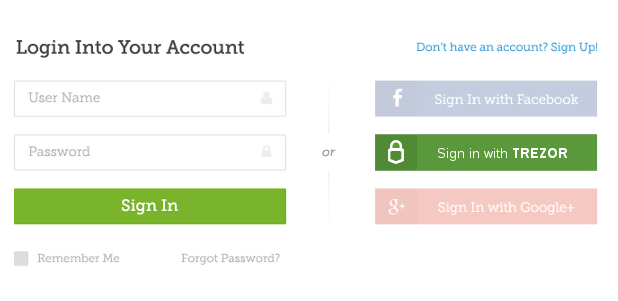
After you implement Trezor Connect into your web page, the following button will appear:

Note It is possible to customize the button to fit your needs and preferences.
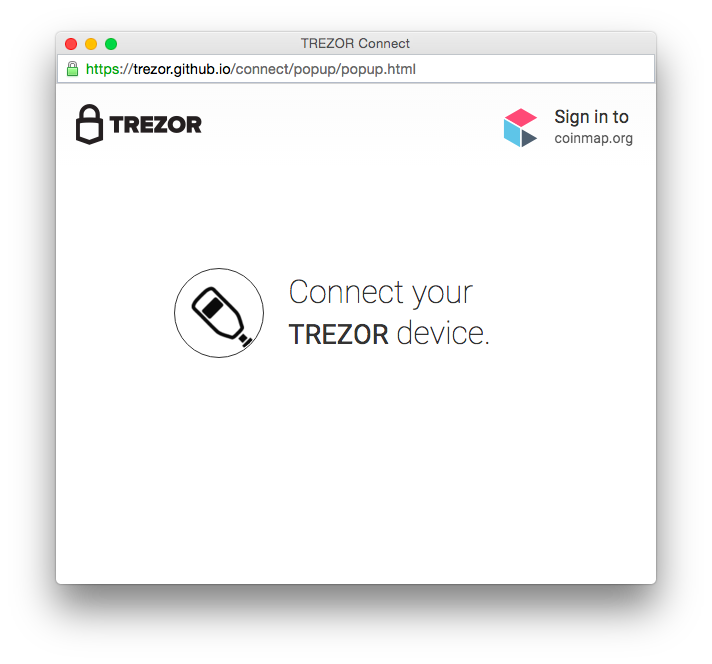
When the user clicks the button, the following dialog windows will popup:
and Trezor will show the following confirmation screen:
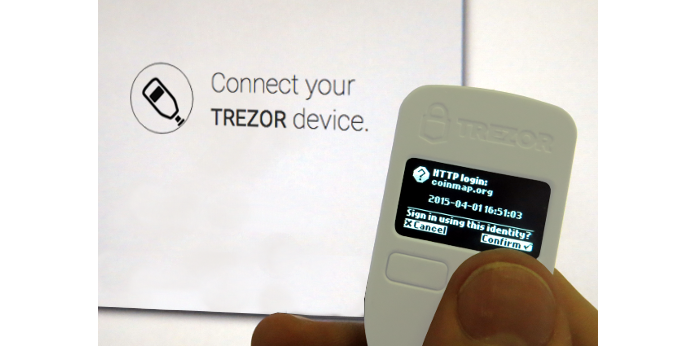
After the user confirms the action, the device will return a structure with signed login information. Your backend service just needs to check the signature against the user’s public key.
Implementation and security considerations
Trezor Connect leverages the ability of Trezor device to hold securely secret keys and use them to sign messages without actually ever exposing these secrets. Thus when using login with Trezor, no user password is needed and no reusable secret can ever be captured by keylogger or other malware.
There are the following basic scenarios:
- Sign in with Trezor only (use case A)
This is the most secure option: When the user signs in with Trezor for the first time, the site offers them to create new account with their site-specific Trezor identity.
There is no other way to log in and the site operator should decide carefully if they allow any other (usually much weaker) form of authentication and Trezor identity override.
- Classic sign in along with Trezor option (use case B)
This case occurs when Trezor is only one of more ways of accessing the user account. Usually, theuser already has an account with username-password authentication and they pair Trezor with the account later.
With this option, the user doesn’t have to expose their original credentials each time they authenticate. Nevertheless, they can still easily recover access to the account using username and password if their Trezor identity gets lost.
The site can also give the user an option of disabling the original credentials, thus effectively creating the first use case.
Pairing Trezor with the user’s account creates a new way of accessing it. The site should always authenticate the user before confirming the action.
Trezor identity recovery
Users are instructed to keep their recovery seed safe and offline. Thus in the event of lost device, the user will still be able to log in with Trezor after they recover the seed on a new device. They may also use recovery and login through software, although the login through software means is not supported by Trezor Connect at the moment.
Nevertheless, there will also be rare cases of users who will loose both device and recovery seed. Therefore the site operator could carefully consider reasonable and solid ways of Trezor identity override to enable the user to access their account even without their Trezor.
Models
The pipeline
Do not change @trezor/connect/src/data/models.ts manually.
The one and only source of truth is models.json definition declared and maintained in the firmware repository.
These are exported to a read-only trezor-common repository.
trezor-common is included as git submodule mounted at submodules/trezor-common.
Update and maintenance in @trezor/connect
- Update
trezor-commonsubmodule:
yarn update-submodules
- Copy
models.jsontotrezor/connect/src/data/models.ts:
yarn update-models
Path
path-string | Array<number>in BIP44 path scheme orArrayof hardended numbers.
Examples
Bitcoin account 1 using BIP44 derivation path
"m/49'/0/'0'";
Bitcoin account 1 using hardended path
[(49 | 0x80000000) >>> 0, 0 | (0x80000000 >>> 0), (0 | 0x80000000) >>> 0];
Bitcoin first address address of account 1 using BIP44 derivation path
"m/49'/0/'0'/0/0";
Bitcoin first address address of account 1 using hardended path
[(49 | 0x80000000) >>> 0, (0 | 0x80000000) >>> 0, (0 | 0x80000000) >>> 0, 0, 0];
Connect Methods
Connect methods documentation has been moved to Connect Explorer.
Suite docs
send form
Send form active elements description
Outputs (BTC coins only):
- regular (transfer) output is set by default
- add OP_RETURN: if default output has any values then OP_RETURN is added as a second output otherwise will replace the first input
- remove OP_RETURN: if there is only 1 output (OP_RETURN) then switch to regular otherwise just remove it
- add recipient
- remove recipient
- Clear all
Address:
- on address input change
- on QR scan
- on Import (to be done)
Address errors:
- RECIPIENT_IS_NOT_SET (empty field)
- RECIPIENT_IS_NOT_VALID (not valid address)
- RECIPIENT_CANNOT_SEND_TO_MYSELF (XRP only: cannot send to myself)
Amount:
- on amount input change
- on Fiat input change
- on QR scan (optional if defined in QR code)
- on Import (to be done, optional if defined in file)
- IF sendmax is ON
- IF sendmax is set AND has second(or multiple) output(s): on second output Amount change
- IF sendmax is set: on every fee level change
- IF sendmax is set: on custom fee change
- IF sendmax is set: on BTC opreturn data changed
- IF sendmax is set: on ETH data changed
- (ETH only) IF sendmax is set AND switching between ETH (base currency) and TOKEN
Amount errors:
- AMOUNT_IS_NOT_SET (empty field)
- AMOUNT_IS_TOO_LOW (lower/equal than zero + ETH exception: 0 amount is possible ONLY for tx with DATA)
- AMOUNT_IS_BELOW_DUST lower than network dust limit
- AMOUNT_IS_NOT_ENOUGH (not enough funds on account)
- AMOUNT_NOT_ENOUGH_CURRENCY_FEE (ETH only: trying to send TOKEN without enough ETH to cover TX fee)
- AMOUNT_IS_MORE_THAN_RESERVE (XRP only: trying to spend the reserve)
- AMOUNT_IS_LESS_THAN_RESERVE (XRP only: trying to send less XRP than required reserve to the empty account)
- AMOUNT_IS_NOT_IN_RANGE_DECIMALS (amount with invalid decimal places)
- AMOUNT_IS_NOT_INTEGER (ERC20 only: token doesn’t accept decimal places)
- REMAINING_BALANCE_LESS_THAN_RENT (solana only: account has to keep a minimal balance equal to rent)
Fiat:
- on fiat input change
- on Amount input change (any reason listed above)
- on Currency select change (recalculation)
- on Import (to be done, optional if defined in file AND amount is not defined in file)
Fiat errors:
- AMOUNT_IS_NOT_SET (empty field)
- AMOUNT_IS_TOO_LOW (lower than 0, 0 is still possible if recalculated amount is lower than 1 cent)
- AMOUNT_IS_NOT_IN_RANGE_DECIMALS (max. 2 decimals allowed)
Fee:
- on fee level click
- on custom fee level input change
- on BTC OP_RETURN data changed
- on ETH data changed
- switching from “regular” fee level to “custom” should set value from last selected fee
- IF fee level wasn’t changed yet (normal) and there is not enough coins to satisfy normal level should be automatically switched to first possible (lower) level, either LOW or CUSTOM…
- last used fee level will be remembered globally for this coin
- estimated time is only available for BTC-like coins
Fee errors (custom level):
- CUSTOM_FEE_IS_NOT_SET (empty field)
- CUSTOM_FEE_IS_NOT_INTEGER (BTC and XRP: decimals not allowed)
- AMOUNT_IS_NOT_IN_RANGE_DECIMALS (ETH only: decimals are allowed but with max. 9 decimals - GWEI is not satoshi)
- CUSTOM_FEE_NOT_IN_RANGE (must be between minFee and maxFee specified in coins.json, in @trezor/connect)
(BTC only) OP_RETURN output:
- HEX field, (on the right) should be changed on every ASCII field (on the left) change
- ASCII field should be changed ONLY if HEX is valid, otherwise should be empty
OP_RETURN output errors:
- DATA_NOT_SET (empty fields)
- DATA_NOT_VALID_HEX (not valid hexadecimal)
- DATA_HEX_TOO_BIG (data size limited to 80 bytes)
(BTC only) Locktime:
Additional field in send form, activated by “Add locktime” option.
If the number is greater than 500000000 then it is a timestamp otherwise is block number
- on “add locktime” input change
- on RBF option enable
- should disable RBF option if set
- should disable BROADCAST option if set
Locktime errors:
- LOCKTIME_IS_NOT_SET
- LOCKTIME_IS_NOT_NUMBER
- LOCKTIME_IS_TOO_LOW (lower/equal zero)
- LOCKTIME_IS_NOT_INTEGER (decimals not allowed)
- LOCKTIME_IS_TOO_BIG (locktime larger than max unix timestamp * 2 = 4294967294)
(BTC only) RBF:
Additional checkbox in send form, since this could be only true/false there is no validation for that filed
(ETH only) Data:
Additional field in send form, activated by “Add data” option. Same behavior as BTC OP_RETURN output.
- HEX field, (on the right) should be changed on every ASCII field (on the left) change
- ASCII field should be changed ONLY if HEX is valid, otherwise should be empty
Data errors:
- DATA_NOT_VALID_HEX
- DATA_HEX_TOO_BIG (data size limit: 8192 bytes for protobuf single message encoding)
(XRP only) Destination tag:
Additional field in send form, activated by “Add destination tag” option It doesn’t have impact on transaction itself (fee, amount etc)
Destination tag errors:
- DESTINATION_TAG_NOT_SET
- DESTINATION_TAG_IS_NOT_NUMBER
- DESTINATION_TAG_IS_NOT_VALID (decimals not allowed, in range: 0 - 4294967295)
Broadcast:
- toggle “Sign transaction” / “Send transaction” button
- “Review transaction” modal with different options at the last step (copy or download signed tx)
Drafts:
- draft should be saved on change of any field (if this field is valid)
- draft should be loaded after changing url (going back to send form from any other page)
Send RAW:
- Broadcast signed tx to the network regardless of tx OWNER, this tx doesn’t have to be signed by currently selected account, only selected NETWORK matters
Precomposed transaction (“Total Sent” field)
- on load draft
- on address change
- on amount change
- on fee change
- on additional option change
Review modal
- can be cancelled at any time during signing
- mirroring data displayed on the device
- if there is BTC OP_RETURN data or ETH DATA present and those data are larger than 10 chars additional “expand button” will appear next to it
- (BTC only) Expandable “Transaction detail” section
- Regarding to BROADCAST option “Send transaction” or “Copy/download transaction” buttons are available on the last step
Send component architecture
Send component is a mix of hooks and redux.
Hooks are used to control and validate form fields using react-hook-form library
Redux is used for persistent data like drafts, fiatRates, settings etc…
@wallet-views/send
Entry point of send form component.
Implements useSendForm hook by passing Redux props to it.
@wallet-hooks/useSendForm
Hook and set of sub-hooks The whole logic of send form pre/post validation, working with field (recalculation), async transaction composing and sending
@wallet-actions/sendFormActions
Called from useSendForm hook. A set of operations with @trezor/connect and post validation (see: Transaction signing)
@wallet-reducers/sendFormReducer
Storing transaction drafts and temporary data used in TransactionReviewModal
Transaction compose process
Validation of react-hook-form state occurs in React.useEffect so potential errors are available after render tick.
In order to work with properly validated state useSendFormCompose.composeRequest also needs to be handled in React.useEffect after render tick.
Every networkType has own sendFormActions.composeTransaction method
sendFormActionsBitcoindoes calculation using@trezor/connectsendFormActionsEthereumdoes calculation locally, customfeePerUnitis calculated iftransactionDatais usedsendFormActionsRippledoes calculation locally, additionalaccount.reservecheck on recipient address

PrecomposedLevelare calculated for all possibleFeeLevelat once.- if
FeeLevelwasn’t changed by the user and currentPrecomposedLevelhas error then tries to switch to a lower/custom possibleFeeLevel - if
PrecomposedLevelhas error set this error inreact-hook-form - if
PrecomposedLevelhasset-maxset calculated amount inreact-hook-form
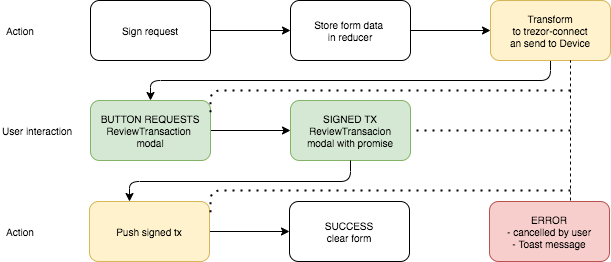
Transaction signing process
Every networkType has own sendFormActions.signTransaction method. This process is async may be interrupted by the user (ReviewTransaction cancel, disconnect device etc.)
Suite Desktop
Main differences between suite-web and suite-desktop builds
- @trezor/connect API
- suite-web
@trezor/connectis part of the JavaScript bundle as a regular module.@trezor/connectimports from@trezor/suiteare replaced to@trezor/connect-websee webpack config
- suite-desktop
@trezor/connectis installed as regular node_module and works in nodejs context (electron main process).@trezor/connectfiles are not hosted on the electron renderer context.- On the renderer context all
@trezor/connectmethods from are replaced by@trezor/ipc-proxymethods. see index
- suite-web
- Firmware binaries
- suite-web
- newest firmware binaries are hosted at
[url]/build/static/connect/data/firmwareand they are downloaded using regularfetchAPI.
- newest firmware binaries are hosted at
- suite-desktop
- firmware binaries are bundled as application resources in
bindirectory, full path depends on OS but it could be found on the as level asapp.asarfile, and they are downloaded usingfs.readFileAPI. see @trezor/connect/src/utils/assets
- firmware binaries are bundled as application resources in
- suite-web
- Trezor Bridge (trezord)
- Tor
- Bluetooth transport
App ID and name by environment
| Environment | App ID | App name | User data dir name |
|---|---|---|---|
| production (codesign) | com.trezor.suite | Trezor Suite | @trezor/suite-desktop |
| development (sldev) | com.trezor.suite.dev | Trezor Suite Dev | @trezor/suite-desktop-dev |
| local dev server | com.github.Electron | Trezor Suite Local | @trezor/suite-desktop-local |
Suite app name and ID are set by the environment so that Suite uses different user data dir and it’s not mixed between environments. The main benefit is that you can switch back and forth between Suite dev versions without losing your remembered production wallets. One disadvantage of this solution is checking of other instance running is not so straightforward between environments.
Same concept (user data separated by environment) works on web out of the box (storage per domain name).
Note that locally built Suite is “development (sldev)”, while “local dev server” is for yarn suite:dev:desktop.
If you want to run built Suite app with fresh data on every start (similarly to running Suite Web in an anonymous browser window), follow these instructions.
Debugging
See separate documentation for debugging with debugging instructions.
Logging
Logging can be enabled by running Suite with the command line flag --log-level=LEVEL (replace LEVEL with error, warn, info or debug based on the logging you wish to display). Additional command line flags can be found here.
More technical information can be found on the Desktop Logger page.
Shortcuts
Available shortcuts as provided by Electron:
| name | commands |
|---|---|
| Reload app | F5, Ctrl+R, Cmd+R |
| Hard Reload app | Shift+F5, Shift+Ctrl+R, Shift+Cmd+R |
| Restart app | Alt+F5, Option+F5, Alt+Shift+R, Option+Shift+R |
| Open DevTools | F12, Cmd+Shift+I,Ctrl+Shift+I, Cmd+Alt+I, Ctrl+Alt+I |
Runtime flags
See separate documentation for runtime-flags with runtime flags.
Extract application
MacOS
npx @electron/asar extract ./Trezor\ Suite.app/Contents/Resources/app.asar ./decompiled
NixOS
Run application to get mount-id like:
Trezor-Suite.AppImage installed in ~/.cache/appimage-run/e4f67ae8624c4079527c669d8a3c4bbc1dd00b83b2e1d15807a5863b11bd4f38
npx @electron/asar extract ~/.cache/appimage-run/[mount-id]/resources/app.asar ./decompiled
Suite Desktop debugging
Debugging main process (Chrome dev tools)
Open chrome and go to chrome://inspect
In “Devices” tab make sure that “Discover network targets” is enabled and “localhost:5858” is added (use Configure button)
dev mode
modify packages/suite-desktop/package.json
"dev:run": "electron ."
// to
"dev:run": "electron --inspect=5858 ."
prod mode
Run production build with --inspect=5858 runtime flag
Debugging build
Linux
./Trezor-Suite-22.7.2.AppImage --log-level=debug
MacOS
./Trezor\ Suite.app/Contents/MacOS/Trezor\ Suite --log-level=debug
NixOS
appimage-run ./Trezor-Suite.AppImage --log-level=debug
Windows
"C:\Users\[user-name]\AppData\Local\Programs\Trezor Suite\Trezor Suite.exe" --log-level=debug
Suite Desktop runtime flags
Runtime flags can be used when running the Suite Desktop executable, enabling or disabling certain features. For example: ./Trezor-Suite-22.7.2.AppImage --open-devtools will run with this flag turned on, which will result in opening DevTools on app launch.
The table below lists only the custom flags defined by Suite. For a full list, see also flags exposed by
Electron and Chromium
Available flags:
| name | description |
|---|---|
--open-devtools | Open DevTools on app launch |
--tor | Start with Tor enabled in settings |
--pre-release | Tells the auto-updater to fetch pre-release updates. |
--enable-updater | Enables the auto updater (if disabled in feature flags) |
--disable-updater | Disables the auto updater (if enabled in feature flags) |
--updater-url=URL | Set custom URL for auto-updater (default is github) |
--bridge-test | Run the internal node-bridge in UDP mode (for use with the device emulator) |
--bridge-daemon | Start Suite in daemon mode (no UI initially) |
--bridge-daemon-show-ui | Start Suite in daemon mode with UI right away |
--log-level=NAME | Set the logging level. Available levels are [name (value)]: error (1), warn (2), info(3), debug (4). All logs with a value equal or lower to the selected log level will be displayed. |
--log-write | Write log to disk |
--log-ui | Enables printing of UI console messages in the console. |
--log-file=FILENAME | Name of the output file (defaults to trezor-suite-log-%tt.txt) |
--log-path=PATHNAME | Path for the output file (defaults to /logs subfolder of Suite data directory or current working directory) |
--log-no-print | Suppress console logs |
--remove-user-data-on-start | Removes user data directory on start (used for E2E testing) |
--expose-connect-ws | Expose Connect websocket even on production build |
--offline-mode | Experimental flag to disable all network connection both in Renderer and Main process. Note that it does not directly control subprocesses (e.g. tor, coinjoin) |
Suite Desktop anonymous mode
Suite Web can be run in an anonymous browser window, guaranteeing fresh data on start, and no persisted data after it is closed.
While Suite Desktop has no such native feature, it is possible to do by wrapping it in a simple shell script. Those are listed below for each platform.
⚠️ Warning
- This will delete your existing data!
- there is no separation of normal session and anonymous session, like there is in a browser
- Already paired bluetooth devices may need to be paired again
- Use at your own risk
Windows
Note: the script autodetects “system” vs. “user” installation.
Create Suite-anonymous.bat anywhere:
@echo off
echo Launching trezor suite \"anonymously\"
set "APP_PF=C:\Program Files\Trezor Suite\Trezor Suite.exe"
set "APP_USER=C:\Users\%USERNAME%\AppData\Local\Programs\Trezor Suite\Trezor Suite.exe"
set "DATA_DIR=C:\Users\%USERNAME%\AppData\Roaming\@trezor\suite-desktop"
if exist "%APP_PF%" (
    start "" /wait "%APP_PF%"
) else if exist "%APP_USER%" (
    start "" /wait "%APP_USER%"
) else (
    echo Trezor Suite executable not found.
    pause
    exit /b 1
)
rmdir /s /q "%DATA_DIR%"
echo "Purged all Trezor Suite data ;)"
pause
macOS
Create Suite-anonymous.sh anywhere, then chmod +x "./Suite-anonymous.sh":
#!/bin/sh
echo Launching trezor suite \"anonymously\"
open "/Applications/Trezor Suite.app"
rm -rf "$HOME/Library/Application Support/@trezor/suite-desktop" "$HOME/Library/Caches/io.trezor.TrezorSuite" "$HOME/Library/Caches/io.trezor.TrezorSuite.ShipIt"
echo "Purged all Trezor Suite data ;)"
Linux AppImage
Note that you have to set your own path in APPIMAGE_PATH, because AppImage has no “install directory”, users can run it from anywhere.
Create Suite-anonymous.sh anywhere, then chmod +x "./Suite-anonymous.sh":
#!/bin/sh
echo Launching trezor suite \"anonymously\"
APPIMAGE_PATH="$HOME/apps/Trezor-Suite.AppImage"
if [ -x "$APPIMAGE_PATH" ]; then
    "$APPIMAGE_PATH" --no-sandbox
else
    echo "Trezor Suite AppImage not found."
    exit 1
fi
rm -rf $HOME/.config/@trezor/suite-desktop
echo "Purged all Trezor Suite data ;)"
The --no-sandbox parameter is necessary on Ubuntu 24+, may not be needed on other distros.
Notes
Note that the local config is located at @trezor/suite-desktop only if you downloaded the official Trezor Suite.
If you have self-built your app instead, then it shall be @trezor/suite-desktop-dev, see details here
Also please note that these scripts only delete custom user data, they do not erase all traces of any activity. Depending on your OS, the USB or Bluetooth devices may be registered by your system (outside of Suite).
MCP Server
Trezor Suite includes a built-in MCP (Model Context Protocol) server that allows AI agents to interact with your Trezor device. The server runs on localhost only and uses the standard Streamable HTTP transport.
Enabling the MCP Server
- Open Trezor Suite Desktop
- Go to Settings → Experimental Features and enable experimental features
- Toggle MCP Server on
Once enabled, the server runs at http://127.0.0.1:21340/mcp.
Client Configuration
Replace <token> with the token shown in Trezor Suite (Settings → Experimental Features → MCP Server). The token is passed as a URL query parameter — no custom headers needed.
Claude Code
Run in your terminal:
claude mcp add trezor-suite http://127.0.0.1:21340/mcp?token=<token> -t http
This adds the server to the current project (local scope). To make it available in all projects, add -s user.
Troubleshooting: If you see “SDK auth failed”, Claude Code’s HTTP transport may be triggering OAuth. Use the
mcp-remotebridge as a workaround:claude mcp add-json trezor-suite '{"command":"npx","args":["mcp-remote","http://127.0.0.1:21340/mcp?token=<token>","--transport","http-only","--allow-http"]}'
Claude Desktop
Claude Desktop only supports stdio transport, so it needs the mcp-remote bridge (requires Node.js). Add this to your config file:
- macOS:
~/Library/Application Support/Claude/claude_desktop_config.json - Windows:
%APPDATA%\Claude\claude_desktop_config.json
{
    "mcpServers": {
        "trezor-suite": {
            "command": "npx",
            "args": [
                "mcp-remote",
                "http://127.0.0.1:21340/mcp?token=<token>",
                "--transport",
                "http-only",
                "--allow-http"
            ]
        }
    }
}
Other MCP Clients (Cursor, VS Code, Windsurf)
{
    "mcpServers": {
        "trezor-suite": {
            "url": "http://127.0.0.1:21340/mcp?token=<token>"
        }
    }
}
Cursor
- Open Cursor Settings
- Navigate to the MCP section
- Add a new server with the URL
http://127.0.0.1:21340/mcp?token=<token>
VS Code (GitHub Copilot)
Create or edit .vscode/mcp.json in your workspace:
{
    "mcpServers": {
        "trezor-suite": {
            "url": "http://127.0.0.1:21340/mcp?token=<token>"
        }
    }
}
Windsurf
Add the MCP server via Windsurf Settings → MCP using the URL http://127.0.0.1:21340/mcp?token=<token>.
Available Tools
The MCP server exposes the following tools:
| Tool | Description | Device confirmation? |
|---|---|---|
trezor_get_address | Get a receive address from the connected device | Only if showOnTrezor: true |
trezor_get_public_key | Get extended public key (xpub) | No |
trezor_get_account_info | Get account info (balance, transactions, etc.) | No |
trezor_send_transaction | Compose, sign, and broadcast a transaction | Yes |
trezor_push_transaction | Broadcast a signed transaction to the network | No |
trezor_sign_message | Sign a message with a device key | Yes |
trezor_verify_message | Verify a signed message | No |
trezor_sign_typed_data | Sign EIP-712 typed data (EVM) | Yes |
All user-facing tool calls require Suite popup approval (unless previously remembered). Internal auto-fill calls (nonce lookup, fee estimation) run silently.
Claude Code Skill
A ready-made Claude Code skill is available that teaches Claude how to use the MCP tools effectively — including coin/path conventions, transaction auto-fill behavior, and common workflows.
To install it, download the skills/trezor-mcp folder and copy it into Claude Code’s skills directory on your machine:
- macOS / Linux:
~/.claude/skills/trezor-mcp/ - Windows:
%USERPROFILE%\.claude\skills\trezor-mcp\
Make sure the folder contains SKILL.md and the references/ subfolder. Once in place, Claude Code will automatically trigger the skill when you mention Trezor wallet operations.
Trezor MCP skill
name: trezor-mcp description: Trigger on any mention of Trezor wallet interaction, crypto addresses, sending crypto, checking balances, signing messages, or hardware wallet operations via MCP. Also trigger when users mention configuring or troubleshooting the Trezor MCP server connection.
Trezor Suite MCP Server
The Trezor Suite MCP server lets AI agents interact with Trezor hardware wallets over the Model Context Protocol. It runs locally inside Trezor Suite Desktop and exposes tools for getting addresses, checking balances, sending transactions, and signing/verifying messages. All sensitive operations require physical confirmation on the Trezor device.
Setup & Configuration
Prerequisites
- Trezor Suite Desktop installed and running
- Trezor device connected via USB
- MCP server enabled: Settings → Experimental Features → enable experimental features → check MCP Server
Once enabled, the server listens at http://127.0.0.1:21340/mcp (localhost only).
Client Configuration
Replace <token> with the token shown in the Trezor Suite config snippet (Settings → Experimental Features → MCP Server). The token is passed as a URL query parameter — no custom headers needed.
Claude Code — run in your terminal:
claude mcp add trezor-suite http://127.0.0.1:21340/mcp?token=<token> -t http
This adds the server to the current project (local scope). To make it available in all projects, add -s user. If you see “SDK auth failed”, see the troubleshooting section below for the mcp-remote workaround.
Claude Desktop — add this to claude_desktop_config.json (requires Node.js for npx):
- macOS:
~/Library/Application Support/Claude/claude_desktop_config.json - Windows:
%APPDATA%\Claude\claude_desktop_config.json
{
    "mcpServers": {
        "trezor-suite": {
            "command": "npx",
            "args": [
                "mcp-remote",
                "http://127.0.0.1:21340/mcp?token=<token>",
                "--transport",
                "http-only",
                "--allow-http"
            ]
        }
    }
}
Claude Desktop only supports stdio transport, so mcp-remote acts as a bridge: it spawns a local process that translates between stdio and the Trezor Suite HTTP server. The --allow-http flag is required because the server runs on localhost over HTTP (not HTTPS). The --transport http-only flag skips SSE transport attempts.
Other MCP clients — add this JSON to your client config:
{
    "mcpServers": {
        "trezor-suite": {
            "url": "http://127.0.0.1:21340/mcp?token=<token>"
        }
    }
}
| Client | Config file |
|---|---|
| VS Code (Copilot) | .vscode/mcp.json in workspace |
| Cursor | Cursor Settings → MCP → add URL |
| Windsurf | Windsurf Settings → MCP → add URL |
Verifying the Connection
- Claude Code: run
/mcpto see connected servers - Manual test:
curl -X POST http://127.0.0.1:21340/mcp -H "Content-Type: application/json" -H "Authorization: Bearer <token>" -d '{"jsonrpc":"2.0","id":"1","method":"initialize","params":{"protocolVersion":"2025-03-26","capabilities":{},"clientInfo":{"name":"test","version":"1.0.0"}}}'
A successful response returns protocolVersion and serverInfo.
Available Tools — Quick Reference
| Tool | Description | Device confirmation? |
|---|---|---|
trezor_get_address | Get a receive address for a coin | Only if showOnTrezor: true |
trezor_get_public_key | Get extended public key (xpub) | No |
trezor_get_account_info | Get balance, transactions, UTXOs | No |
trezor_send_transaction | Compose, sign, and broadcast a transaction | Yes |
trezor_push_transaction | Broadcast a pre-signed transaction | No |
trezor_sign_message | Sign a message with a device key | Yes |
trezor_verify_message | Verify a signed message | No |
trezor_sign_typed_data | Sign EIP-712 typed data (EVM) | Yes |
Common Workflows
Get a Receive Address
Use trezor_get_address with the coin and derivation path.
Bitcoin (native segwit):
{ "coin": "btc", "path": "m/84'/0'/0'/0/0", "showOnTrezor": true }
Ethereum:
{ "coin": "eth", "path": "m/44'/60'/0'/0/0", "showOnTrezor": true }
Set showOnTrezor: true when the user wants to verify the address on their device screen. For programmatic lookups where verification is not needed, omit it or set it to false.
Check Account Balance
Use trezor_get_account_info with the coin and an account-level path.
Bitcoin:
{ "coin": "btc", "path": "m/84'/0'/0'", "details": "basic" }
Ethereum:
{ "coin": "eth", "path": "m/44'/60'/0'/0/0", "details": "tokenBalances" }
The response includes balance (in the smallest unit — satoshis for BTC, wei for ETH), availableBalance, and transaction history depending on the details level:
"basic"— balance only"tokens"/"tokenBalances"— include token info (useful for EVM)"txids"/"txs"— include transaction IDs or full transaction objects
Send a Transaction
Use trezor_send_transaction. For simple transfers you only need coin, to, and value — nonce, fees, and UTXOs are auto-filled.
Send 0.001 BTC:
{ "coin": "btc", "to": "bc1q...", "value": "0.001" }
For UTXO coins, the tool auto-handles account discovery, UTXO selection, fee estimation, signing, and broadcasting in one call.
Send 0.1 ETH:
{ "coin": "eth", "to": "0xABC...123", "value": "0.1" }
EVM auto-fill: nonce from account state, fees estimated via EIP-1559 (falls back to legacy if gasPrice is explicitly provided).
Send 10 XRP:
{ "coin": "xrp", "to": "rN7d...", "value": "10", "destinationTag": 12345 }
XRP auto-fill: sequence number and fee (defaults to 12 drops if estimation fails).
Important: The user confirms the transaction details physically on their Trezor device — do not ask for separate confirmation in chat. Just call the tool directly and let the device handle approval.
Common Stablecoin Contracts
When the user asks to send stablecoins, always ask which stablecoin and which network before proceeding — never assume.
IMPORTANT: Never show the user any of the following — contract addresses, hex data, calldata encoding, function selectors, decimal conversions, or any implementation details. The user should only see: “Sending X USDT to [address] on Ethereum. Please confirm on your Trezor device.” Nothing more.
Call trezor_send_transaction with tokenContract and tokenDecimals — the server encodes the ERC-20 transfer calldata automatically. No hex encoding needed.
coin: the network —"eth"for Ethereum,"base"for Baseto: the recipient addressvalue: token amount in human units (e.g."10"for 10 USDC)tokenContract: the token’s contract addresstokenDecimals: the token’s decimal places
Example — send 10 USDC on Ethereum:
{
    "coin": "eth",
    "to": "0xRecipientAddress",
    "value": "10",
    "tokenContract": "0xA0b86991c6218b36c1d19D4a2e9Eb0cE3606eB48",
    "tokenDecimals": 6
}
The server handles calldata encoding, nonce, EIP-1559 fees, gas limit, signing, and broadcasting.
Ethereum (eth) contracts:
- USDC:
0xA0b86991c6218b36c1d19D4a2e9Eb0cE3606eB48(6 decimals) - USDT:
0xdAC17F958D2ee523a2206206994597C13D831ec7(6 decimals) - DAI:
0x6B175474E89094C44Da98b954EedeAC495271d0F(18 decimals)
Base (base) contracts:
- USDC:
0x833589fCD6eDb6E08f4c7C32D4f71b54bdA02913(6 decimals) - DAI:
0x50c5725949A6F0c72E6C4a641F24049A917DB0Cb(18 decimals)
To send from a non-default account, use accountIndex (0-based) or provide an explicit path.
If you need to sign without broadcasting, set "broadcast": false. The response will contain the signed transaction hex, which you can later broadcast with trezor_push_transaction.
Sign & Verify a Message
Sign:
{ "coin": "btc", "path": "m/84'/0'/0'/0/0", "message": "Hello, world!" }
Returns { "address": "bc1q...", "signature": "base64..." }.
Verify:
{ "coin": "btc", "address": "bc1q...", "message": "Hello, world!", "signature": "base64..." }
Returns a success/failure result.
Sign EIP-712 Typed Data
Use trezor_sign_typed_data to sign EIP-712 structured data on EVM chains. Common use cases include token permits (EIP-2612), NFT marketplace orders, and DAO governance votes.
EIP-2612 permit example (approve USDC spending without a transaction):
{
    "data": {
        "types": {
            "EIP712Domain": [
                { "name": "name", "type": "string" },
                { "name": "version", "type": "string" },
                { "name": "chainId", "type": "uint256" },
                { "name": "verifyingContract", "type": "address" }
            ],
            "Permit": [
                { "name": "owner", "type": "address" },
                { "name": "spender", "type": "address" },
                { "name": "value", "type": "uint256" },
                { "name": "nonce", "type": "uint256" },
                { "name": "deadline", "type": "uint256" }
            ]
        },
        "primaryType": "Permit",
        "domain": {
            "name": "USD Coin",
            "version": "2",
            "chainId": 1,
            "verifyingContract": "0xA0b86991c6218b36c1d19D4a2e9Eb0cE3606eB48"
        },
        "message": {
            "owner": "0xYourAddress",
            "spender": "0xSpenderContract",
            "value": "1000000",
            "nonce": "0",
            "deadline": "1735689600"
        }
    }
}
The path is auto-derived for Ethereum (account index 0) if omitted. Use accountIndex to select a different account, or provide an explicit path.
Broadcast a Pre-Signed Transaction
Use trezor_push_transaction when you have a signed transaction hex (e.g., from a send_transaction call with broadcast: false):
{ "coin": "eth", "tx": "0xf86c..." }
Coin & Path Conventions
Common coins and their default derivation paths:
| Coin | Symbol | Default path | Notes |
|---|---|---|---|
| Bitcoin | btc | m/84'/0'/0' | Native segwit (bech32). Also: m/49' (segwit), m/44' (legacy), m/86' (taproot) |
| Ethereum | eth | m/44'/60'/0'/0/0 | All EVM chains share coin type 60 |
| Litecoin | ltc | m/84'/2'/0' | Native segwit default |
| Bitcoin Cash | bch | m/44'/145'/0' | Legacy only |
| Dogecoin | doge | m/44'/3'/0' | Legacy only |
| Zcash | zec | m/44'/133'/0' | Legacy only |
| XRP | xrp | m/44'/144'/0'/0/0 | |
| Solana | sol | m/44'/501'/0'/0' | Requires full transaction object |
| Cardano | ada | m/1852'/1815'/0' | Requires full transaction object |
| Stellar | xlm | m/44'/148'/0' | Requires full transaction object |
For the full list of supported coins (including testnets, EVM L2s, and decimals), see references/tools-reference.md.
Safety & Confirmation Model
- All signing and sending operations require physical confirmation on the Trezor device. This is the primary safety gate — no transaction can be signed without the user pressing a button on their hardware wallet.
- Read-only tools (
get_account_info,get_addresswithoutshowOnTrezor,verify_message) do not require device interaction. - Do not ask for confirmation in chat before calling tools. The Trezor device is the confirmation mechanism — the user reviews and approves every transaction on the device screen. Asking in chat is redundant and slows down the workflow. Just call the tool directly.
- The MCP server only accepts connections from localhost — it cannot be accessed remotely.
- Bearer token authentication is required on every request. The token is auto-generated when MCP is first enabled and included in the config snippet. Requests without a valid
Authorization: Bearer <token>header receive HTTP 401.
Agent Recovery: MCP Tools Not Available
If the Trezor MCP tools are not showing up as connected tools, follow these steps in order — do NOT fall back to raw HTTP/curl:
- Retry the MCP connection. In Claude Code, run
/mcpto reconnect. The server may have just started. - If still not connected, tell the user the auth token is likely missing or wrong. Say: “The Trezor MCP server isn’t connected. Please check that the Bearer token in your MCP client config matches the one shown in Trezor Suite → Settings → Experimental Features → MCP Server. Copy the full config snippet and paste it into
~/.claude.json(or your MCP client config), then restart the MCP connection.” - If the user confirms the token is correct, check the basics: Is Trezor Suite running? Is the MCP server toggle enabled in Settings → Experimental Features?
- Never bypass the MCP protocol by sending raw HTTP requests to the server. Always use the MCP tools through the proper MCP client connection.
Troubleshooting
| Problem | Cause | Fix |
|---|---|---|
| “Connection refused” | MCP server not enabled or Trezor Suite not running | Open Trezor Suite → Settings → Experimental Features → enable MCP Server |
| “Failed to reconnect” / server unreachable | Suite crashed or port conflict | Restart Trezor Suite, verify nothing else uses port 21340 |
| HTTP 404 “Session not found” | Session expired (Suite was restarted) | Re-initialize: send a new initialize request. In Claude Code, restart the MCP connection via /mcp |
| Tool call hangs / times out | User hasn’t confirmed on Trezor device | Check the Trezor device screen — it is waiting for button press |
| HTTP 401 Unauthorized | Missing or invalid token | Provide the token via ?token= query parameter in the URL or Authorization: Bearer <token> header. The token is auto-generated and shown in Trezor Suite under Settings → Experimental Features → MCP Server. Copy the full config snippet into your MCP client config. If you recently re-enabled MCP, the token may have changed. |
| HTTP 403 Forbidden | Request not from localhost | Ensure the MCP client is running on the same machine as Trezor Suite |
| “Unknown coin” error | Unsupported coin symbol or typo | Check the supported coins table in references/tools-reference.md |
| “not valid MCP server” (Claude Desktop) | Missing mcp-remote bridge config | Claude Desktop only supports stdio transport. Use the mcp-remote bridge config (see Claude Desktop section above). Ensure Node.js is installed for npx. |
| “SDK auth failed” (Claude Code or Desktop) | Direct HTTP transport triggers OAuth | Claude Code’s HTTP transport has a known issue where it tries OAuth before sending headers. Use mcp-remote bridge instead of direct HTTP: claude mcp add-json trezor-suite '{"command":"npx","args":["mcp-remote","http://127.0.0.1:21340/mcp?token=<token>","--transport","http-only","--allow-http"]}'. Also check ~/.claude.json for old "type":"http" entries and replace them with the mcp-remote config. |
| “Session not found” after reconnect | Stale session from previous connection | Toggle MCP off and on in Trezor Suite to reset the session, then reconnect the client. |
References
For detailed tool parameters, all supported coins with paths and decimals, example JSON-RPC payloads, transaction auto-fill details, and error codes, read references/tools-reference.md.
Trezor MCP Tools Reference
Detailed parameter reference, example payloads, supported coins, and error codes for the Trezor Suite MCP server.
Server endpoint: POST http://127.0.0.1:21340/mcp
Authentication: Authorization: Bearer <token> header required on every request
Protocol: JSON-RPC 2.0 (Streamable HTTP transport)
MCP version: 2025-03-26
Tool Parameters
trezor_get_address
Get a receive address from the Trezor device.
| Parameter | Type | Required | Default | Description |
|---|---|---|---|---|
coin | string | Yes | — | Coin symbol (e.g., "btc", "eth", "ltc") |
path | string | Yes | — | BIP44 derivation path (e.g., "m/84'/0'/0'/0/0") |
showOnTrezor | boolean | No | false | Display the address on device screen for verification |
Automatically selects the correct method (getAddress for UTXO coins, ethereumGetAddress for EVM chains) based on coin type.
trezor_get_public_key
Get the extended public key (xpub) for a derivation path.
| Parameter | Type | Required | Default | Description |
|---|---|---|---|---|
coin | string | Yes | — | Coin symbol (e.g., "btc", "ltc") |
path | string | Yes | — | BIP44 derivation path (e.g., "m/84'/0'/0'") |
trezor_get_account_info
Get account information including balance, transaction history, and UTXOs.
| Parameter | Type | Required | Default | Description |
|---|---|---|---|---|
coin | string | Yes | — | Coin symbol |
path | string | No | — | BIP44 account-level derivation path |
descriptor | string | No | — | Account descriptor (xpub for BTC, address for ETH). Alternative to path |
details | string | No | "basic" | Detail level: "basic", "tokens", "tokenBalances", "txids", "txs" |
Provide either path or descriptor (at least one recommended).
trezor_send_transaction
Compose, sign, and broadcast a cryptocurrency transaction.
Common parameters:
| Parameter | Type | Required | Default | Description |
|---|---|---|---|---|
coin | string | Yes | — | Coin symbol |
to | string | Yes* | — | Destination address (*required for EVM and XRP) |
value | string | Yes* | — | Amount in native unit, e.g., "0.1" for 0.1 ETH (*required for EVM and XRP) |
accountIndex | number | No | 0 | Account index (0-based). Ignored if path is provided |
path | string | No | — | BIP44 path override. Auto-derived from coin + accountIndex if omitted |
broadcast | boolean | No | true | Whether to broadcast after signing |
transaction | object | No | — | Full transaction object for manual composition |
EVM-specific parameters (eth, pol, bsc, arb, base, op, avax, etc, tsep, thod):
| Parameter | Type | Required | Default | Description |
|---|---|---|---|---|
nonce | string | No | auto-filled | Transaction nonce |
gasLimit | string | No | "21000" / "100000" | Gas limit (21000 for transfers, 100000 if data present) |
gasPrice | string | No | — | Legacy gas price in wei. If set, uses legacy mode instead of EIP-1559 |
maxFeePerGas | string | No | auto-estimated | EIP-1559 max fee per gas in wei |
maxPriorityFeePerGas | string | No | auto-estimated | EIP-1559 priority fee in wei |
data | string | No | — | Contract call data (hex string) |
chainId | number | No | auto-derived | EVM chain ID |
XRP-specific parameters (xrp, txrp):
| Parameter | Type | Required | Default | Description |
|---|---|---|---|---|
destinationTag | number | No | — | Destination tag for XRP transactions |
UTXO coins (btc, ltc, bch, doge, zec): Only coin, to, and value are needed. The tool internally calls composeTransaction which handles UTXO selection, fee estimation, signing, and broadcasting.
Other chains (sol, ada, xlm, trx): Require a full transaction object with chain-specific parameters per TrezorConnect docs.
trezor_push_transaction
Broadcast a signed transaction to the network.
| Parameter | Type | Required | Default | Description |
|---|---|---|---|---|
coin | string | Yes | — | Coin symbol |
tx | string | Yes | — | Signed transaction hex string |
trezor_sign_message
Sign a message with a private key on the Trezor device.
| Parameter | Type | Required | Default | Description |
|---|---|---|---|---|
coin | string | Yes | — | Coin symbol |
path | string | Yes | — | BIP44 derivation path for the signing key |
message | string | Yes | — | The message to sign |
Automatically selects signMessage (Bitcoin) or ethereumSignMessage (EVM) based on coin type.
trezor_verify_message
Verify a signed message.
| Parameter | Type | Required | Default | Description |
|---|---|---|---|---|
coin | string | Yes | — | Coin symbol |
address | string | Yes | — | Address that allegedly signed the message |
message | string | Yes | — | Original message |
signature | string | Yes | — | Signature to verify |
Automatically selects verifyMessage (Bitcoin) or ethereumVerifyMessage (EVM) based on coin type.
trezor_sign_typed_data
Sign EIP-712 typed structured data using the Trezor device (EVM chains only).
| Parameter | Type | Required | Default | Description |
|---|---|---|---|---|
path | string | No | auto-derived | BIP44 derivation path (e.g., "m/44'/60'/0'/0/0") |
accountIndex | number | No | 0 | Account index (0-based). Ignored if path is provided |
data | object | Yes | — | EIP-712 typed data object (see structure below) |
metamask_v4_compat | boolean | No | true | Use MetaMask V4 compatibility mode for hashing |
data object structure:
| Field | Type | Required | Description |
|---|---|---|---|
types | object | Yes | Type definitions including EIP712Domain and custom types |
primaryType | string | Yes | The primary type being signed (e.g., "Permit", "Order") |
domain | object | Yes | Domain separator fields (name, version, chainId, verifyingContract) |
message | object | Yes | The message data matching the primaryType schema |
If path is omitted, it is auto-derived for Ethereum (SLIP-44 coin type 60) from the given accountIndex. For EVM-compatible chains that use a different coin type (for example, Ethereum Classic with coin type 61), you must provide an explicit path matching that chain’s derivation scheme.
Example JSON-RPC Payloads
Initialize Session
{
    "jsonrpc": "2.0",
    "id": "1",
    "method": "initialize",
    "params": {
        "protocolVersion": "2025-03-26",
        "capabilities": {},
        "clientInfo": { "name": "my-agent", "version": "1.0.0" }
    }
}
Response (note the Mcp-Session-Id header — include it in subsequent requests):
{
    "jsonrpc": "2.0",
    "id": "1",
    "result": {
        "protocolVersion": "2025-03-26",
        "serverInfo": { "name": "trezor-suite-mcp-server", "version": "1.0.0" },
        "capabilities": { "tools": {} }
    }
}
List Tools
{
    "jsonrpc": "2.0",
    "id": "2",
    "method": "tools/list",
    "params": {}
}
Call a Tool
{
    "jsonrpc": "2.0",
    "id": "3",
    "method": "tools/call",
    "params": {
        "name": "trezor_get_account_info",
        "arguments": {
            "coin": "btc",
            "path": "m/84'/0'/0'",
            "details": "basic"
        }
    }
}
Success response:
{
    "jsonrpc": "2.0",
    "id": "3",
    "result": {
        "content": [
            {
                "type": "text",
                "text": "{\"balance\":\"123456\",\"availableBalance\":\"123456\", ...}"
            }
        ]
    }
}
Error response:
{
    "jsonrpc": "2.0",
    "id": "3",
    "result": {
        "content": [
            {
                "type": "text",
                "text": "Error: Unknown coin 'xyz' and no explicit 'path' provided."
            }
        ],
        "isError": true
    }
}
Send Transaction (EVM)
{
    "jsonrpc": "2.0",
    "id": "4",
    "method": "tools/call",
    "params": {
        "name": "trezor_send_transaction",
        "arguments": {
            "coin": "eth",
            "to": "0x742d35Cc6634C0532925a3b844Bc9e7595f2bD18",
            "value": "0.05"
        }
    }
}
Send Transaction (BTC)
{
    "jsonrpc": "2.0",
    "id": "5",
    "method": "tools/call",
    "params": {
        "name": "trezor_send_transaction",
        "arguments": {
            "coin": "btc",
            "to": "bc1qw508d6qejxtdg4y5r3zarvary0c5xw7kv8f3t4",
            "value": "0.001"
        }
    }
}
Sign EIP-712 Typed Data
{
    "jsonrpc": "2.0",
    "id": "6",
    "method": "tools/call",
    "params": {
        "name": "trezor_sign_typed_data",
        "arguments": {
            "data": {
                "types": {
                    "EIP712Domain": [
                        { "name": "name", "type": "string" },
                        { "name": "version", "type": "string" },
                        { "name": "chainId", "type": "uint256" },
                        { "name": "verifyingContract", "type": "address" }
                    ],
                    "Mail": [
                        { "name": "from", "type": "string" },
                        { "name": "to", "type": "string" },
                        { "name": "contents", "type": "string" }
                    ]
                },
                "primaryType": "Mail",
                "domain": {
                    "name": "Example DApp",
                    "version": "1",
                    "chainId": 1,
                    "verifyingContract": "0xCcCCccccCCCCcCCCCCCcCcCccCcCCCcCcccccccC"
                },
                "message": {
                    "from": "Alice",
                    "to": "Bob",
                    "contents": "Hello, Bob!"
                }
            }
        }
    }
}
Supported Coins
Mainnet
| Coin | Symbol | Default Path | Decimals | Chain ID | Notes |
|---|---|---|---|---|---|
| Bitcoin | btc | m/84'/0'/i' | 8 | — | Also: m/49' (segwit), m/44' (legacy), m/86' (taproot) |
| Ethereum | eth | m/44'/60'/0'/0/i | 18 | 1 | |
| Polygon | pol | m/44'/60'/0'/0/i | 18 | 137 | |
| BNB Smart Chain | bsc | m/44'/60'/0'/0/i | 18 | 56 | |
| Arbitrum One | arb | m/44'/60'/0'/0/i | 18 | 42161 | |
| Base | base | m/44'/60'/0'/0/i | 18 | 8453 | |
| Optimism | op | m/44'/60'/0'/0/i | 18 | 10 | |
| Avalanche | avax | m/44'/60'/0'/0/i | 18 | 43114 | |
| Ethereum Classic | etc | m/44'/61'/0'/0/i | 18 | 61 | Note: coin type 61, not 60 |
| Litecoin | ltc | m/84'/2'/i' | 8 | — | Also: m/49' (segwit), m/44' (legacy) |
| Bitcoin Cash | bch | m/44'/145'/i' | 8 | — | |
| Dogecoin | doge | m/44'/3'/i' | 8 | — | |
| Zcash | zec | m/44'/133'/i' | 8 | — | |
| XRP Ledger | xrp | m/44'/144'/i'/0/0 | 6 | — | |
| Solana | sol | m/44'/501'/i'/0' | 9 | — | Requires full transaction object |
| Tron | trx | m/44'/195'/0'/0/i | 6 | — | Requires full transaction object |
| Cardano | ada | m/1852'/1815'/i' | 6 | — | Requires full transaction object |
| Stellar | xlm | m/44'/148'/i' | 7 | — | Requires full transaction object |
Testnet
| Coin | Symbol | Default Path | Decimals | Chain ID |
|---|---|---|---|---|
| Bitcoin Testnet | test | m/84'/1'/i' | 8 | — |
| Bitcoin Regtest | regtest | m/84'/1'/i' | 8 | — |
| Ethereum Sepolia | tsep | m/44'/1'/0'/0/i | 18 | 11155111 |
| Ethereum Hoodi | thod | m/44'/1'/0'/0/i | 18 | 560048 |
| Solana Devnet | dsol | m/44'/501'/i'/0' | 9 | — |
| XRP Testnet | txrp | m/44'/144'/i'/0/0 | 6 | — |
| Stellar Testnet | txlm | m/44'/148'/i' | 7 | — |
In paths above, i is the account index (default 0).
Transaction Auto-Fill Details
EVM Chains (eth, pol, bsc, arb, base, op, avax, etc)
| Field | Auto-fill method |
|---|---|
| Nonce | Silent getAccountInfo call → misc.nonce |
| Gas limit | 21000 for simple transfers, 100000 if data is present |
| Fees | blockchainEstimateFee with { blocks: [2], feeLevels: 'smart' } → picks “normal” tier. Falls back to 0x0 if estimation fails (UI allows adjustment before signing) |
| Chain ID | Derived from coin config |
| Value | Converted from native unit (e.g., "0.1" ETH) to wei using 18 decimals |
Default mode is EIP-1559 (maxFeePerGas + maxPriorityFeePerGas). Switches to legacy mode only if gasPrice is explicitly provided.
XRP
| Field | Auto-fill method |
|---|---|
| Sequence | Silent getAccountInfo call → misc.sequence |
| Fee | blockchainEstimateFee (no params) → defaults to 12 drops if fails |
| Amount | Converted from native unit (e.g., "10" XRP) to drops using 6 decimals |
UTXO Coins (btc, ltc, bch, doge, zec)
A single composeTransaction call with push: true handles everything:
- Account discovery and UTXO selection
- Fee estimation
- Transaction signing
- Broadcasting
No individual fields need to be auto-filled — the entire flow is managed internally.
Other Chains (sol, ada, xlm, trx)
No auto-fill is available. You must provide a complete transaction object with all chain-specific parameters as defined in the TrezorConnect documentation for the corresponding sign method (solanaSignTransaction, cardanoSignTransaction, stellarSignTransaction, tronSignTransaction).
Error Codes
JSON-RPC Errors (HTTP-level)
| Code | Name | Meaning |
|---|---|---|
-32700 | Parse error | Malformed JSON in request body |
-32601 | Method not found | Unknown JSON-RPC method (typo in "method" field) |
-32602 | Invalid params | Unknown tool name in tools/call |
HTTP Status Codes
| Status | Meaning |
|---|---|
200 | Success |
202 | Notification accepted (request without id) |
401 | Unauthorized — provide token via ?token= query parameter or Authorization: Bearer <token> header (token from Trezor Suite Settings → Experimental Features → MCP Server) |
403 | Forbidden — request not from localhost |
404 | Session not found — Mcp-Session-Id header doesn’t match server session |
405 | Method not allowed — GET is not supported |
Tool-Level Errors
Returned as successful JSON-RPC responses with isError: true:
| Error message | Cause |
|---|---|
"EVM transactions require 'to' and 'value' fields." | Missing required fields for EVM send |
"Failed to get account info for nonce: ..." | Could not auto-fill nonce |
"Unknown coin 'xyz' and no explicit 'path' provided." | Unrecognized coin symbol and no fallback path |
"{COIN} transactions require a 'transaction' object." | Missing transaction object for sol/ada/xlm/trx |
Auto-Broadcast Failure
When signing succeeds but broadcast fails, the response has success: true with both results:
{
    "success": true,
    "payload": {
        "signed": { "...sign result..." },
        "broadcastError": { "...error details..." }
    }
}
Use trezor_push_transaction to retry the broadcast manually with the signed transaction hex.
Session Management
- Session ID is generated on the first
initializecall and returned in theMcp-Session-Idresponse header - All subsequent requests must include the
Mcp-Session-Idheader — requests that omit it or send a mismatched value are rejected with HTTP 404 - If the server returns HTTP 404 “Session not found”, send a new
initializerequest - Send
DELETE /mcpwith the session header to terminate a session - Sessions are in-memory only — they do not survive app restarts
How to create new package?
- Use
yarn generate-package @scope/new-package-name- it will generate package boilerplate inscope/new-package-namefolder.
How to use this new package?
- Place this package to dependency field of package.json in package where you want to use it.
- Run
yarn refsto generate tsconfig refs. - Run
yarnto let yarn symlink this package.
Features
This directory contains description of various Trezor Suite features.
- coin-handler
- transactions export
- transactions search
- metadata labeling
- fiat rates
- guide
- localization
- messaging system
- feature flags
- desktop logger
- application log
- onboarding
Coin Protocol Handler
Trezor Suite, both on web and desktop, can handle opening of coin URLs in coin:address and coin:address?amount= formats. Currently all bitcoin-like coins schemes are supported (Applies for bitcoin-like coins supported by Trezor Suite). bitcoin: is supported in both web and desktop app environment. Other coins, such as litecoin:, dogecoin: are supported only in desktop app. MDN docs
Behavior
Behavior on web
When opening Suite on web, in Firefox it will prompt the user to associate the opening of bitcoin: URLs with Suite. On Chrome, you have to click on small icon in address bar and allow bitcoin: URLs. By accepting, all bitcoin: URLs in the browser will open Suite.
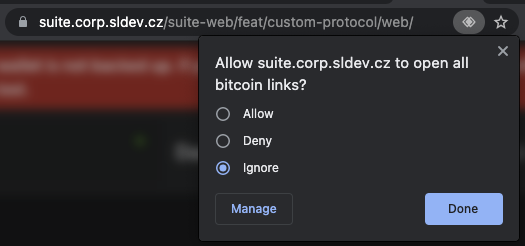

Behavior on desktop
By installing the desktop application, the bitcoin: protocol handler will be automatically registered in the system. In Firefox, the user will have the choice to use Suite Desktop to open bitcoin: URLs or browser if the protocol handler is also registered there. In Chrome, if the desktop application protocol handler is registered but web is not, Chrome will offer the desktop app. If both desktop and web app is registered, Chrome will open the web app without asking.
More apps with same handler (macOS)
If user has more desktop apps with same handler installed, the behavior is not defined. However, it looks like that the last installed application is launched.
Structure
The implementation adheres to the BIP29 specification (with the exception of the label and message parameters).
Example
bitcoin:39FpPxnR1gji9LJpNDZsB1bBeZttgTtg4L?amount=0.001 bitcoin:39FpPxnR1gji9LJpNDZsB1bBeZttgTtg4L
UI
When an app is opened using bitcoin: protocol handler, it shows a notification informing a user about stored address and an amount ready to be filled into bitcoin send form.
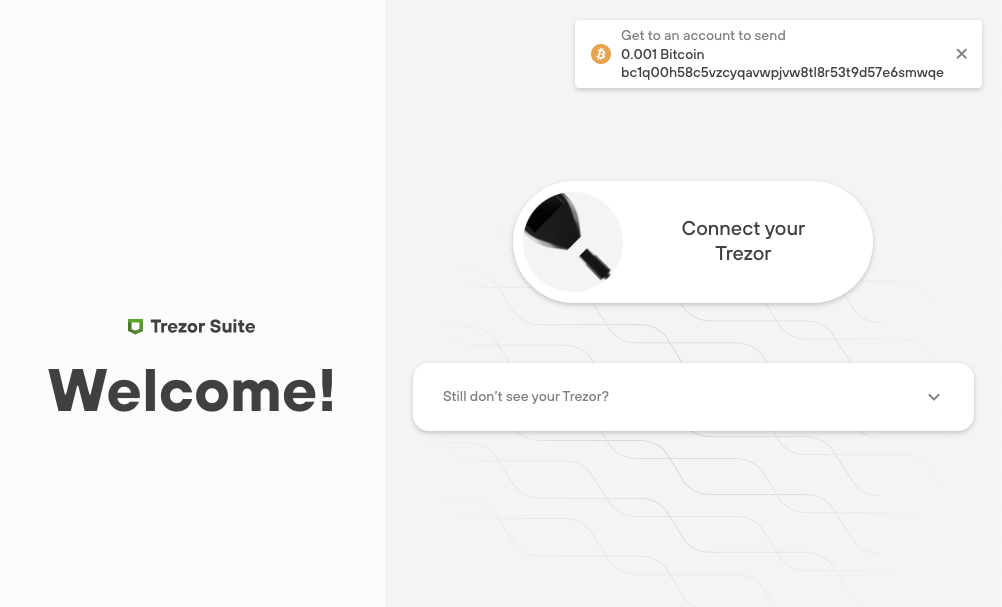
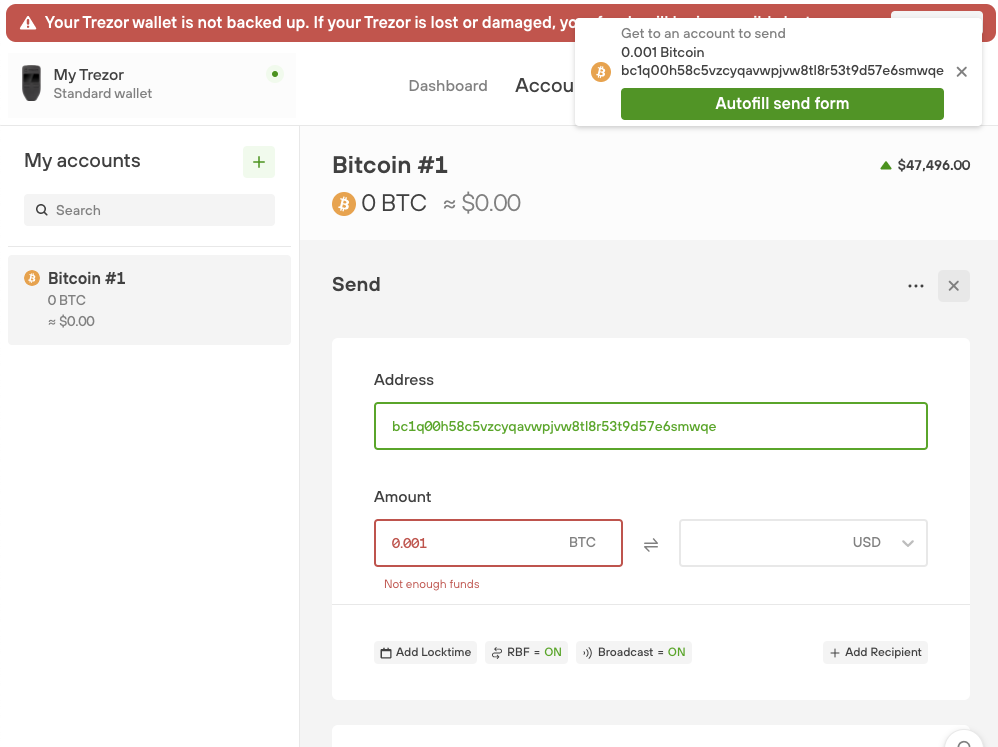
Useful links
GitHub #3294 GitHub #5266 GitHub #5508
Handlers manipulation
Chrome
Navigate to chrome://settings/handlers and remove handlers you want.
Firefox
Navigate to about:preferences#general and scroll to Applications. Find handler, click on chevron in Action column, hit Application details and remove apps you want.
Desktop app - macOS
Delete desktop app and use terminal open -a Xcode ~/Library/Preferences/com.apple.LaunchServices/com.apple.launchservices.secure.plist. Find and delete bitcoin and other coin handlers. If it still wants to open a desktop app. Find all occurrences of Trezor Suite.app and delete them, even the .dmg files in suite-desktop/build-electron.
Transactions - Export
You have the possibility to export your data in multiple formats: PDF, CSV and JSON. The export menu is available by clicking the three little dots near to the search button.
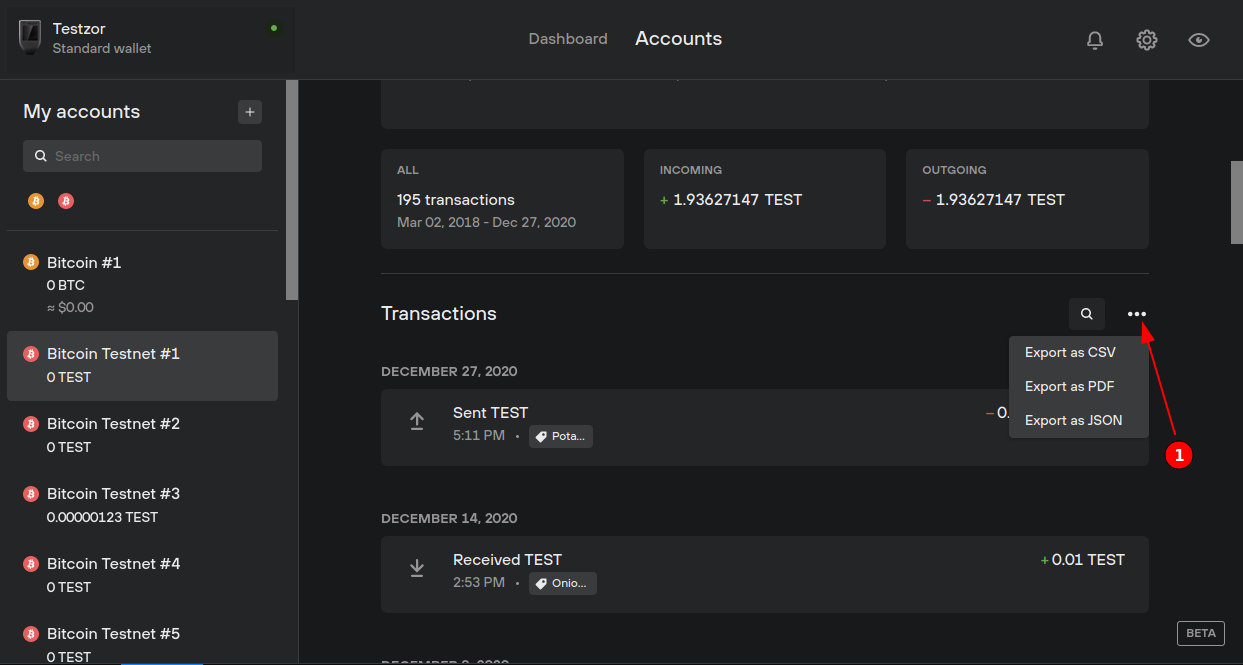
The JSON format contains the most extensive amount of information. This export can be used for data vizualisation for example.
Transactions - Search
Transactions can be searched using an input field located above the transaction list. Clicking the magnifying glass will open the input and focus in it. You can use the keyboard shortcut CTRL/⌘ + F for the same result.
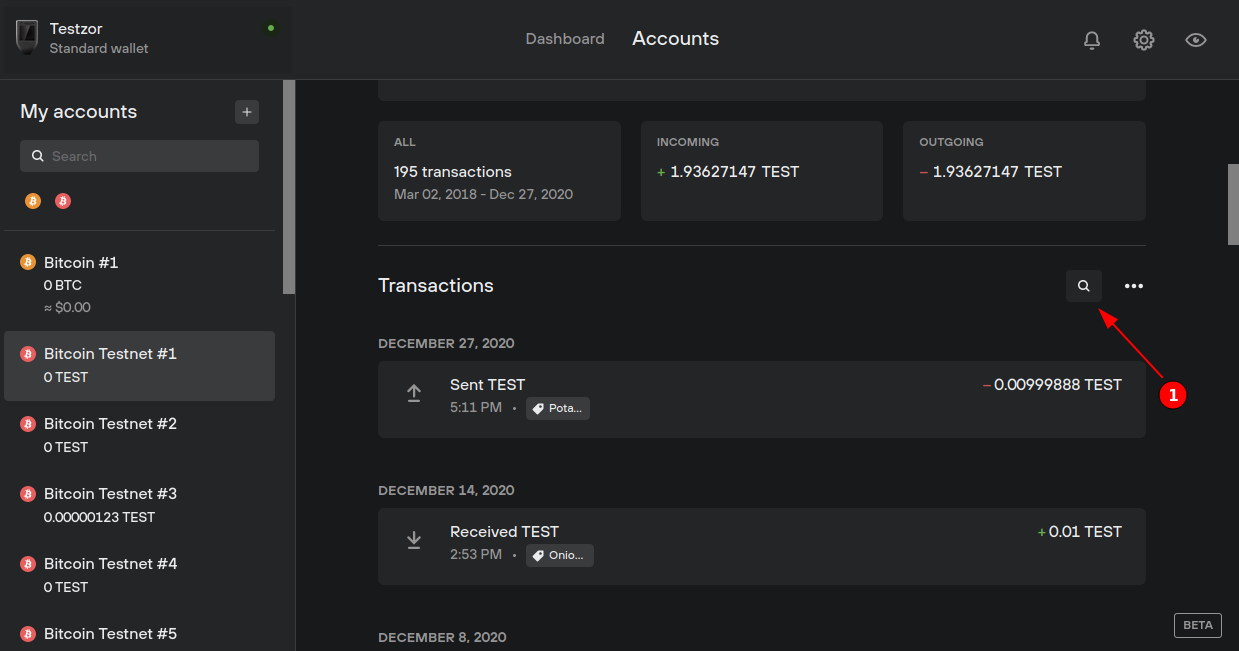
You can search for the following information:
- Transaction ID (txid)
- Input and Output addresses
- Output labels
- Address labels
- Amounts
- Dates
All searches, apart from the two last ones (Amounts and Dates), are free text searches. No specific format is required, anything (txid, addresses, labels) matching the search will be returned.
Any numbers will be treated as amounts. For a given number, partially matching amounts will be shown. Operators, prefixed to the number, can be used for different results:
>will return amounts greater than the value (i.e.> 0.001for all amounts greater than 0.001).<will return amounts lower than the value (i.e.< 0for all negative amounts).=will return amounts that strictly match the value (i.e.= 0.01will return all amounts that are exactly 0.01).!=will return amounts that do not match the value (i.e.!= 0.01will return all amounts that are not 0.01).
Dates provided in the format yyyy-mm-dd will return transactions matching that date. Just like amount searches, prefixed operators can be used:
>will return all transactions after the date, including the given date itself (i.e.> 2020-12-14will return all transactions after December 14th, 2020).<will return all transactions before the date, including the given date itself (i.e.< 2020-12-14will return all transactions before December 14th, 2020).!=will return all transactions that are not matching the date (i.e.!= 2020-12-14will return all transactions except the ones on December 14th, 2020).
Multiple fields can be searched at the same time using AND (&) and OR (|) operators. A few examples using these operators might be pretty self-explanatory:
> 2020-12-01 & < 2020-12-31will return all transactions from December 2020.> 2020-12-01 & < 2020-12-31 & > 0will return all incoming (positive) transactions from December 2020.> 0.01 | > 2020-12-01will return all transactions with an amount higher than 0.01 OR that have happened since December 1st, 2020.> 2019-12-01 & < 2019-12-31 | > 2020-12-01 & < 2020-12-31will return all transactions from December 2020 and 2019.
As you may see in the last example, and similarly to SQL, the AND (&) operator has precedence over the OR (|) operator.
Metadata (labeling)
Metadata is a feature that allows the user to associate persistent data with their wallets, accounts, receive addresses, and outputs. Trezor Suite refers to metadata as to “labeling” in the user interface.
For non-technical introduction, see Trezor Learn.
Data stores
Because Trezor Suite is not a typical application with a backend server, data must be stored elsewhere. Currently supported providers are:
- Dropbox
- Google Drive
- Local file system (desktop only)
Google Drive specifics
Google Drive authentication has differing implementations for desktop and web version of Suite. For security reasons, Google does not allow the authorization code flow for web apps, thus only allowing the user of web Suite to log in via the implicit flow with an access token lasting for lasts one hour. Authorization code flow used in the desktop app leverages a refresh token to enable the user to stay logged in permanently while using desktop Suite. To implement this flow, we had to establish an authorization backend holding a client_secret, see @trezor/auth-server. If the authorization via our backend fails for some reason, there is a fallback to the implicit flow in the desktop app. TODO: switch from the fallback flow to the authorization code flow as soon as possible so that the user does not have to re-authenticate every hour.
Data structure in store
version 1.0.0 (current)
device metadata example
{
  "version": "1.0.0",
  "walletLabel": "my hidden wallet label",
},
account metadata example
{
  "version": "1.0.0",
  "accountLabel": "my cool account label",
  "outputLabels": {
    "9f472739fa7034dfb9736fa4d98915f2e8ddf70a86ee5e0a9ac0634f8c1d0007": {
      "0": "transaction 1"
    },
  },
  "addressLabels": {
    "bc1qannfxke2tfd4l7vhepehpvt05y83v3qsf6nfkk": "my cool address label",
  }
}
version 2.0.0 (future)
Each record will have timestamp which will allow user to resolve potential conflicts. (Implementation not currently planned.)
Data encryption
Data is stored in encrypted form using aes-256-gcm cipher. Master key for encryption is generated by users Trezor with constants defined in suite/src/actions/suite/constants/metadataConstants.ts Files encryption-decryption logic is located in suite/src/utils/suite/metadata.ts
Where data lives in the App
Settings related data is defined in suite/src/reducers/suite/metadataReducer which contains
{
 enabled: bool,
 initiating: bool,
 provider: {
  isCloud: bool,
   type: "dropbox" | "google" | "fileSystem",
   tokens: {
    accessToken?: string,
    refreshToken?: string
   },
   user: string
 }
}
Metadata itself is divided into 2 groups (device metadata and account metadata). They are stored together with concrete records.
Device has metadata property:
{
  /*
   - disabled is initial state. user has not interacted with metadata before, metadata keys are not available
   - enabled means that metadata is enabled for this device and application has metadata keys. App will try to download and decipher metadata
   - cancelled means that user rejected cipherKeyValue call on device.
  */
  status: "disabled" |"enabled" | "cancelled",
  key: string,
  fileName: string,
  aesKey: string,
  walletLabel: string
}
Account has metadata property which is an object of following shape:
{
  key: string(xpub),
  fileName: string,
  aesKey: string,
  outputLabels: {
    [string(txid)]: {
      [number(outputIndex)]: string
    },
  },
  addressLabels: {
    [string(address)]: string,
  },
  accountLabel: string
}
Where metadata is set and displayed
- Wallet label is set in the modal where wallet is selected.
- Account label is set in account header.
- Receiving address label is set in the receive address list.
- Output label is set in send form address field, coin control or transaction history
Note that transaction history displays output label and address next to each other. If the output does not have a label, only the address is shown. If it does, the address is shown when the label is hovered. The address is displayed as follows:
- If a receive address has a label, its label is displayed.
- If a receive address has a label and it belongs to the same account, it is replaced by “Sent to myself”.
- If an outgoing address belongs to another discovered wallet or account, it is replaced by the account label (and wallet label, if it is a different wallet).
- If none of the above is true, plain address is displayed.
Wallet and account labels can also be displayed in other places in Suite as read-only, e.g. in send form when sending to an address belonging to another discovered wallet or account.
Device name set in device settings is not part of metadata.
User stories
First time user:
- User opens App for the first time. Metadata is disabled. “Add label” buttons are present on mouse hover over labelable data.
- User clicks “Add label” button.
- Device metadata key is generated.
- Using device metadata key, account metadata keys are created.
- Open modal with metadata providers and connect.
- Fetch data from metadata provider and set interval for fetching data.
- Activate editable input.
Metadata enabled during discovery process:
Controlled by discoveryActions and metadataMiddleware
- If passphrase is not used, device metadata key is generated before discovery process starts. (
discoveryActions) - If passphrase is used, metadata key is generated either:
- in the middle of the discovery process after successfully receiving the first bundle of accounts and at least one account is not empty. (
discoveryActions) - after passphrase confirmation process. (
metadataMiddleware)
- in the middle of the discovery process after successfully receiving the first bundle of accounts and at least one account is not empty. (
How to turn metadata off
- controls for common metadata related actions are located in general settings under the labeling section
- there is a switch which:
- sets metadata.enabled bool value
- if setting to false, it triggers removal of all metadata (including keys) from devices and accounts.
- if setting to false, disconnects metadata provider (Dropbox, Google Drive)
- there is a button “disconnect provider” which:
- triggers removal of all metadata values (excluding metadata keys) from devices and accounts. This way provider might be reconnected without reconnecting device
- disconnects metadata provider
Fiat rates
Suite provides several types of fiat rates:
- Current fiat rate: Used on Dashboard, next to the account balance, for converting a crypto amount in send form to a fiat currency, etc…
- Weekly rates: In addition to current rate we also fetch 7 days old rate and based on the difference we either show green or red arrow next to an exchange rate (can be seen in assets table on Dashboard).
- Historical fiat rate: Exchange rate at the time of facilitating a transaction. Used in list of transactions to calculate daily deltas and in transaction detail modal. ERC-20 tokens are not yet implemented.
Providers
- Blockbook: For all main networks (BTC, LTC, ETH + ERC-20 tokens, …) except XRP, SOL + SOL tokens and ADA + ADA tokens
- CoinGecko: Used for XRP, SOL + SOL tokens and ADA + ADA tokens and as a fallback for failed requests to blockbook.
First fetch
Current fiat rates
For main networks: On app launch for enabled networks and then immediately after enabling new coin/network
Current fiat rates for ERC-20 tokens
ERC-20 tokens: On ACCOUNT.CREATE which is triggered during account discovery (if account were not remembered), on ACCOUNT.UPDATE when account.tokens has some new items.
Weekly fiat rates
Weekly rates are downloaded on app launch and on enabling new network.
Historical fiat rates (for transactions)
Historical rates for transactions: On addTransaction action, which means after a new transaction is added, stored within the tx object,
Update intervals
Current fiat rates
Every rate stored in wallet.fiat reducer is checked in 3-minute interval. If the rate is older then 10 minutes then it is refetched.
Current fiat rates for ERC-20 tokens
List of tokens is part of the account object (account.tokens).
Fiat rates for ERC-20 tokens are fetched on ACCOUNT.CREATE (fired during account discovery) and ACCOUNT.UPDATE (new token can appear after receiving a token transaction). These actions are intercepted in fiatRatesMiddleware. We don’t fetch rates for tokens without definitions.
Weekly fiat rates
Check for deciding if a weekly rate for a coin needs to be updated runs every hour. Fetched rates are cached also for 1 hour. Eg. If user opens app and there are already weekly fiat rates, no older than 1 hour, stored in redux state then Suite won’t fire new fetch.
Historical fiat rates (for transactions)
They are stored as part of the transaction. They don’t need to be periodically updated as the exchange rate in the past cannot change anymore. If fetch fails for some reason we will retry on next BLOCKCHAIN.CONNECTED.
Usage
To make your life easier use FiatValue component.
Most straightforward usage is to just pass amount and symbol, if you need to work with tokens also add tokenAddress property:
<FiatValue amount={amount} symbol={assetSymbol} tokenAddress={tokenTransfer?.address} />
For converting to fiat amount using rates from history use useHistoricRate in combination with historicRate property:
<FiatValue
    amount={targetAmount}
    symbol={transaction.symbol}
    historicRate={historicRate}
    useHistoricRate
/>
To support more complex use-cases we are leveraging render props.
When passing function as a children it will get called with one parameter, object with value, rate and timestamp. This allows us to handle cases where fiat rates are missing (all fields in the object are set null) or show not only fiat amount, but also used exchange rate.
<FiatValue amount="1" symbol={symbol}>
    {({ _value, rate, timestamp }) =>
        rate && timestamp ? (
            // we got rates!
            // show the exchange rate and provide information about last update in tooltip
            <Tooltip
                content={
                    <LastUpdate>
                        <Translation
                            id="TR_LAST_UPDATE"
                            values={{
                                value: (
                                    <FormattedRelativeTime
                                        value={rateAge(timestamp) * 60}
                                        numeric="auto"
                                        updateIntervalInSeconds={10}
                                    />
                                ),
                            }}
                        />
                    </LastUpdate>
                }
            >
                <FiatRateWrapper>{rate}</FiatRateWrapper>
            </Tooltip>
        ) : (
            // no rates available!
            <NoRatesTooltip />
        )
    }
</FiatValue>
There are other handy props like showApproximationIndicator (self explanatory) and disableHiddenPlaceholder which disables blurred overlay used when discreet-mode is activated.
Suite Guide
Guide is a feature that allows us to write content on various topics like basics of deterministic wallets, cryptocurrencies, Suite specifics or generally anything a Suite user might be interested in and then provide it to the user directly in the app.
Content
The content is maintained in a GitBook project. (You’ll need an account with appropriate privileges to access it.) GitBook mirrors the content to a GitHub repository from where it’s fetched when Suite builds. The fetch happens in the suite-data package on build:lib yarn task. Once fetched the content is indexed and transformed to a format usable in the Suite app. This format is then copied into the static directories of web, desktop and native builds.
Indexing, transforming and copying of the content is handled by scripts in packages/suite-data/src/guide. These are configured to fetch a particular commit of the GitBook mirror by the GITBOOK_REVISION constant in packages/suite-data/src/guide/constants.ts. This constant must/can be changed accordingly to propagate changes from GitBook to suite builds. (One could set it to the master branch to always use the latest content version, however that is discouraged as we rather want to precisely control which version of the content will get included in each release.)
How to update
Change GITBOOK_REVISION constant in packages/suite-data/src/guide/constants.ts to the new revision. Example: 40855097. That’s it.
Coinjoin service is suite
Development
For development and e2e purposes you can use local version of coinjoin backend (Regtest only).
VPN is required for communication with affiliate server
-
run
./docker/docker-coinjoin-backend.shIf you are using
trezor-user-envmake sure that it’s started with-roption (disabled regtest)Pull and run docker image of https://github.com/trezor/coinjoin-backend
Backend control panel (faucet) should be accessible at
http://localhost:8080/ -
Run suite, go to settings and enable
Debug mode(click 5 times on the “Settings” header) -
go to Settings > Crypto tab and enable
Bitcoin Regtestand set custom backend tohttp://localhost:19121/(default)Optionally disable other coins
Coinjoin accounts are not using this backend but you want to have all Regtest accounts synchronized with the same bitcoind
-
Access coinjoin account
Localization
Suite uses react-intl package for all in-app localization needs. Definitions of all messages are stored in messages.ts.
To allow non-developers to edit these messages through user-friendly interface, we upload them to Crowdin via their CLI.
After strings have been translated we use Crowdin CLI again to download the translated json files to suite-data package. To finish the process these files need to be committed to the repository.
Message definitions
messages.ts is the place where you add new messages to be used in Suite. It’s basically just a huge object where a key is an ID of the message and a value is the message definition.
Do not manually edit language json files in suite-data/files/translations/ directory. These are auto-generated, changing them directly is plausible only for development purposes.
Structure
id: We don’t have strict conventions for generating these IDs, although using a prefixTR_, or expanded variantTR_<SCOPE>, where scope is, for example, “ONBOARDING” is really handy. ID must be the same as the object’s key.defaultMessage: Used as a source string for translator. It’s also a text that is shown in the app as a fallback till someone changes/improves it in Crowdin.description: Optional. Useful for describing the context in which the message occurs, especially if it is not clear from adefaultMessagefield.dynamic: Optional. Must be set to true for programmatically constructed keys. Otherwise, the keys will be deleted by the list-duplicates script.
Example:
{
  ...
  TR_ADDRESS: {
      id: 'TR_ADDRESS',
      defaultMessage: 'Address',
      description: 'Used as label for receive/send address input',
  },
  ...
}
Usage in Suite
To render a message use our wrapper for react-intl’s FormattedMessage, Translation. It will always return JSX.Element. If, for some reason, you need to render the message as a string (for example for passing it as a placeholder prop to an input) use useTranslation hook.
Translation accepts the same parameters as FormattedMessage and adds a little bit of magic.
Most straightforward usage is to just pass message’s ID to id prop:
<Translation id="TR_CONTINUE" />
or for string variant using hook:
const { translationString } = useTranslation();
translationString('TR_CONTINUE');
There are cases where you need to pass a variable which needs to be part of the translated message:
<Translation id="TR_ENTERED_PIN_NOT_CORRECT" values={{ deviceLabel: device.label }} />
or for string variant using hook:
const { translationString } = useTranslation();
translationString('TR_ENTERED_PIN_NOT_CORRECT', { deviceLabel: device.label });
Definition for TR_ENTERED_PIN_NOT_CORRECT:
TR_ENTERED_PIN_NOT_CORRECT: {
    defaultMessage: 'Entered PIN for "{deviceLabel}" is not correct',
    id: 'TR_ENTERED_PIN_NOT_CORRECT',
}
Sometimes you need to provide a translator the ability to emphasize some words in a sentence AKA rich text formatting. In this example a text enclosed in <strong> will be wrapped in StrongStyling component.
<Translation
    id="TR_TRANSACTIONS_SEARCH_TIP_2"
    values={{
        strong: chunks => <StrongStyling>{chunks}</StrongStyling>, // search string is wrapped in strong tag for additional styling
    }}
/>
Definition for TR_TRANSACTIONS_SEARCH_TIP_2:
TR_TRANSACTIONS_SEARCH_TIP_2: {
  id: 'TR_TRANSACTIONS_SEARCH_TIP_2',
  defaultMessage:
      'Tip: You can use the greater than (>) and lesser than (<) symbols on amount searches. For example <strong>> 1</strong> will show all transactions that have an amount of 1 or higher.',
},
For even more shenanigans (like handling plural form) check this great overview on ICU Message syntax.
Synchronization with Crowdin
With the automated CI job from GitHub.
Navigate to the Crowdin translations update action and trigger manual job with a base branch develop
Before triggering the job, make sure there is no pull request already opened with the title Crowdin translations update
Action will create a pull request with the title Crowdin translations update, review it and merge.
Locally
All work could be done with shortcuts defined in package.json scripts section. In order to interact with Crowdin you need to ask the project owner for access token and either store it in your $HOME/.crowdin.yml file:
'api_token': xxxx
or, alternatively, add it as an option for each called script:
yarn workspace @suite/intl translations:download --token xxxx
Extract
To extract message definitions from Suite into master.json file run:
yarn workspace @suite/intl translations:extract
The newly created master.json file is generated from messages.ts and serves only as a base for translations in Crowdin, therefore it is not committed into Git repository.
Upload
To upload extracted master.json file with updated message definitions from Suite to Crowdin run:
yarn workspace @suite/intl translations:upload
You can even do that from your branch with messages that are not yet merged in develop branch, just be sure you have rebased your branch on latest develop before doing so. This process replaces all definitions in Crowdin, meaning if your branch is missing some definitions, that are already in develop branch and uploaded in Crowdin, they will be removed.
Download
To download new translations from Crowdin run:
yarn workspace @suite/intl translations:download
and then open a PR with updated language files.
Workflow for regular Crowdin Synchronization
BRANCH_NAME=feat/crowdin-sync

git checkout develop
git pull
git checkout -b $BRANCH_NAME

# Extract message definitions from Suite
yarn workspace @suite/intl translations:extract
# Upload to sync the key set.
yarn workspace @suite/intl translations:upload
# Download to fetch values for all keys.
yarn workspace @suite/intl translations:download

git add packages/suite-data/files/translations
git commit -m 'feat(translations): Sync with Crowdin'
git push origin $BRANCH_NAME
Plus creating, reviewing and merging the PR.
Message System
Message system was implemented to allow sending emergency messages to Trezor Suite app to a user with specific stack.
Notion for production deployment
Features of message system
Messages
There are multiple ways of displaying message to a user:
- banner
- looks like a cookie bar above the page
- modal
- TODO: missing implementation
- context
- messages on specific places in app (e.g. settings page, banner in account page)
Feature
Disabling some feature with an explanation message.
A/B testing
The ability to create A/B testing.
Implementation
Config
The system of messages is based on a configuration file in which messages with specific conditions are described. If specific conditions are satisfied, the message is shown to a user.
Current configuration file is located in suite-common/message-system/config folder. Its name is config.vX.json. The X express current version messaging system.
The config is fetched at launch of the application and then every minute. It remembers the previously fetched config to inform the user even if he is offline. For this reason, the latest available config during build time is bundled with the application.
If fetching of a new config fails, the fetching process is repeated every 30 seconds.
Data source (Remote vs Local)
You can choose where Suite loads the message-system config from:
- Remote server (default) – config is fetched on startup and then polled at a fixed interval (desktop/web vs. mobile may differ).
- Local file – config is loaded from the repository bundle; no network (useful for development).
This setting is available in Settings → Debug → Message System info.
Schema
The configuration structure is specified in JSON file using JSON schema. The file can be found in suite-common/message-system/schema folder. Its name is config.schema.vX.json.
We use JSON schema for 2 reasons:
- generating TypeScript types
- validating configuration file
Types
Types are generated from JSON-schema during the build:libs process or can be generated manually by yarn workspace @suite-common/message-system msg-system-types. A messageSystem.ts file is created in suite-common/suite-types/src folder.
- This file should never be changed manually.
- This file is committed into the repository.
Signing
To ensure the authenticity of a configuration file, JSON Web Signatures are used. The configuration file is signed by a private key using elliptic curves (ES256) and the data specified in the config are used. The authenticity is verified on client side using corresponding public key.
CI job
Validation
- Validation of configuration file is performed in CI job in
validationphase. It is used to detect possible structure and semantic errors. - It can be run locally by
yarn workspace @suite-common/message-system validate-configscript.
Signing
- Signing of the configuration file is performed:
- in CI job in
prebuildphase for distribution and - manually by
yarn message-system-sign-config(oryarn build:libs) script for local development.
- in CI job in
- The results are saved into
suite-common/message-system/filesas two files:config.v1.jwsto be uploaded tohttps://data.trezor.io/config/$environment/config.vX.jwsconfig.v1.tsto be bundled with application
- Development private key is baked into project structure together with public keys for both development and production.
- Production private key is available only on
codesignbranch in Github CI. - Development private key can be found in
suite-common/message-system/scripts/sign-config.tsfile, the public keys can be found inpackages/suite-build/utils/jws.tsfile.
Versioning of implementation
If changes made to the message system are incompatible with the previous version, the version number should be bumped in messageSystemConstants.ts file and CI jobs has to be adapted. There are also few places where the version is defined statically so search for config.v1 over the whole project.
Config Structure
Structure of config, types and optionality of specific keys can be found in the schema or in generated types. Example config is commented below.
{
    // Version of message system implementation. Bump if new version is not backward compatible.
    "version": 1,
    // Datetime in ISO8601 when was config created.
    "timestamp": "2021-03-03T03:48:16+00:00",
    // Version of config. New config is accepted only if sequence number is higher.
    "sequence": 1,
    "actions": [
        {
            /*
            - User's stack has to match one of the condition objects to show this message.
            - The bitwise operation is OR.
            */
            "conditions": [
                /*
                - All keys are optional (duration, os, environment, browser, settings, transport,
                  devices, architecture (To be implemented))
                - If a value is specified then all its subkeys have to be specified
                - The bitwise operation is AND.
                */
                {
                    /*
                    - Datetime in ISO8601 from / to which date this message is valid.
                    - If duration category is used, then both times have to be set.
                    */
                    "duration": {
                        "from": "2021-03-01T12:10:00.000Z",
                        "to": "2022-01-31T12:10:00.000Z"
                    },
                    /*
                    For os, environment, browser and transport.
                    - All values (except for revision in environment) are version definitions
                    - Semver npm library is used for working with versions https://www.npmjs.com/package/semver.
                    - "*" = all versions; "!" = not for this type of browser/os/...
                    - Options: gte, lt, ranges, tildes, carets,... are supported, see semver lib for more info.
                    */
                    "os": {
                        "macos": ["10.14", "10.18", "11"],
                        "linux": "*",
                        "windows": "!",
                        "android": "*",
                        "ios": "13",
                        "chromeos": "*"
                    },
                    // revision is optional
                    "environment": {
                        "desktop": "<21.5",
                        "mobile": "!",
                        "web": "<22",
                        "revision": "7281ac61483e38d974625c2505bfe5efd519aacb"
                    },
                    "browser": {
                        "firefox": ["82", "83"],
                        "chrome": "*",
                        "chromium": "!"
                    },
                    "transport": {
                        "bridge": ["2.0.30", "2.0.27"],
                        "webusbplugin": "*"
                    },
                    /*
                    - If key is not available (undefined), then it can be whatever.
                    - Currently supported keys are "tor" and coin symbols from "enabledNetworks".
                    - The bitwise operation is OR.
                    */
                    "settings": [
                        {
                            "tor": true,
                            "btc": true
                        },
                        {
                            "tor": false,
                            "ltc": true
                        }
                    ],
                    // Empty device array is targeting users without a connected device.
                    "devices": [
                        {
                            // Possible values: "1" +  "T1B1", "T" + "T2T1", "T2B1", "T3B1", "T3T1"
                            // in case of targeting "T1B1" or "T2T1", for backwards compatibility use old (1, T) and new naming (T1B1, T2T1 together in a new object
                            // in case of targeting "T2B1" in Suites before device release, please use all three "T2B1", "Safe 3" and empty string ""
                            "model": "T1B1",
                            /*
                            Beware
                            - firmware version in bootloader mode is unavailable on T1B1
                            - bootloader version is available only in bootloader mode
                            */
                            "firmware": "2.4.1",
                            "bootloader": "2.0.4",
                            // Possible values: "*", "bitcoin-only", and "regular"
                            "variant": "bitcoin-only",
                            "firmwareRevision": "*",
                            "vendor": "trezor.io"
                        }
                    ]
                }
            ],
            "message": {
                // Used for remembering dismissed messages.
                "id": "0f3ec64d-c3e4-4787-8106-162f3ac14c34",
                /*
                - Existing banners have defined priorities.
                - The range is 0 to 100.
                */
                "priority": 100,
                // When a user closes the message, it will never show again until the user clear app storage.
                "dismissible": true,
                /*
                Variants:
                - info (blue)
                - warning (orange)
                - critical (red)
                */
                "variant": "warning",
                // Options: banner, modal, context, feature
                "category": "banner",
                /*
                - Message in language of Suite app is shown to a user.
                - Only official languages are required, community are optional
                */
                "content": {
                    "en": "New Trezor firmware is available!",
                    "de": "Neue Trezor Firmware ist verfügbar!"
                },
                // optional headline following the language structure of content
                "headline": {
                    "en": "Update your Trezor",
                    "de": "Neue"
                },
                // Call to action. Used only for banner and context.
                "cta": {
                    /*
                    Options: "internal-link" or "external-link"
                    - internal-link is route name, see routes.ts file
                        - anchor property can be used, see anchors.ts file
                    - external-link is url address
                    */
                    "action": "internal-link",
                    // Route name or url address according to action.
                    "link": "settings-device",
                    "anchor": "@device-settings/firmware-version",
                    /*
                    - Label of call to action button shown to a user.
                    */
                    "label": {
                        "en": "Update now",
                        "de": "Jetzt aktualisieren"
                    }
                },
                // Used only for modals. (To be implemented)
                "modal": {
                    "title": {
                        "en": "Update now",
                        "de": "Jetzt aktualisieren"
                    },
                    "image": "https://example.com/example.png"
                },
                // Used only for context.
                "context": {
                    "domain": ["coins.receive", "coins.btc"]
                },
                // Used only for feature
                "feature": [
                    {
                        "domain": "coinjoin",
                        "flag": false
                    }
                ]
            }
        }
    ],
    // Used for AB testing
    "experiments": [
        {
            // Same as for actions, check conditions above
            "conditions": [
                {
                    "environment": {
                        "desktop": ">=24.5.1",
                        "mobile": "!",
                        "web": ">=24.5.1"
                    },
                    // It's very useful to define a duration for each experiment that starts the next day at the earliest,
                    // to minimize changing the application under the hands of those who have it open at the moment.
                    "duration": {
                        "from": "2021-03-01T12:10:00.000Z",
                        "to": "2022-01-31T12:10:00.000Z"
                    },
                    // Country-based targeting is now evaluated only after the user visits the staking or trading section.
                    // This behavior is currently implemented only for the desktop/web version.
                    "countryCodes": ["CZ", "US"]
                }
            ],
            // Detail of an experiment
            "experiment": {
                // Used as a selector for the test
                // For `id` use UUID and then use mapping in `suite-common/message-system/src/experiment/experiments.ts`
                "id": "e2e8d05f-1469-4e47-9ab0-53544e5cad07",
                // Array of testing groups - minimum length of items is two
                // The sum of group percentages must equal 100 in total
                "groups": [
                    {
                        // Name of variant - any string
                        "variant": "A",
                        // The percentage range a user can be assigned to (0-100)
                        "percentage": 30
                    },
                    {
                        "variant": "B",
                        "percentage": 70
                    }
                ]
            }
        }
    ]
}
How to update
When updating message system config, sequence number must always be higher than the previous one. Once released config cannot be rolled back to the previous one with lower sequence number. A new one with higher sequence number has to be created.
Updated config is automatically uploaded by CI job to the corresponding S3 bucket based on the current branch.
Priorities of messages
Based on the priority of the message, the message is displayed to the user. 0 is the lowest priority, 100 is the highest priority. Current priorities of existing banners can be found here.
Targeting Linux version
Unfortunately, it is not possible to target specific distributions and versions of Linux. It is possible to only target all Linux users using * or exclude all Linux users using !.
Experiment implementation
The experiment is based on the instanceId used by analytics. It will remain active regardless of user consent. However, no data will be sent to analytics without user consent.
Component experiment
To create an experiment for components, use ExperimentWrapper.tsx. It requires the id of the test and the components to be tested as properties. Check the implementation details for more information here.
Application steps
- Config is fetched on load of application and is stored in Redux state. To be persisted between sessions, is is mirrored into IndexDB.
- Conditions of config are evaluated on specific Redux actions. See
messageSystemMiddleware.tsfile. - If conditions of a message satisfy the user’s stack, the message is accordingly propagated. If it is dismissible, its ID is saved to Redux state (IndexDB) on close, to avoid displaying it next time.
Message Manager (UI)
Built-in UI to inspect and test messages:
-
Visual list of messages (banner/context/etc.) with details (translations, conditions, devices, CTA).
-
Filtering by category and active only.
Development workflow (recommended)
-
Go to Settings → Debug → Message System info
-
Switch the Config source to Local
-
Open Message Manager and click Add new message, fill the JSON (validated by the same schema).
-
The message is added only to app state (not to the config file).
-
Verify behavior in the UI.
-
Use Copy to clipboard and paste the JSON into the config file to make it permanent.
-
Run validation/signing (yarn messages).
-
Test that everything works from a local file
Followup
Ideas and non-critical bugs can be added to the followup issue.
Feature Flags
Feature flags allow us to enable and disable certain features at build time, helping us to produce specific builds for specific environments.
Workflow
All feature flags are located in suite-common/suite-config/src/features.ts. To add a new flag, start by doing the following:
- Add your flag to the
FLAGSconstant and set its default value. When naming your flag, bear in mind the following conventions:- Always explain what the flag is about using a comment next to it.
- The name of the flag should always be in capitals.
- The name of the flag should never contain the world
enableordisablebecause the name should always towards an enabled state. Its value should reflect whether the feature is enabled or not. - The name of the flag should never contain the word
flagbecause it’s inferred.
- (optional) You can override the flag for each environment (web, desktop) using their specific constants.
- Use the
isFeatureFlagEnabledfunction from@suite-utils/featuresto check if the flag is enabled or not. - Wrap the code you wish to control in a condition checking for your flag being enabled or not.
Example
import { isFeatureFlagEnabled } from '@suite-utils/features';

const main = () => {
    alwaysRunning();

    if (isFeatureFlagEnabled('LABELING')) {
        myLabelingFeature();
    }
};
Future evolutions
- Control feature flags at runtime.
Application Log
Application Log findable in Settings > General in Trezor Suite provides valuable info to the Support Team when helping our users.
The application log is in JSON format. It starts with App & Platform information and below it, it contains the last 200 meaningful redux actions ordered from the oldest one to the newest one.
App & Platform information
Contains basic information about the user’s platform and app status at the time of displaying the Application log such as:
- app version
- browser name and version
- transport type
- number of connected devices
- enabled networks and custom backends
- …
See getApplicationInfo method in logsUtils.ts in suite package.
Redux actions
Hundreds of redux actions are fired when using Trezor Suite. The actions, which should help the Support Team understand the user’s problem, are logged. Each log record consists of:
typewhich should express the type of user’s action.datetimeshowing UTC when user action occurredpayloadcontaining additional information
Example log record occurred when user’s internet connectivity status changed to offline
{
    "type": "@suite/online-status",
    "datetime": "Mon, 18 Jul 2022 13:11:30 GMT",
    "payload": {
        "status": false
    }
}
See logsMiddleware.ts in suite package.
Sensitive information
Some actions contain sensitive information such as device id, transactions or XPUB. The user has an option to redact it using the switch button in the Application Log window under the log.
Some of the redux actions are modified even before they are logged. For example, in BLOCKCHAIN.SET_BACKEND action, we log only coin, URL is stripped off immediately.
Extending
Requests
There is a page in Notion Engineering/Suite/Application Log where the Support Team can add requests to extend the application log either by new items to App & Platform information or by logging new redux action / extending current ones.
New redux action
Redux action name has to be added to logsMiddleware.ts and if it contains sensitive information, it should be redacted using redactAction method in logsUtils.ts.
Desktop Logger
The desktop application includes a logging library to display various types of log in the console or in a file.
Four (or five if we count ‘mute’) log levels are currently implemented:
- error (1)
- warn (2)
- info (3)
- debug (4)
All messages with an inferior level to the selected one will be displayed. For example, if the selected log level is info, then it will also display warn and error messages.
How to enable logging
Logging can be enabled by running Suite with the command line flag --log-level=LEVEL (replace LEVEL with error, warn, info or debug based on the logging you wish to display). Additional command line flags can be found on the Suite-Desktop page.
If you activate Debug menu, logging to file is automatically started. When you deactivate Debug menu, logging stopped if the app is not running with the command line flag. If you run the app with --log-write flag and then activate the Debug menu, logging just continue with the same file.
API
Exported Types
LogLevel
Any of the following values:
- mute (0)
- error (1)
- warn (2)
- info (3)
- debug (4)
Options (all optional)
| name | type | default value | description |
|---|---|---|---|
| colors | boolean | true | Console output has colors |
| writeToConsole | boolean | true | Output is displayed in the console |
| writeToDisk | boolean | false | Output is written to a file |
| outputFile | string | 'trezor-suite-log-%tt.txt' | file name for the output |
| outputPath | string | /logs subfolder in Suite data directory or CWD | path for the output |
| logFormat | string | '%dt - %lvl(%top): %msg' | Output format of the log |
String formatters
The options outputFile and logFormat can be used with some expressions, prefixed with the percent (%) symbol, to apply certain dynamic elements. It is for example possible to display a timestamp or the current date & time in the listed options above. While some expressions can be used in any strings, some strings have their own expressions.
Global
| Expression | Example output | Description |
|---|---|---|
%tt | 2021-01-19T11-07-40 | Date and time in filename friendly format |
%ts | 1611054460306 | Timestamp |
%dt | 2021-01-19T11:08:22.244Z | Date and time in ISO format (ISO 8601) |
logFormat
| Expression | Example output | Description |
|---|---|---|
%lvl | INFO | Level in letters and upper case |
%top | Example | Topic |
%msg | Example message | Message |
Constructor
The constructor has the following parameters:
- level (LogLevel): Selected log level (see LogLevels in Exported Types above)
- options (Options): Optional parameter containing settings for the logger (see Options in Exported Types above)
Log methods
All log methods have the same signature as they are just wrappers around a private logging method.
The following methods are available:
error(topic: string, messages: string | string[]); // level: 1warn(topic: string, messages: string | string[]); // level: 2info(topic: string, messages: string | string[]); // level: 3debug(topic: string, messages: string | string[]); // level: 4
Parameters:
- topic (string): Message topic
- messages (string | string[]): Single message or array of messages which will be displayed one by line.
Exit method
The exit() method is used to close the write stream of the log file. If you are not planning to write logs to disk, you won’t need to use this method. Otherwise it is highly advised to place this inside exit/crash callbacks.
Example
const logger = new Logger('warn', {
    colors: false, // Turning off colors
    logFormat: '%lvl: %msg', // Level and message only
    writeToDisk: true, // Write to disk
    outputFile: 'log-desktop.txt', // Static file name, will be overwritten if it exists
});

// These messages will be printed with the level provided above
logger.error('example', 'This is an example error message with the topic "example"');
logger.warn('example', 'This is an example warn message with the topic "example"');

// And these won't
logger.info('example', 'This is an example info message with the topic "example"');
logger.debug('example', 'This is an example debug message with the topic "example"');

// Closes the write stream (only needed of writing the log file)
logger.exit();
Q&A
How to format a string?
The library does not have any formatting capabilities as JavaScript already has templating features built-in. Simply use string literals (for example: logger.info('Topic', `My string ${myvar}.`)).
How to output an object?
The library does not include any helper for this as there is already a language feature that does this. Simply use JSON.stringify(myObject).
How can I write the log in JSON format?
You can change the logOutput option to be formatted like JSON. For example: logOutput: '{ "ts": "%ts", "lvl": "%lvl", "topic": "%top", "message": "%msg" },'.
In order to display/use it properly, you will have to edit the output a little bit. Wrap all the messages in square brackets ([, ]) and remove the comma (,) from the last message.
Onboarding
Incomplete developers guide to Onboarding in Trezor Suite
There are few different ways to trigger the onboarding process:
- Initial run
- Initial run is what we call a state when Suite is launched for the first time. It may also be triggered by clearing the app storage (flag is stored inside a reducer
suite.flags.initialRunand saved to persistent storage). This is stored per device. If Suite detects initial run it’ll automatically launch the onboarding.
- Initial run is what we call a state when Suite is launched for the first time. It may also be triggered by clearing the app storage (flag is stored inside a reducer
- Connecting an uninitialized device (without a seed)
- Suite will automatically launch the onboarding
- Wiping a device from Suite UI and proceeding with device setup
Prerequisites
Button Requests
Each device object inside has its buttonRequests array which gets populated through buttonRequestMiddleware. It it basically a way for a device to request cooperation from the app.
It is used, for example, by firmware update flow for setting correct firmware.status after device requested confirmation on the device:
case SUITE.ADD_BUTTON_REQUEST:
      if (action.payload.code === 'ButtonRequest_FirmwareUpdate') {
          draft.status = 'waiting-for-confirmation';
      }
Another usage is in “Setup Pin” step, where the device, through button request, will let us know if user should enter pin for the first time or 2nd time (for confirmation). It is also leveraged outside of Onboarding every time user needs to enter a PIN. Thanks to these buttons we can reuse the same component that will adjust just based on these button requests.
In onboarding, we clear this array after each step (handled in buttonRequestMiddleware).
Steps
- Welcome
- Firmware
- Note about normal and bootloader mode
- Firmware update or installation
- Device with older firmware installed
- Device with no firmware installed
- State of currently shipped devices, intermediary firmware
- Generating seed
- Backup seed
- PIN Setup
- Suite Settings (enabled coins, custom backends, TOR)
- Final step (device label, homescreen)
Welcome
Before a user connects a device
As a first step we prompt the user to connect his device in normal mode. In this step we handle various invalid device modes and problems with transport layer used to facilitate communication with the device (webUSB, Trezor Bridge).
List of valid states
- Waiting for a device
- We provide some troubleshooting tips and link to download Trezor Bridge as it may happen that user launched Suite for the first time without installing Trezor Bridge (only in Web environment)

- We provide some troubleshooting tips and link to download Trezor Bridge as it may happen that user launched Suite for the first time without installing Trezor Bridge (only in Web environment)
- Device connected in normal mode
- Part of happy path. After the device is connected we proceed to Data analytics (only in initial run) or to Device security (genuinity) check
List of invalid states
Invalid device states:
- Device connected, but in bootloader mode
- Device connected, but unreadable
- Seedless device setup is not supported in Suite (not to be confused with regular device without seed).
Invalid transport states:
- No transport available (Trezor Bridge is not running)
- We need to provide link to download Trezor Bridge (only in Web environment)
Data analytics (only in initial run)
During the initial run we ask users to give their consent to collect and process anonymous data in order to help us improve the user experience.

Device security (genuinity) check
This sub step is adjusted based on a state of the device. We distinguish between device that was already used before (it has a firmware installed) and most likely unused device (no seed, no firmware).
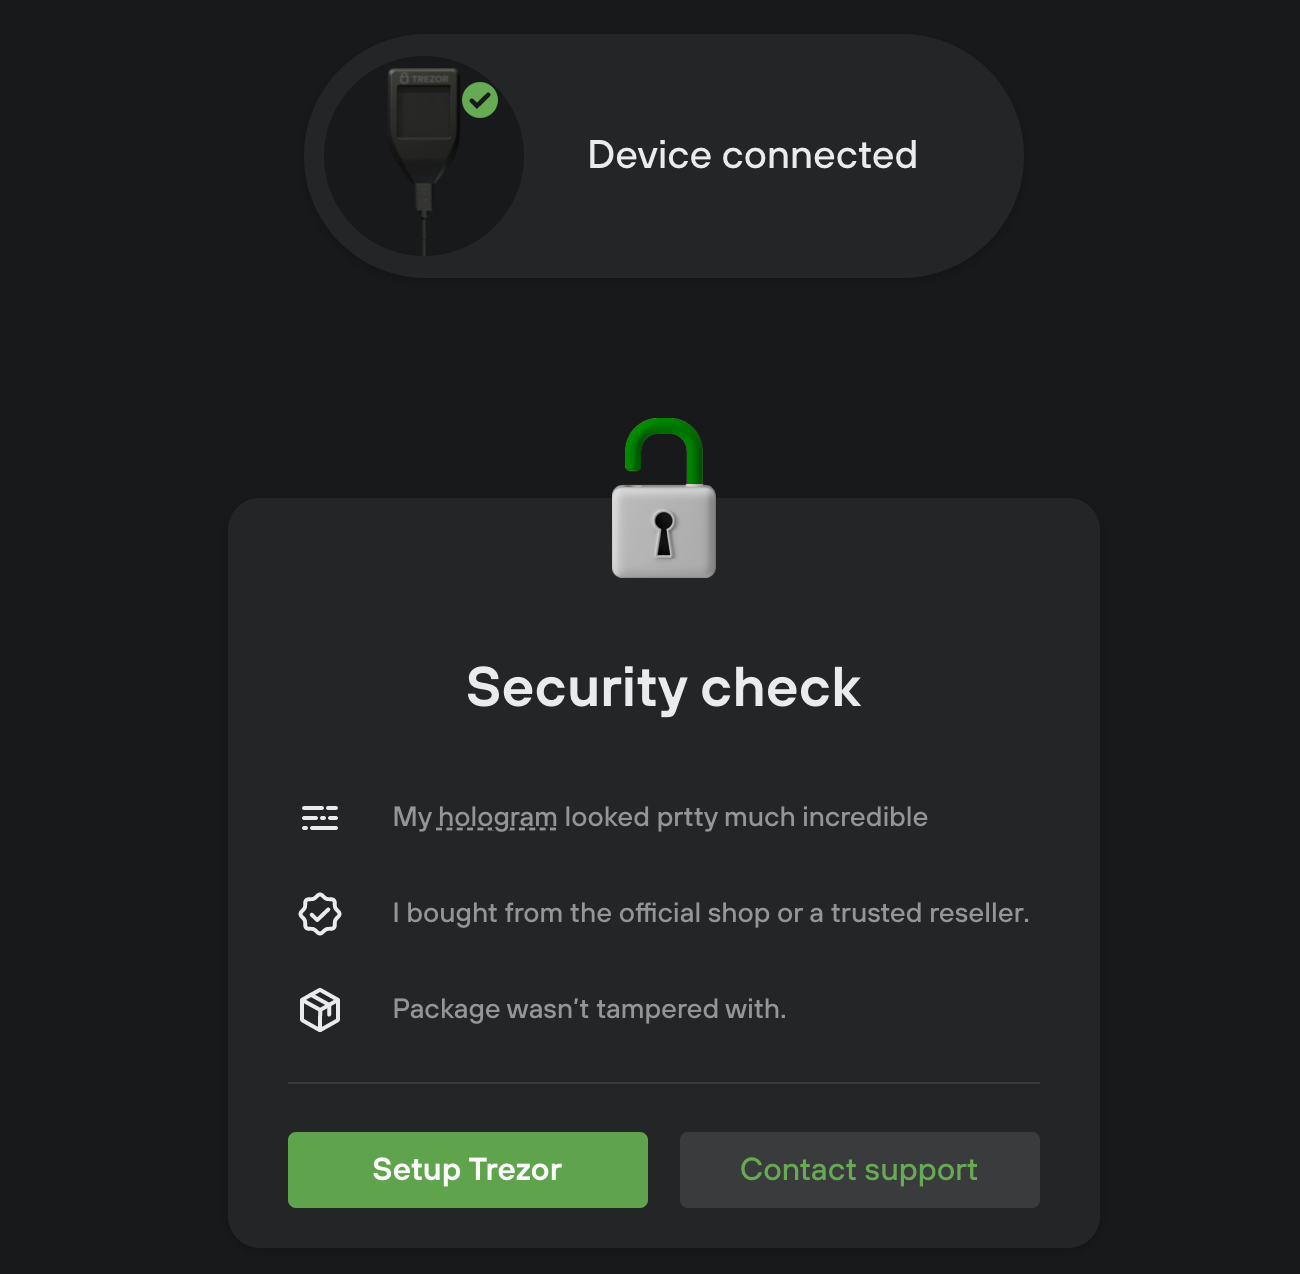
Device without seed, no firmware installed
This should be the most common case in onboarding.
Scenario:
- New device bought from trusted seller
- User wiped the device (and firmware)
Security questions: Check hologram, verify seller, check package…
Primary action: Setup device (starts onboarding)
Secondary action: Contact support
Device without seed, firmware already installed
Scenario:
- User has wiped the device (without erasing a firmware)
- Device has been tampered with
Security questions: Have the user used the device before?
Primary action: Setup device (starts onboarding)
Secondary action: Contact support
Device with seed (thus also a firmware)
Scenario:
- User cleared app storage so the onboarding was started on initial run.
- Device has been tampered with
Security questions: Have the user used the device before?
Primary action: Setup device (starts onboarding)
Secondary action: Contact support
Firmware
To provide good user and dev experience firmware flow has its own reducer. It is shared between firmware flow used in onboarding and standalone modal for firmware update. Both flows,fw installation via onboarding and firmware update via standalone modal, reuse same components.
Active sub step of firmware step is stored in status field. Explanation of each field and sub steps can be found in firmwareReducer.ts.
Note about normal and bootloader mode
Device can be connected in “normal” mode or in “bootloader“ mode which you access by pressing left button (both buttons on old T1B1 fw) or swiping on touchscreen during connecting usb cable to the device. Before starting the installation process, user needs to disconnect the device and reconnect it in bootloader mode.
From the technical perspective, these two modes are seen as 2 different devices and there is no way we can tell that the device, which was reconnected in bootloader mode is indeed the same device which was before connected in normal mode. This basically means that if you are updating a firmware with a device connected via webUSB you will need to do pairing process twice.
When device is in bootloader mode device.features.major_version, device.features.minor_version, device.features.patch_version is version of a bootloader, not a firmware.
Another interesting fact is that a device without installed firmware acts as it is in bootloader mode regardless of buttons you are or you are not pressing (device has always some bootloader installed).
Bootloader mode has another catch, not all device’s features are accessible while a device is in this state. Such inaccessible fields are set to null. For example, device.features.pin_protection is set to null, but that doesn’t mean that device has this feature disabled. After reconnecting the same device in normal mode pin_protection might be set true (or false).
This is the reason why, in Welcome step, we force the user to connect a device in normal mode first. Otherwise we wouldn’t know what firmware version is installed or what firmware update we can offer.
Firmware installation
Device could be in various states when the user enters this step.
- Firmware not installed
- Fresh device (
device.firmwareset tonone) - We don’t need to prompt the user to switch to bootloader mode in this case.
- Fresh device (
- Firmware already installed and:
- Update available: It can be optional (skip button is present) or mandatory. Be aware that a device, while in bootloader mode, doesn’t report its fw version, only version of bootloader.
- Latest firmware already installed (just wiped seed)
Possible error states:
- Generic firmware installation fail
- User cancelled installation on a device
- Device disconnected during the process
- Some unexpected error
- Device is connected in bootloader mode from the start
- We will prompt the user to connect device in normal mode
- This won’t happen in Onboarding so much, but it is handled as this firmware flow is used in standalone firmware update modal which can be triggered from Suite
- Device disconnected before firmware installation starts
- Prompt the user to reconnect the device
- Device disconnected after firmware installation starts
- Installation will fail with generic error
- This could happen when a cable is not connected properly and the device will disconnect during the process
Device with older firmware installed

If device is connected in normal mode and user proceeds by clicking “install firmware” we will ask the user to disconnect the device
and reconnect it in bootloader mode (via a small modal popup).
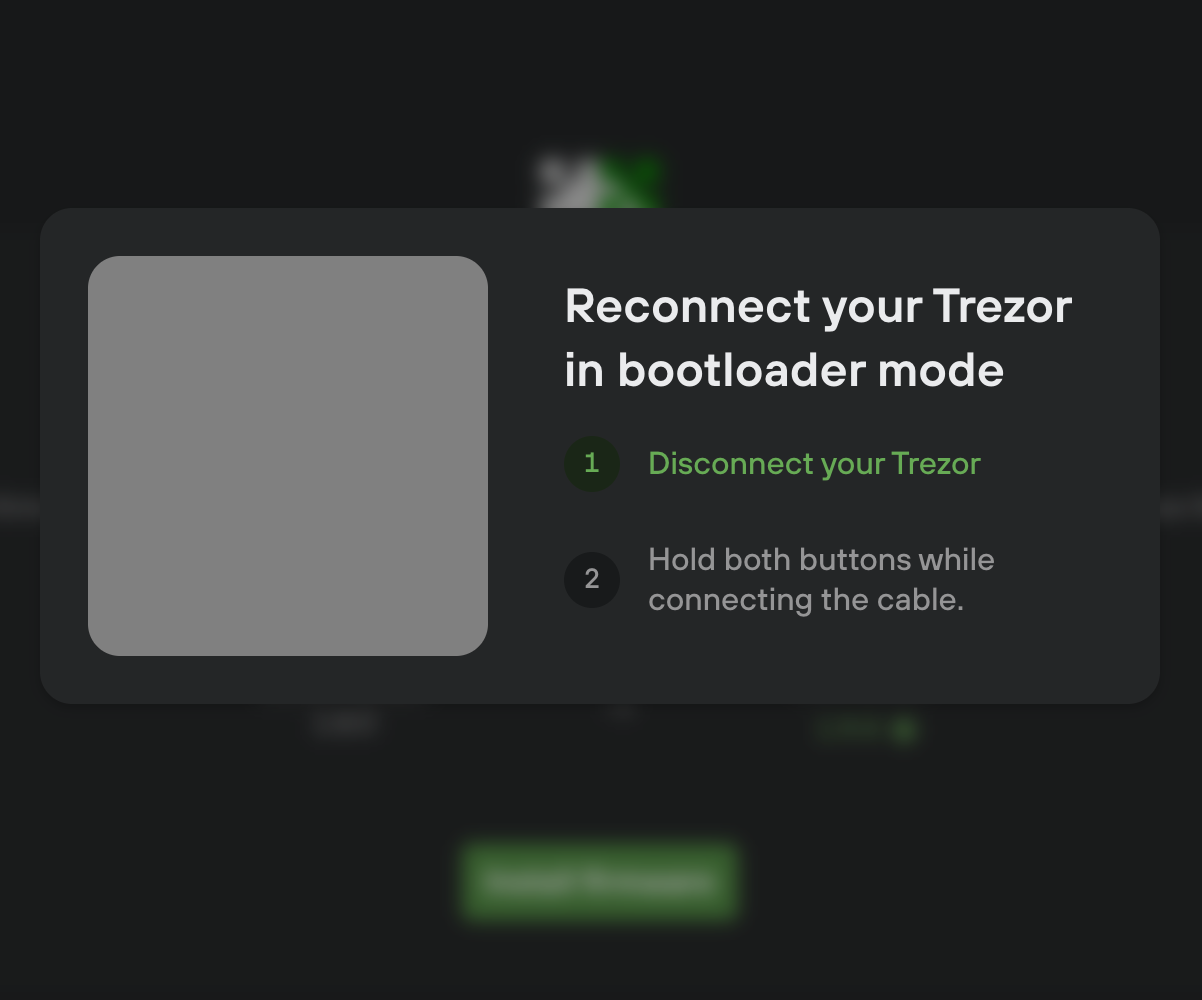
After the device is reconnected we show a button to trigger an update process. Then the device will request a confirmation from the user. Only after the user confirms it the installation begins.
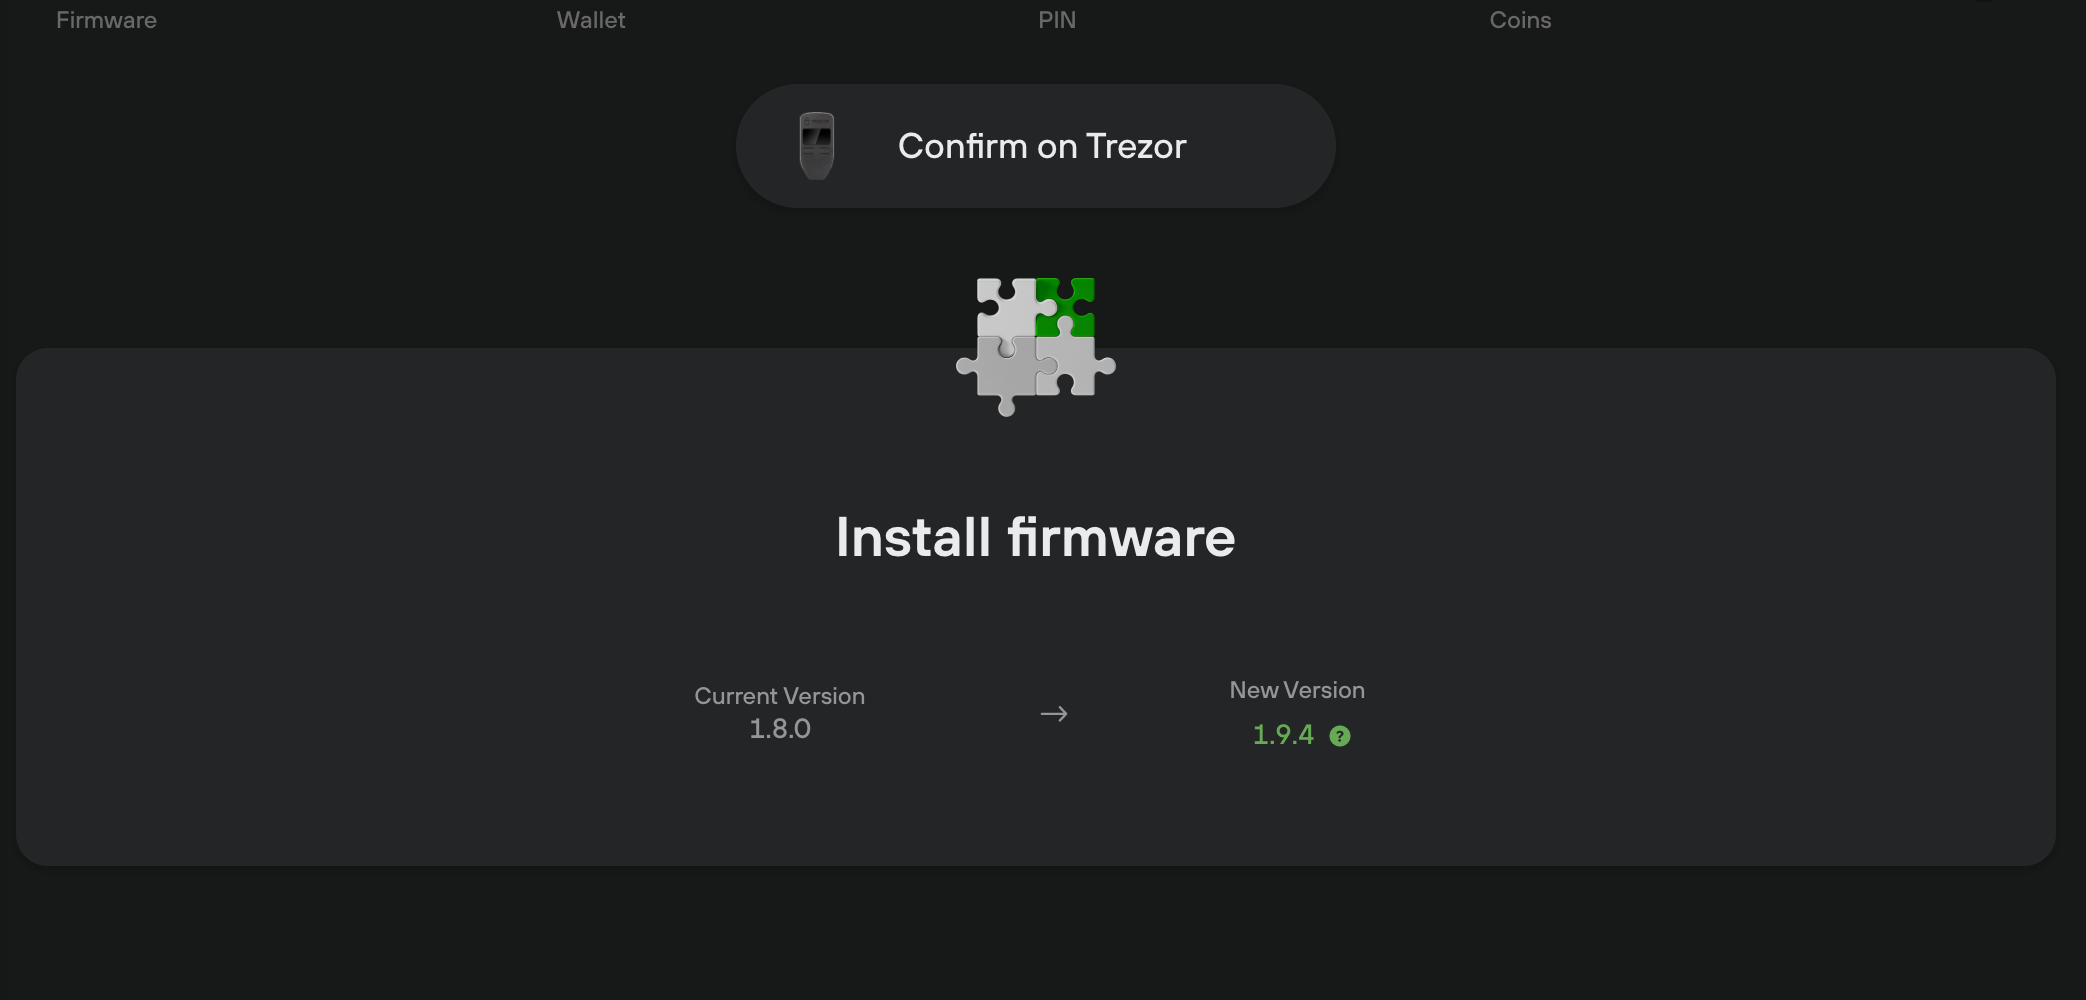
Device with no firmware installed
User proceeds by clicking “Install firmware” CTA. Since the device without firmware is always in bootloader mode we don’t need any cooperation from the user. Device doesn’t ask for confirming the installation of the fw. User of T1B1 is prompted to disconnect the device and reconnect it in normal mode. Newer device models automatically restart. Then we continue to the next step, (Generating seed)
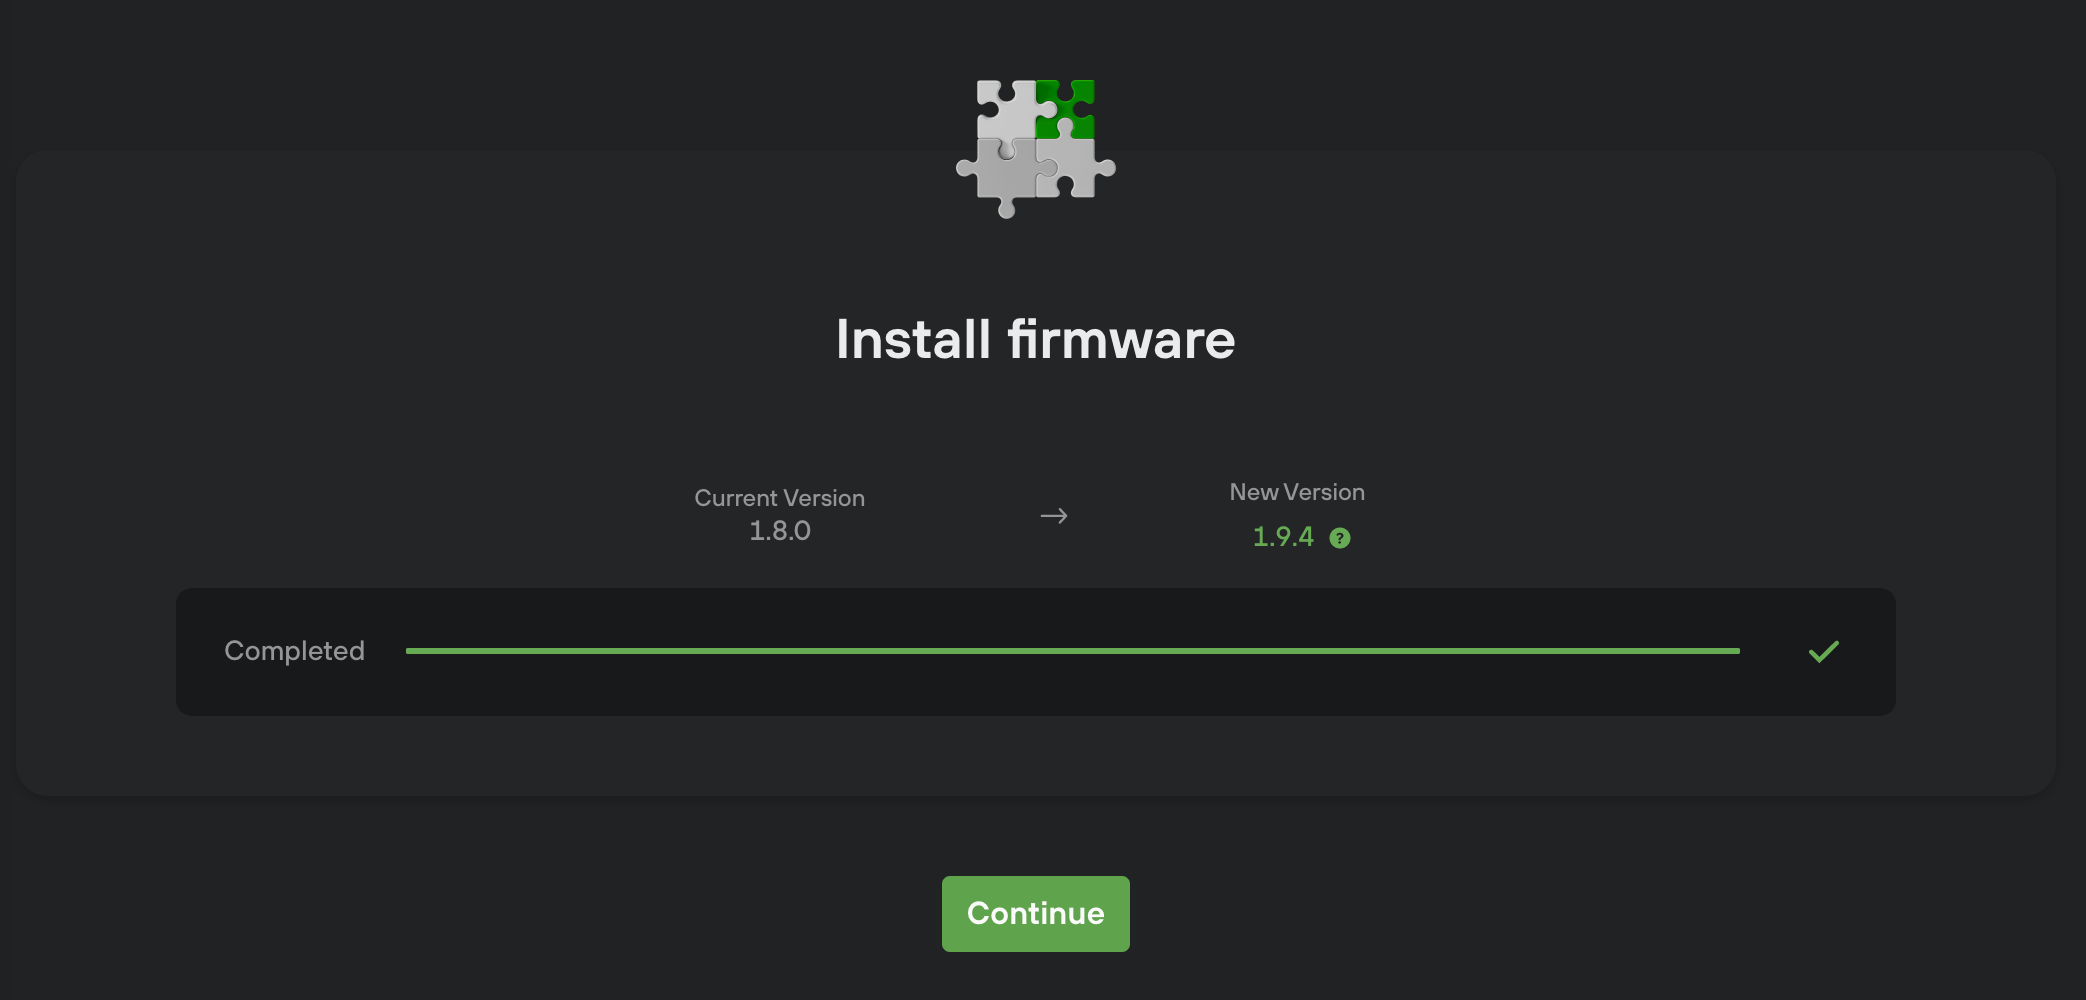
State of currently shipped devices
Intermediary firmware
T1B1 devices with old bootloader cannot be upgraded to latest firmware directly. First we’ll install so called intermediary firmware, which will bump bootloader to newer version. After installation is completed, the user will be asked to reconnect the device. Because intermediary firmware only bumps bootloader and doesn’t install any firmware, device will be in bootloader mode regardless of how the user reconnects it (whether they press a button or not). Then it triggers an installation of subsequent firmware, which will be the latest firmware available. It will follow basically the same flow as with the first installation.
WebUSB
Support for the WebUSB came pretty late for T1B1 (bootloader 1.6.0 bundled with FW 1.7.1). Currently shipped devices won’t support WebUSB out of-the-box and user won’t be able to pair such device. In this case user needs to install Trezor Bridge. After finishing fw upgrade WebUSB support will be available.
Caveats
UI.FIRMWARE_PROGRESS
- Devices won’t dispatch any event after the user confirms the installation on a device. We only detect that the installation has started when we receive
UI.FIRMWARE_PROGRESSwhich is triggered about 10 seconds too late on T1B1.
Remembered wallet, multiple devices
The onboarding inherited few bugs from its predecessor. After the installation of a firmware user is asked to reconnect his device (T1B1) or the device is auto restarted. To prevent Suite from selecting another device while the one we use was disconnected, we force remembering the device (and storing it to persistent storage). However this doesn’t work in case of freshly unpacked device (or device with wiped fw), which are in bootloader mode from the start and cannot be “remembered”.
When this happens Suite will try to select another available device, which will be the other connected device or remembered wallet and there is no way ho to switch the device back unless you restart the app/refresh the page.
To work around this in suiteActions.onHandleDisconnect, before selecting the next active device, we check if we are in Onboarding (or standalone firmware update flow) and if so we won’t allow switching selected device to different one.
Generating seed
User chooses between generating a new seed or seed recovery.
Generating new seed
- Single seed
- Shamir (not available on T1B1)
At first it might seem that both options are doing exactly the same, real difference between these two will present itself in Backup seed step
Recovery from mnemonic
T2T1 or newer
The entire process is done on device. All we need to do in Suite UI is to show generic “Confirm on your Trezor” bubble.
T1B1
For T1B1 there are two things the user needs to decide:
- Does the user want to recover from 12, 28 or 24 words?
- Does the user want to enter the seed by selecting words in Suite UI (Standard recovery) or he/she wants the most secure environment and will enter the words via keyboard matrix shown on the device (advanced recovery)?
Backup seed
User needs to confirm that the seed will be safe, there will be no digital copy of it. Then he can start the process on a device.
T2T1 or newer
The entire process is done on device. All we need to do in Suite UI is to show generic “Confirm on your Trezor” bubble.
T1B1
Process consists of clicking “Next” button too many times and writing down words displayed on a trusty seed card. During this process we will display “Confirm on Trezor” prompt and instructions.
This step is optional and can be skipped and finished later from Suite settings.
PIN Setup
After the user hits CTA button “Create PIN” we need to show confirmation prompt. It is handled by checking device.buttonRequests to see if there is ButtonRequest_Other (T1B1) or ButtonRequest_ProtectCall. Yes, it is hacky. But thanks to clearing buttonRequests array in each step of the onboarding it should be safe and presence of these requests should indeed indicate that a device is asking for a confirmation.
When the user hits cancel on a device, @SUITE/lock-device is fired, buttonRequestsMiddleware will intercept it and fire removeButtonRequests action which clears the array resulting in cancelling confirmation prompt in the Onboarding UI.
Entering PIN
T1B1
After the user confirms setting new PIN on the device we’ll receive UI.REQUEST_PIN, which will be stored in modal reducer (as every other request coming from a device). Based on this we display PIN matrix.
The user enters PIN twice, if there is a mismatch, process is stopped and an error shown with a button to try again.
T2T1 or newer
The entire process is done on device (including handling of mismatched pins). All we need to do in Suite UI is to show generic “Confirm on your Trezor” bubble.
Be aware that after the PIN is set, device auto-lock functionality gets activated (starting from some firmware version). Thus if it’s taking the user too long to finish the onboarding process, the device will get auto locked. If in the final step, where the user can change device label and/or homescreen, the device is locked and will respond with a request to show a PIN matrix. This is handled globally, in UnexpectedStates component, for the whole onboarding flow.
Suite Settings
User can choose what coins should be enabled right from the start. There is also an option to enable TOR and set custom Blockbook backends. These settings mirror what is already set in Suite. If a user has used Suite before and changed its setting he/she will see these changed settings here as we don’t want to reset user’s settings just because he/she goes through onboarding process with another (or wiped) device.
Final step
The last step which contains basic device setup such as changing its label and homescreen.
Tests
This chapter contains information about tests.
- Suite Playwright E2E
- Suite E2E in CI
- Playwright contribution guide
- GitHub Test Reporter
- regtest
- @suite-native/test-utils
- @suite-common/test-utils
See also general code-style-guide/tests for more information about writing tests in Trezor Suite.
@trezor/suite-desktop and @trezor/suite-web e2e tests
@suite/e2e uses Playwright to run e2e tests. It also uses trezor-user-env which is daily built into a docker image providing all the necessary instrumentation required to run tests (bridge and emulators).
Run it locally
Note: All paths below are relative to the root of trezor-suite repository, if not specified otherwise.
Prerequisites
- Docker
- Trezor user env
- No other instance of
Suiteortrezordservice is running
Common steps
- macOS only: Run Docker and go to Preferences -> Resources -> Advanced and increase RAM to at least 4GB. Otherwise, the app during tests does not even load.
- In terminal window, navigate to
trezor-user-envrepo root and run./run.sh. - In another terminal window, run
yarn workspace @trezor/suite-e2e docker:suite-syncto have local Relay server instance - In workspace
@trezor/suite-e2ecreate a.envfile according to the.example.env
Web
- In another terminal window, run web
Suitewithyarn suite:dev. - In another terminal window, run
yarn workspace @trezor/suite-e2e test:e2e:web.
Desktop
-
TEST_BUILD=true yarn workspace @trezor/suite-desktop build:uiProduces
suite-desktop/builddirectory with javascript bundles & assets in production mode for the electron-renderer process. TEST_BUILD env variable serves to mock bundled message-system config .Note: This step needs to be repeated on each change in
suiteorsuite-desktop-uipackage. -
yarn workspace @trezor/suite-desktop build:appProduces
suite-desktop/distdirectory with javascript bundles & assets in production mode for the electron-main process.Note: This step needs to be repeated on each change in
connectorsuite-desktop-corepackage. -
yarn workspace @trezor/suite-e2e test:e2e:desktop
Troubleshooting
-
To run tests headed (showing UI) you can add:
--headed. -
To run just one test file you can do:
yarn workspace @trezor/suite-e2e test:e2e:web general/wallet-discovery.test.tsoryarn workspace @trezor/suite-e2e test:e2e:desktop general/wallet-discovery.test.ts -
To run just one test you can add:
-g "Basic cardano walkthrough" -
To run on a specific device model you can only run the device specific project i.e.:
yarn workspace @trezor/suite-e2e test:e2e:web --project=T3T1 general/wallet-discovery.test.ts -
To run tests with canary FW you need to use canary yarn script i.e.
yarn workspace @trezor/suite-e2e test:e2e:web:canary general/wallet-discovery.test.ts -
To open advance playwright runner/debugger ui you can add:
--ui -
To check for flakiness you can specify test/suite and how many time it should run:
--repeat-each=10 -
To check for flakiness on CI you can edit in
packages/suite/package.jsonscript"test:orchestrated:e2e:desktop": "NODE_OPTIONS='--no-warnings=DEP0040' yarn xvfb-maybe -- pwc-p --config=./playwright-config/playwright-desktop-nightly.config.ts --repeat-each=30 --grep=<test-file-name>",, commit, push and run this CI against your branch. This will run this one test 30 times. Please, always specify limited number of tests, never run full suite 30 times. -
To debug test add
await page.pause();to place where you want test to stop. Debugger window will open. This works only in--headedrun. -
To enable Debug Tools in the browser press
Ctrl+Shift+I -
To enable Electron verbose logging add env variable LOGLEVEL=debug or any other level
-
To increase test timeouts when your local run exceed 1m limit, you can specify test timeout override in
packages/suite/.env. (UI runner –ui needs to be restarted to reflect the change in.env) -
To find a breaking commit in develop you can checkout latest develop and run
yarn workspace @trezor/suite-desktop git:bisect <last_good_commit> <desktop|web> <test_file>
Contribution
Please follow our general Playwright contribution guide
Tags
Each test must be assigned a tag according to what device model it is supported by the test i.e.
- @T1B1
- @T2T1
- @T3B1
- @T3T1
- @T3W1
- @noDevice
At the moment, there are these additional tags:
- @desktopOnly
- @webOnly
- @nightlyOnly
- @specificFirmware
- @firmware-ready
Device coverage on PR
Most E2E tests are specified to cover T3T1 and T3W1, the two flagship models. But to save Currents quota, T3T1 is skipped on PR test runs, and only T3W1 is covered, unless the test is exclusive (T3T1-only) test. Meanwhile, nightly tests provide full coverage, i.e. they run both flagship models. This is configured entirely in the Playwright project configs. To summarize:
- in PR run, if a test specifies T3T1 alongside any other models, T3T1 is skipped, and only other models are covered (usually just T3W1)
- in PR run, if a test specifies T3T1 as its only model, it is covered
- in nightly run, all models specified in the test are covered
@desktopOnly or @webOnly
Some tests are only applicable for Desktop app or Web and you can use this tag to notify the runner, that the test should be ignored when running against opposite Suite. This negative filtering is done on playwright-config level.
Currently, we are also applying @webOnly as a positive filter on Web PR runs. This is done in Web PR workflow definition. Meaning, Web PR runs execute only tests with @WebOnly tag to reduce amount of test run daily and save quota on Currents, where we are paying extra for any test runs over 100 000.
@nightlyOnly
Some tests should run on nighty runs only for specific reasons. This tags is used for reversed filtering in PR and release workflows definitions. This means tests with this tags will run only on nightly and canary runs.
@specificFirmware
Some tests must run on specific Firmware version. That version is setup and defined in test. This tag lets our runner know, that this test should not be included in Canary nightly run.
@firmware-ready
This tag server for easier test quarantine. This tag si dedicated to few tests that are guarding against firmware update issues. As such those tests start failing on every firmware release until we adopt new firmware to out Trezor User Env
Results
Results contains traces, metadata, logs, screenshots, videos and various useful information for debugging.
Traces contain electron logs of our desktop suit app. Both in CI, currents and local env (suite/e2e/test-results).
CI runs have artifact with logs from trezor-user-env. They exist per group. Log are separated by Log entry - - - STARTING TEST trading/swap-tokens.test.ts and - - - FINISHING TEST trading/swap-tokens.test.ts
- electrum-regtest.txt
- trezor-user-env-debugging.log
- tenv-emulator-bridge-debugging.log
- trezor-user-env-version.txt
- quota-db.txt
- suite-sync.txt
Local Relay Server
The local relay server is used by the Suite Sync automation and its test suite to provide an isolated, controllable endpoint and deterministic test data. Each test start by restarting the server and wiping its data store, so do not expect data to persist between test runs. After a test run finishes, the data remains on the server for troubleshooting until the next setup wipe. The server runs from a Docker image pulled from a tagged image in our GitHub repository. Those images are build as part of Suite Sync server pipelines
- Relay: http://localhost:4000
- Quota manager: http://localhost:4001
- Health check: http://localhost:4002
Currents.dev
Test reports are uploaded to currents.dev
E2E tests CI pipelines for Trezor Suite web and desktop
Let’s have a look at how CI pipelines for E2E tests are set up.
Test runner + reporting
We are using Playwright in combination with Currents.dev to run and orchestrate our E2E tests. All pipelines mentioned in this document have a desktop and web version. Their flows are identical, the only difference is which version of the app is tested.
Features
- Currents reporting - Test reports and very useful statistics are available in https://app.currents.dev/
- Currents orchestration - Tests are running in parallel groups and the tests are dynamically distributed to these groups to optimize execution time.
- Configurable fail fast - If a given number of tests fails, all the parallel groups are terminated and the rest of the testing is skipped. This is used to save resources and time in case of heavily broken build.
- Test retries - The test runner is configured to perform up to two retries (i.e. maximum of 3 runs) to deal with test flakiness
Note manual workflow reruns and orchestration
Due to the dynamic distribution of tests to the groups, we advise you to always use the option to rerun all jobs and never only the failed ones. That is because the orchestration would have less workers to run the tests and it would cause your test execution to be unnecessarily long.
When to use manual reruns
Please use manual workflow rerun in case you’ve made significant and dangerous changes in subsequent pushes after your tests already passed once and would be skipped.
When to NEVER use manual reruns
You should never need to manually rerun tests, because you think the fail is caused by flakiness. This is already solved by the built-in retries and the fail is most likely real and will occur again in the rerun.
Pull request pipeline
Description and usage
This is the most commonly triggered pipeline, because it runs as part of each PR verification. It is optimized to save resources, when tests already successfully passed.
Triggers
- Open PR
- Push to PR
Flow
This CI pipeline decides whether to build app and run E2E tests following this logic:
🔹 Is First Attempt?
-
Yes (e.g. initial run after a push):
- Check Previous Test Runs:
- ✅ If a previous successful run exists:
- 🛑 Skip Build
- 🛑 Skip Tests
- ❌ If no successful run exists (failed or incomplete):
- 🔄 Run Build
- ✅ Run All Tests
- ✅ If a previous successful run exists:
- Check Previous Test Runs:
-
No (e.g. a manual rerun of the same workflow run):
- 🔄 Run Build
- ✅ Run All Tests
Flowchart representation:

Nightly and FW canary pipelines
Description and usage
These pipelines are running nightly scheduled tests on develop branch. The FW canary is using firmware built from main branch to verify the latest build.
Triggers
- Cron
Test runner configuration
- Fail fast disabled
Flow
The pipeline always runs all the tests with no additional logic.
Release pipeline
Description and usage
This pipeline serves as a release candidate verification.
Triggers
- Push to release branch
Test runner configuration
- Fail fast disabled
Flow
The pipeline always runs all the tests with no additional logic.
General Playwright contribution guide
Page Objects
We use page objects/actions pattern to encapsulate all UI elements and operations.
Furthermore, every method in the page object class should have step decorator. This decorator wraps the method into playwright test.step(). This vastly improves readability of test report.
Example:
import { step } from '../common';

export class WalletPage {
    readonly searchInput: Locator;
    readonly accountChevron: Locator;

    constructor(private readonly page: Page) {
        this.searchInput = this.window.getByTestId('@wallet/accounts/search-icon');
        this.accountChevron = this.window.getByTestId('@account-menu/arrow');
    }

    @step()
    async filterTransactions(transaction: string) {
        await this.searchInput.click();
        await this.searchInput.fill(transaction, { force: true });
    }

    @step()
    async expandAllAccountsInMenu() {
        for (const chevron of await this.accountChevron.all()) {
            await chevron.click();
        }
    }
❌ Never pass Page instance as a method argument.
✅ Always create a construtor to pass the Page instance to the page action.
✅ Always add an descriptor @step() before every Page object method.
✅ Page objects naming should clearly indicate what kind object we are dealing with. We use suffixes: page for whole pages, section for just parts of page, and other suffixes reflecting type of elements they cover: modal, panel, input and prompt.
Fixtures
To further improve test readability we want to use fixtures to inject our page actions into the tests. Additionally, we use fixtures also for mocks (blockbookMock), setups (page) and watchers (exceptionLogger)
Example:
import { test as base } from '@playwright/test';
import { WalletPage } from './pageActions/walletActions';

const test = base.extend<{
    walletPage: WalletPage;
}>({
    walletPage: async ({ page }, use) => {
        const walletPage = new WalletActions(page);
        await use(walletPage);
    },
});

export { test };
✅ Correct way to use page fixture in the test:
test('Wallet test', async ({ walletPage }) => {
    await walletPage.clickAllAccountArrows();
    ...
});
❌ Wrong way to use page action in the test:
test('Wallet test', async ({ page }) => {
    const walletPage = new WalletPage(page);
    await walletPage.clickAllAccountArrows();
    ...
});
Locators
We want our locators to be defined as page object properties to further improve provide reusability, centralized maintenance, and improved readability.
Example:
export class SuiteGuide {
    private readonly window: Page;
    readonly guideButton: Locator;
    readonly guidePanel: Locator;
    readonly bugLocationDropdown: Locator;
    readonly bugLocationDropdownInput: Locator;
    readonly bugLocationDropdownOption = (location: FeedbackCategory) =>
        this.window.getByTestId(`@guide/feedback/suggestion-dropdown/select/option/${location}`);

    constructor(window: Page) {
        this.window = window;
        this.guideButton = this.window.getByTestId('@guide/button-open');
        this.guidePanel = this.window.getByTestId('@guide/panel');
        this.bugLocationDropdown = this.window.getByTestId('@guide/feedback/suggestion-dropdown');
        this.bugLocationDropdownInput = this.window.getByTestId(
            '@guide/feedback/suggestion-dropdown/select/input',
        );
    }

    @step()
    async openPanel() {
        await this.guideButton.click();
        await expect(this.guidePanel).toBeVisible();
    }

    @step()
    async selectBugLocation(location: FeedbackCategory) {
        await this.bugLocationDropdown.click();
        await this.bugLocationDropdownOption(location).click();
        await expect(this.bugLocationDropdownInput).toHaveText(capitalizeFirstLetter(location));
    }
Locators should mainly rely on testIds this.window.getByTestId('@guide/panel') that we add to our product as html attributes data-testid="@guide/panel".
Alternatively you can use user facing locators page.getByRole('button', { name: 'Submit' }).but testIds are our strong preference.
Adhere to consistent and clear naming. End the locator name with info of what kind of element it is dashboardMenuButton, discoveryHeader, discoveryBar, bugLocationDropdown.
There is vast documentation on how to work with Locators on PlayWraith webpages
❌ Never use XPath or CSS locator. They are fragile and break often.
await page
    .locator('#tsf > div:nth-child(2) > div.A8SBwf > div.RNNXgb > div > div.a4bIc > input')
    .click();

await page.locator('//*[@id="tsf"]/div[2]/div[1]/div[1]/div/div[2]/input').click();
GitHub Test Reporter
The GitHub Test Reporter is a unified test documentation and reporting framework designed to create a single source of truth for both automated and manual tests in our repository. This framework uses structured test annotations to document tests directly in the codebase and automatically generates GitHub project items during release for efficient QA regression testing and single overview of both manual and automated results of release testing. Currently, the GitHub Test Reporter is used in Suite and Suite native.
Purpose
The primary goals of this reporter are to:
- Unify Test Documentation - Keep all test cases (both automated and manual) in one place within the repository
- Streamline QA Regression - Populate a GitHub project with all tests as draft issues for release regression testing
- One overview of Release testing - Github project contains results of both manual and regression release testing
When executed during release builds, the reporter adds new draft issues to a GitHub project. These issues contain all relevant test metadata and results, providing QA teams with a comprehensive dashboard for regression testing and quality assurance.
How to run
Reporter no longer has automatic trigger. It needs to be triggered manually by running its orchestration workflow [Test] Release Suite Report orchestration which will run 3 relevant workflows (Web, Desktop and Manual). All automated tests will be run on the release again, their results reported to GitHub project and issues for manual regression will be generated as well.
You can also run the specific workflow one by one. Web and Desktop workflows needs to be run with parameter publish_results_to_github set to true.
What to do when workflow fails
Each failed reporter run contains detailed instructions how to rerun it for specific set of tests and doing so creating complete report in our project without missing any tests.
Overview
The framework consists of three main components:
- Test Annotations - Define metadata about tests
- TestReportProvider - Extracts and formats test metadata
- GitHub Reporter - Populates GitHub project with test results as draft issues
Annotation Types
Test annotations are defined in testAnnotations.ts, all of them are optional and include:
| Annotation Type | Description |
|---|---|
testCase | The title of the test |
prerequisites | List of requirements before running the test |
steps | List of steps to execute the test |
category | Test category (e.g., Onboarding, Security, Wallets) |
priority | Test priority (Critical, High, Medium, Low) |
stream | Team assignment (Trends, Foundation, Engagement, etc.) |
deviceModel | Target device model (T1B1, T2T1, etc.) |
osMatrix | Operating systems to test on |
Project Fields
The GitHub project is configured with fields that correspond to test metadata:
- Status - Test outcome (Todo, In Progress, Done PASS, Done FAIL, etc.)
- Stream - Team assignment
- Test Run - Whether the test is manual or automated (and which platform)
- Priority - Test importance
- Device Model - Target device for testing
- Comment - Additional notes
- Release Build - The release build identifier (branch-commit format)
- OS Matrix - Operating systems to test on (macOS ARM/Intel, Linux, Windows, Android)
How to Use
Adding Annotations to Tests
Suite workspace with Playwright
test.describe('Test suite name', { tag: ['@group=manual'] }, () => {
    test(
        'My test case title',
        {
            annotation: createTestAnnotation({
                testCase: 'Verify user can login with correct credentials',
                prerequisites: ['User has an existing account', 'Application is at login screen'],
                steps: [
                    'Enter valid username',
                    'Enter valid password',
                    'Click login button',
                    'Verify dashboard is displayed',
                ],
                category: TestCategory.Security,
                priority: TestPriority.High,
                stream: TestStream.Foundation,
                deviceModel: DeviceModel.T2T1,
                osMatrix: [TestOsMatrix.Windows, TestOsMatrix.MacOSArm],
            }),
        },

        async () => {},
    );
});
Suite Native workspace with Jest/Detox
import { it } from '../../support/wrappedIt';

describe.skip('Settings', () => {
    it(
        'Change currency',
        {
            testCase: 'Change currency in settings',
            prerequisites: ['Suite app with an Bitcoin account already imported'],
            steps: [
                'On bottom bar, click on "Settings gear" icon',
                'Click on "Localization"',
                'Change fiat "currency"',
                'Navigate to "Home" section',
                'Price of imported accounts changed accordingly',
            ],
            category: TestCategory.Settings,
            priority: TestPriority.Medium,
        },
        async () => {},
    );
});
Configuration
The reporter is configured with environment variables:
GITHUB_TOKEN- Required for API accessRELEASE_BUILD- Used to identify the specific release build (format: branch-commit)GITHUB_REPORTER_VERBOSE- Set to control logging detail (false/true)
Project Creation
The GitHub project used for testing reports must be created manually using the provided script:
yarn workspace @trezor/suite-e2e node ./support/reporters/scriptCreateProject.ts
This script creates a central “Trezor Suite release testing” project that will contain all test results. The project is reused across releases, with the Release Build field differentiating between builds.
Local run
The reporter can be run from a local environment for troubleshooting and development purposes. Suite:
yarn workspace @trezor/suite-e2e test:e2e:web --reporter=./support/reporters/gitHubReporter.tsyarn workspace @trezor/suite-e2e test:e2e:desktop --reporter=./support/reporters/gitHubReporter.tsyarn workspace @trezor/suite-e2e github:report:manual
Suite-native:
PUBLISH_RESULTS_TO_GITHUB=true yarn workspace @suite-native/app test:e2e android.emu.debugyarn workspace @suite-native/app github:report:manual
Implementation Notes
Reporter Architecture
The GitHubReporter class handles:
- Initialization - Setting up GitHub API access through Octokit
- Test Result Processing - Creating or updating GitHub issues for each test, utilizes TestReportProvider
- Asynchronous Operation Management - Tracking and ensuring completion of all API operations
The reporter creates separate issues for each operating system in the test’s OS matrix, adding appropriate emojis to the title (🍏 macOS ARM, 🍎 macOS Intel, 🐧 Linux, 🪟 Windows, 🤖 Android).
The TestReportProvider abstract class provides a foundation for generating consistent test reports across different testing frameworks. It standardizes test metadata extraction and formatting by implementing shared logic for retrieving test annotations, generating descriptive content, and providing sensible defaults for test properties like category, priority, and device model. Platform-specific implementations extend this base class to integrate with their respective testing frameworks (e.g., Playwright, Jest) while inheriting common reporting functionality.
Extending the Framework
To add new annotation types:
- Add a new enum value in
TestAnnotationType - Create a new annotation definition object
- Add it to the appropriate arrays:
annotationsForBodyDescription- For issue body contentannotationsForProjectFields- For project board fieldsannotationsAddedToTest- For annotations that can be set on tests
- Update
TestReportProvider- Add new getter for the new annotation
- adds its default to class property defaults
- update constant validGetterKeys in getterByKey
To add or change value of annotation, simply change or add new enum value in corresponding object in testAnnotations.ts
Retry Strategy
The GitHub Test Reporter implements a retry mechanism to handle network issues or temporary API failures. It uses the scheduleAction utility. Each API operation will be attempted up to 5 times with a 500ms delay between attempts.
The current implementation does not have built-in deduplication logic for duplicate test issues created by scheduleAction retries or another workflow run.
We have implemented a random delay for action create Draft Issue in Project in order to distribute load and solve often issue “Your attempt to move this item created a temporary conflict. Please try again”
Test Retry Deduplication
The reporter handles test retries by tracking previously created issues for each test. When a test is retried, the reporter updates the existing issue’s status field rather than creating a duplicate issue. This ensures that each test case appears only once in the project board regardless of how many retry attempts occur.
Release Build Differentiation
Tests from different release builds are added to the same GitHub project but are differentiated by the Release Build field. This allows filtering and organization of tests by specific releases while maintaining a centralized project structure.
CI Integration
The reporter is integrated into release branch CI workflows:
test-suite-web-e2e-release.ymlfor Suite Web teststest-suite-desktop-e2e-release.ymlfor Suite Desktop teststest-suite-manual-release.ymlfor Suite Sanity teststest-suite-release-e2e-report-orchestrationservers to run all relevant workflowstest-suite-native-e2e-manual-reporterfor Suite native Sanity teststest-suite-native-e2e-android.ymlfor Suite native Android teststest-suite-native-e2e-ios.ymlfor Suite native iOS tests (wf is broken ATM so we cannot guarantee reporter is working)
Each workflow passes the RELEASE_BUILD and GITHUB_TOKEN environment variables to enable test reporting.
On the Web, Desktop, Android and iOS workflows, reporter is enabled only when workflow is run manually with param publish_results_to_github se to true. Otherwise only test are run. That way we have full control on the generation of issues in GitHub. We had a problem of duplicate and unwanted triggers when it was based on push to release branch.
Regtest
Regtest is a private blockchain which has the same rules and address format as testnet, but there is no global p2p network to connect to.
To use custom backend (electrum server) with bitcoind running in regtest mode you can use the docker container by running the command below:
bash docker/docker-regtest-electrum.sh
The previous command will initialize a new fresh regtest bitcoin blockchain with electrum server running and expose to the localhost at TCP port 50001.
In order to be able to use regtest electrum in suite it is required to configured the REGTEST coin with custom backend with URL below:
localhost:50001:t
@suite/test-utils
This package is a wrapper around @testing-library/react that provides custom utilities for testing React
components in the Trezor Suite web application.
It also re-exports everything from @testing-library/react, so you should use it as a drop-in replacement.
Testing components
flowchart TD
    A{{Do you need redux store?}} -- Yes --> B[Use 'renderWithStoreProvider']
    A -- No --> C{{Do you need any other provider? Such as theme, formatters, etc.}}
    C -- Yes --> D[Use 'renderWithBasicProvider']
    C -- No --> E{{Are you sure?}}
    E -- Yes --> F[Use 'render']
    E -- No --> D
Using render
render function is just re-exported from @testing-library/react. For more information, please refer to
the official documentation.
You most probably do not want to use this function directly.
Using renderWithBasicProvider
renderWithBasicProvider is a custom utility that provides basic context providers. Namely:
- IntlProvider: For internationalization support. Uses
enlocale by default with empty messages for tests. - ConnectedThemeProvider: For theme support.
- ResponsiveContextProvider: For responsive design support.
- SuiteServicesProvider: With
extraDependenciesDesktopMock.services. - MockedFormatterProvider: For currency and number formatting in tests.
Usage example
Basic usage
import { renderWithBasicProvider, userEvent } from '@suite/test-utils';

describe('Counter', () => {
    it('should start with 0 value', () => {
        const { getByLabelText } = renderWithBasicProvider(<Counter />);

        expect(getByLabelText('Counter value')).toHaveTextContent('0');
    });

    it('should increment value on button press', async () => {
        const { getByLabelText, getByText } = renderWithBasicProvider(<Counter />);
        const user = userEvent.setup();

        await user.click(getByText('+'));

        expect(getByLabelText('Counter value')).toHaveTextContent('1');
    });
});
Using renderWithStoreProvider
renderWithStoreProvider is a custom utility that provides all the context providers from renderWithBasicProvider
plus:
- Redux store provider
- Allows to specify custom store or preloaded state.
Usage with preloaded state
Use when you do not need to access the store directly, but you want to set some initial state for your component. For example, you want to test how your component renders with some specific value from the store.
import { type PreloadedState, renderWithStoreProvider, userEvent } from '@suite/test-utils';

describe('Counter', () => {
    const renderCounter = (preloadedState: PreloadedState) =>
        renderWithStoreProvider(<Counter />, { preloadedState });

    it('should render correct value on 1st render', () => {
        const preloadedState: PreloadedState = {
            counter: { value: 1 },
        };
        const { getByLabelText } = renderCounter(preloadedState);

        expect(getByLabelText('Counter value')).toHaveTextContent('1');
    });

    it('should increment value on button press', async () => {
        const preloadedState: PreloadedState = {
            counter: { value: 1 },
        };
        const { getByLabelText, getByText } = renderCounter(preloadedState);
        const user = userEvent.setup();

        await user.click(getByText('+'));

        expect(getByLabelText('Counter value')).toHaveTextContent('2');
    });
});
Usage with custom store
Use when you need to access the store directly in your test. For example, you want to check if some action was dispatched or if the state was updated correctly. You have also the possibility to dispatch an action by yourself.
import {
    type TestStore,
    act,
    initStoreForTests,
    renderWithStoreProvider,
    userEvent,
} from '@suite/test-utils';

describe('Counter', () => {
    let store: TestStore;

    beforeEach(() => {
        ({ store } = initStoreForTests({ counter: { value: 0 } }));
    });

    const renderCounter = () => renderWithStoreProvider(<Counter />, { store });

    it('should react to state changes', () => {
        const { getByLabelText } = renderCounter();

        act(() => {
            store.dispatch({ type: 'counter/increment' });
        });

        expect(getByLabelText('Counter value')).toHaveTextContent('1');
    });

    it('should increment value on button press', async () => {
        const { getByLabelText, getByText } = renderCounter();
        const user = userEvent.setup();

        await user.click(getByText('+'));

        expect(getByLabelText('Counter value')).toHaveTextContent('1');
        expect(store.getState().counter.value).toBe(1);
    });
});
Testing hooks
flowchart TD
    A{{Do you need redux store?}} -- Yes --> B[Use 'renderHookWithStoreProvider']
    A -- No --> C{{Do you need any other provider? Such as theme, formatters, etc.}}
    C -- Yes --> D[Use 'renderHookWithBasicProvider']
    C -- No --> F[Use 'renderHook']
Using renderHook
renderHook function is just re-exported from @testing-library/react. For more information, please refer to
the official documentation.
You should use it when your hook does not depend on any context providers.
Using renderHookWithBasicProvider
renderHookWithBasicProvider is a custom utility that provides the same context providers as renderWithBasicProvider.
For more information, please refer to the section about renderWithBasicProvider.
Usage example
import { act, renderHookWithBasicProvider } from '@suite/test-utils';

describe('useCounter', () => {
    const renderUseCounter = () => renderHookWithBasicProvider(() => useCounter());

    it('should initialize with count 0', () => {
        const { result } = renderUseCounter();

        expect(result.current.count).toBe(0);
    });

    describe('increment', () => {
        it('should increment count by 1', () => {
            const { result } = renderUseCounter();

            act(() => {
                result.current.increment();
            });

            expect(result.current.count).toBe(1);
        });
    });
});
Using renderHookWithStoreProvider
renderHookWithStoreProvider is a custom utility that provides the same context providers as renderWithStoreProvider.
For more information, please refer to the section about renderWithStoreProvider.
Usage with preloaded state
import { type PreloadedState, act, renderHookWithStoreProvider } from '@suite/test-utils';

describe('useCounter', () => {
    const renderUseCounter = (preloadedState: PreloadedState) =>
        renderHookWithStoreProvider(() => useCounter(), { preloadedState });

    it('should initialize with count from store', () => {
        const { result } = renderUseCounter({
            counter: { value: 5 },
        });

        expect(result.current.count).toBe(5);
    });
});
Usage example with store access
import {
    type TestStore,
    act,
    initStoreForTests,
    renderHookWithStoreProvider,
} from '@suite/test-utils';

describe('useCounter', () => {
    let store: TestStore;

    beforeEach(() => {
        ({ store } = initStoreForTests({ counter: { value: 0 } }));
    });

    const renderUseCounter = () => renderHookWithStoreProvider(() => useCounter(), { store });

    it('should increment count and update store', () => {
        const { result } = renderUseCounter();

        act(() => {
            result.current.increment();
        });

        expect(result.current.count).toBe(1);
        expect(store.getState().counter.value).toBe(1);
    });
});
Best Practices
Always use userEvent over fireEvent
userEvent provides more realistic user interactions compared to fireEvent. It simulates the full user interaction flow:
// ❌ Bad - using fireEvent
import { fireEvent, renderWithBasicProvider } from '@suite/test-utils';

fireEvent.click(button);

// ✅ Good - using userEvent
import { renderWithBasicProvider, userEvent } from '@suite/test-utils';

const user = userEvent.setup();
await user.click(button);
Use screen queries for better error messages
Import screen from @suite/test-utils for better error messages when elements are not found:
import { screen, renderWithBasicProvider } from '@suite/test-utils';

renderWithBasicProvider(<MyComponent />);

// ✅ Better error messages
const button = screen.getByRole('button', { name: /submit/i });
Prefer getByRole over other queries
getByRole encourages accessible components and provides better error messages:
// ✅ Best - semantic and accessible
screen.getByRole('button', { name: /submit/i });

// ⚠️ OK - but less accessible
screen.getByLabelText('Submit');

// ❌ Avoid - implementation details
screen.getByTestId('submit-button');
Wait for async operations
Use waitFor when testing asynchronous behavior:
import { waitFor, screen, renderWithBasicProvider, userEvent } from '@suite/test-utils';

it('should load data on mount', async () => {
    renderWithBasicProvider(<DataComponent />);
    const user = userEvent.setup();

    await user.click(screen.getByRole('button', { name: /load/i }));

    await waitFor(() => {
        expect(screen.getByText('Data loaded')).toBeInTheDocument();
    });
});
Common Patterns
Testing Redux-connected components
import { renderWithStoreProvider, screen } from '@suite/test-utils';

describe('AccountSelector', () => {
    it('should display account balance', () => {
        const preloadedState = {
            wallet: {
                accounts: [{ id: '1', balance: '1.5', symbol: 'BTC' }],
            },
        };

        renderWithStoreProvider(<AccountSelector />, { preloadedState });

        expect(screen.getByText('1.5 BTC')).toBeInTheDocument();
    });
});
Testing forms
import { renderWithBasicProvider, screen, userEvent, waitFor } from '@suite/test-utils';

describe('LoginForm', () => {
    it('should submit form with valid data', async () => {
        const onSubmit = jest.fn();
        const user = userEvent.setup();

        renderWithBasicProvider(<LoginForm onSubmit={onSubmit} />);

        await user.type(screen.getByLabelText(/email/i), '[email protected]');
        await user.type(screen.getByLabelText(/password/i), 'password123');
        await user.click(screen.getByRole('button', { name: /submit/i }));

        await waitFor(() => {
            expect(onSubmit).toHaveBeenCalledWith({
                email: '[email protected]',
                password: 'password123',
            });
        });
    });
});
Testing components with internationalization
import { renderWithBasicProvider, screen } from '@suite/test-utils';

describe('WelcomeMessage', () => {
    it('should display welcome message', () => {
        renderWithBasicProvider(<WelcomeMessage />);

        // Component should handle translation internally
        expect(screen.getByText(/welcome/i)).toBeInTheDocument();
    });
});
Exported Utilities
The package exports the following utilities:
Rendering functions
render- Basic render from @testing-library/reactrenderWithBasicProvider- Render with basic providersrenderWithStoreProvider- Render with store and basic providersrenderHook- Render hook from @testing-library/reactrenderHookWithBasicProvider- Render hook with basic providersrenderHookWithStoreProvider- Render hook with store and basic providers
Testing utilities
screen- Query methods bound to document.bodywaitFor- Wait for async operationsact- Wrap state updatesuserEvent- User interaction simulation
Store utilities
initStoreForTests- Initialize Redux store for tests with history mockedTestStore(type) - TypeScript type for test storePreloadedState(type) - TypeScript type for preloaded state
Provider components
BasicProviderForTests- Basic provider wrapperStoreProviderForTests- Store provider wrapper
@suite-common/test-utils
This package provides common utilities for testing React hooks that depend on Redux store.
It also re-exports everything from @testing-library/react, so you should use it as a drop-in replacement.
configureMockStore
configureMockStore is a utility for creating a Redux store configured for testing. It wraps @reduxjs/toolkit’s configureStore with additional testing features like action logging.
Usage example
import { configureMockStore } from '@suite-common/test-utils';

const store = configureMockStore({
    reducer: {
        counter: (state = { value: 0 }, action) => {
            if (action.type === 'counter/increment') {
                return { value: state.value + 1 };
            }

            return state;
        },
    },
    preloadedState: {
        counter: { value: 5 },
    },
});

// Dispatch actions
store.dispatch({ type: 'counter/increment' });

// Get current state
expect(store.getState().counter.value).toBe(6);

// Get all dispatched actions
expect(store.getActions()).toEqual([{ type: 'counter/increment' }]);

// Clear action log
store.clearActions();
Configuration options
reducer- Redux reducer or reducer mappreloadedState- Initial state for the storemiddleware- Additional middleware to includeextra- Extra dependencies for thunk middlewareserializableCheck- Configuration for serializable check middleware
initPreloadedState
initPreloadedState is a utility for merging partial state with the initial state from a reducer. This is useful when you want to override only specific parts of the state while keeping the rest at their default values.
Usage example
import { configureMockStore, initPreloadedState } from '@suite-common/test-utils';

const rootReducer = (state = { counter: { value: 0 }, user: { name: 'John' } }, action) => {
    // reducer logic
    return state;
};

const preloadedState = initPreloadedState({
    rootReducer,
    partialState: {
        counter: { value: 10 },
        // user.name will remain 'John' from default state
    },
});

const store = configureMockStore({
    reducer: rootReducer,
    preloadedState,
});

expect(store.getState()).toEqual({
    counter: { value: 10 },
    user: { name: 'John' },
});
Testing hooks
flowchart TD
    A{{Do you need redux store?}} -- Yes --> B[Use 'renderHookWithStoreProvider']
    A -- No --> C[Use 'renderHook']
Using renderHook
renderHook function is just re-exported from @testing-library/react. For more information, please refer to
the official documentation.
You should use it when your hook does not depend on any context providers.
Using renderHookWithStoreProvider
renderHookWithStoreProvider is a custom utility that wraps your hook with Redux Provider.
Use this when your hook depends on Redux store.
Note: Unlike @suite-native/test-utils, this utility requires you to provide your own store instance.
There is no preloadedState option - you must create and configure the store yourself.
Usage example
import {
    type TestStore,
    act,
    renderHookWithStoreProvider,
    configureMockStore,
} from '@suite-common/test-utils';

describe('useCounter', () => {
    const createStore = (initialValue: number) =>
        configureMockStore({
            reducer: {
                counter: (state = { value: initialValue }, action) => {
                    if (action.type === 'counter/increment') {
                        return { value: state.value + 1 };
                    }

                    return state;
                },
            },
        });

    const renderUseCounter = (store: TestStore) =>
        renderHookWithStoreProvider(() => useCounter(), { store });

    it('should initialize with count from store', () => {
        const store = createStore(5);
        const { result } = renderUseCounter(store);

        expect(result.current.count).toBe(5);
    });

    it('should increment count and update store', () => {
        const store = createStore(0);
        const { result } = renderUseCounter(store);

        act(() => {
            result.current.increment();
        });

        expect(result.current.count).toBe(1);
        expect(store.getState().counter.value).toBe(1);
    });
});
Injecting custom providers
To inject a custom provider, you can use the wrapper option. The custom wrapper will be rendered inside
the Redux Provider.
import { type TestStore, renderHookWithStoreProvider } from '@suite-common/test-utils';

const renderUseCounterA = (store: TestStore) =>
    renderHookWithStoreProvider(() => useCounter(), { store, wrapper: MyCustomProvider });

const renderUseCounterB = (store: TestStore) =>
    renderHookWithStoreProvider(() => useCounter(), {
        store,
        wrapper: ({ children }) => (
            <MyCustomProvider someProp={someValue}>{children}</MyCustomProvider>
        ),
    });
@suite-native/test-utils
This package is wrapper around @testing-library/react-native that provides some custom utilities for testing React
Native components in the Suite Native project.
It also reexports everything from @testing-library/react-native, so you should use it as a drop-in replacement.
Testing components
flowchart TD
    A{{Do you need redux store?}} -- Yes --> B[Use 'renderWithStoreProvider']
    A -- No --> C{{Do you need any other provider? Such as theme, formatters, etc.}}
    C -- Yes --> D[Use 'renderWithBasicProvider']
    C -- No --> E{{Are you sure?}}
    E -- Yes --> F[Use 'render']
    E -- No --> D
Using render
render function is just re-exported from @testing-library/react-native. For more information, please refer to
the official documentation.
You most probably do not want to use this function directly.
Using renderWithBasicProvider
renderWithBasicProvider is a custom utility that provides basic context providers. Namely:
- IntlProvider: Simplified variant for tests. Always uses
en-USlocale. - StylesProvider: With
colorVariantset tostandard. - NavigationContainer
- NativeServicesProvider: With
extraDependenciesNativeMock.services. - FormatterProvider: With
localeset toenandbaseCurrencyset toUSD. - BottomSheetModalProvider
Usage example
Basic usage
import { renderWithBasicProvider, userEvent } from '@suite-native/test-utils';

describe('Counter', () => {
    it('should start with 0 value', () => {
        const { getByLabelText } = renderWithBasicProvider(<Counter />);

        expect(getByLabelText('Counter value')).toHaveTextContent('0');
    });

    it('should increment value on button press', async () => {
        const { getByLabelText, getByText } = renderWithBasicProvider(<Counter />);

        await userEvent.press(getByText('+'));

        expect(getByLabelText('Counter value')).toHaveTextContent('1');
    });
});
Using renderWithStoreProvider
renderWithStoreProvider is a custom utility that provides all the context providers from renderWithBasicProvider
plus:
- Redux store provider
- Formatters config is now loaded from store instead of being hardcoded.
- Allows to specify custom store or preloaded state.
Usage with preloaded state
Use when you do not need to access the store directly, but you want to set some initial state for your component. For example, you want to test how your component renders with some specific value from the store.
import {
    type PreloadedState,
    initStore,
    renderWithStoreProvider,
    userEvent,
} from '@suite-native/test-utils';

describe('Counter', () => {
    const renderCounter = (preloadedState: PreloadedState) =>
        renderWithStoreProvider(<Counter />, { preloadedState });

    it('should render correct value on 1st render', () => {
        const preloadedState: PreloadedState = {
            counter: { value: 1 },
        };
        const { getByLabelText } = renderCounter(preloadedState);

        expect(getByLabelText('Counter value')).toHaveTextContent('1');
    });

    it('should increment value on button press', async () => {
        const preloadedState: PreloadedState = {
            counter: { value: 1 },
        };
        const { getByLabelText, getByText } = renderCounter(preloadedState);

        await userEvent.press(getByText('+'));

        expect(getByLabelText('Counter value')).toHaveTextContent('2');
    });
});
Usage with custom store
Use when you need to access the store directly in your test. For example, you want to check if some action was dispatched or if the state was updated correctly. You have also possibility to dispatch an action by yourself.
import {
    type TestStore,
    act,
    initStore,
    renderWithStoreProvider,
    userEvent,
} from '@suite-native/test-utils';

describe('Counter', () => {
    let store: TestStore;

    beforeEach(() => {
        ({ store } = initStore({ counter: { value: 0 } }));
    });

    const renderCounter = () => renderWithStoreProvider(<Counter />, { store });

    it('should react to state changes', () => {
        const { getByLabelText } = renderCounter();

        act(() => {
            store.dispatch({ type: 'counter/increment' });
        });

        expect(getByLabelText('Counter value')).toHaveTextContent('1');
    });

    it('should increment value on button press', async () => {
        const { getByLabelText, getByText } = renderCounter();

        await userEvent.press(getByText('+'));

        expect(getByLabelText('Counter value')).toHaveTextContent('1');
        expect(store.getState().counter.value).toBe(1);
        expect(store.getActions()).toContainEqual({ type: 'counter/increment' });
    });
});
Injecting custom providers
To inject custom provider, you can use wrapper option of either render, renderWithBasicProvider or
renderWithStoreProvider.
const renderCounterA = () =>
    renderWithStoreProvider(<Counter />, { store, wrapper: MyCustomProvider });

const renderCounterB = () =>
    renderWithBasicProvider(<Counter />, {
        wrapper: ({ children }) => (
            <MyCustomProvider someProp={someValue}>{children}</MyCustomProvider>
        ),
    });
Testing hooks
flowchart TD
    A{{Do you need redux store?}} -- Yes --> B[Use 'renderHookWithStoreProvider']
    A -- No --> C{{Do you need any other provider? Such as theme, formatters, etc.}}
    C -- Yes --> D[Use 'renderHookWithBasicProvider']
    C -- No --> F[Use 'renderHook']
Using renderHook
renderHook function is just re-exported from @testing-library/react-native. For more information, please refer to
the official documentation.
You should use it when your hook does not depend on any context providers.
Using renderHookWithBasicProvider
renderHookWithBasicProvider is a custom utility that provides the same context providers as renderWithBasicProvider.
For more information, please refer to the section about renderWithBasicProvider.
Usage example
import { act, renderHookWithBasicProvider } from '@suite-native/test-utils';

describe('useCounter', () => {
    const renderUseCounter = () => renderHookWithBasicProvider(() => useCounter());

    it('should initialize with count 0', () => {
        const { result } = renderUseCounter();

        expect(result.current.count).toBe(0);
    });

    describe('increment', () => {
        it('should increment count by 1', () => {
            const { result } = renderUseCounter();

            act(() => {
                result.current.increment();
            });

            expect(result.current.count).toBe(1);
        });
    });
});
Using renderHookWithStoreProvider
renderHookWithStoreProvider is a custom utility that provides the same context providers as renderWithStoreProvider.
For more information, please refer to the section about renderWithStoreProvider.
Usage with preloaded state
import {
    type PreloadedState,
    act,
    initStore,
    renderHookWithStoreProvider,
} from '@suite-native/test-utils';

describe('useCounter', () => {
    const renderUseCounter = (store: PreloadedState) =>
        renderHookWithStoreProvider(() => useCounter(), { store });

    it('should initialize with count from store', () => {
        const { result } = renderUseCounter({
            counter: { value: 5 },
        });

        expect(result.current.count).toBe(5);
    });
});
Usage example with store access
import { act, initStore, renderHookWithStoreProvider } from '@suite-native/test-utils';

describe('useCounter', () => {
    const renderUseCounter = (store: TestStore) =>
        renderHookWithStoreProvider(() => useCounter(), { store });

    it('should increment count and update store', () => {
        const store = initStore({ counter: { value: 0 } });
        const { result } = renderUseCounter(store);

        act(() => {
            result.current.increment();
        });

        expect(result.current.count).toBe(1);
        expect(store.getState().counter.value).toBe(1);
        expect(store.getActions()).toContainEqual({ type: 'counter/increment' });
    });
});
Injecting custom providers
To inject custom provider, you can use wrapper option of either renderHook, renderHookWithBasicProvider or
renderHookWithStoreProvider.
const renderUseCounterA = () =>
    renderHookWithStoreProvider(() => useCounter(), { store, wrapper: MyCustomProvider });

const renderUseCounterB = () =>
    renderHookWithBasicProvider(() => useCounter(), {
        wrapper: ({ children }) => (
            <MyCustomProvider someProp={someValue}>{children}</MyCustomProvider>
        ),
    });
Assorted knowledge
This directory serves as a dumping ground for important knowledge tidbits that do not clearly fit in any particular location. Please add any information that you think should be written down.
At any time, information stored here might be restructured or moved to a different location, so as to ensure that the documentation is well structured overall.
Local development security
Given the emerging supply chain attacks, it is not enough to rely on CI security checks.
Those only safeguard CI itself, and prevent merging compromised code to develop.
Additional hardening for local development is highly recommended for developers to work safely with npm packages (adding new npm packages, updating existing ones).
PMG by SafeDep
pmg is a tool that wraps yarn, and scans packages that are being fetched from npm registry for known malicious code.
PMG was chosen because it is fully open source, with permissible license, works well with yarn and can easily be built from source.
You can refer to the official documentation for more details.
See their Quick start README for setup instructions.
Note that building from source is a viable option.
You can test it by running yarn add [email protected] (PMG blocks the package as if it was malicious).
Alternatives
- SFW was explored previously, but rejected due to being closed source and higher setup complexity.
- DataDog firewall was rejected because it doesn’t support
yarn
Front-End Build
The front-end build of Suite is handled by Webpack configurations inside the suite-build package.
The folder structure is as follows:
- configs: Contains the Webpack configuration files.
base.webpack.config.tsserves as a common base for all other configurations. The other files in this folder are project specific such asweb.webpack.config.tsordesktop.webpack.config.tsforsuite-webandsuite-desktoprespectively. - plugins: Contains custom Webpack plugins.
- utils: Contains various utils for the build scripts.
These Webpack configurations are using TypeScript and use the tsconfig.json file at the root of the package. This is specified via the TS_NODE_PROJECT environment variable to avoid any issues regardless of the location where the command is run.
The following commands are available in this package (using yarn run at the root of the package or yarn workspace @trezor/suite-build run at the root of the project):
| Command | Description |
|---|---|
| dev:web | Runs a watch build of suite-web with development settings and serves it. |
| build:web | Builds a production build of suite-web. |
| dev:desktop | Runs a watch build of suite-desktop with development settings, serves it and runs the Electron wrapper. |
| build:desktop | Builds a production build of suite-desktop. |
| lint | Runs the linter on the package. |
| type-check | Runs the TypeScript checker on the package. |
| type-check:watch | Same as type-check but in watch mode. |
Aliases
Aliases for imports (for example @suite-utils/features) are defined in the tsconfig.json file at the root of the project, in the compilerOptions.paths property. The values are processed at build time for the webpack configuration in order to properly resolve aliases.
Development on Windows
This guide will describe two ways how to run Trezor Suite dev environment & build pipeline on a Windows system:
natively on Windows or through WSL.
Native Windows
Running the dev environment natively on Windows is not most straightforward, but it should offer best compatibility.
Prerequisites
- Install Python preferably via the Python for Windows installer, not from Microsoft Store
- Install latest Visual Studio Community with C++ build tools
- Make sure to install the “Desktop development with C++” workload and include “C++ Clang Tools for Windows”
- FYI: it’s necessary so that yarn packages with native code can be built,
node-gypdepends on it: details
- Install git using the installer and make sure to include git bash for Windows
- Install nodeJS version as per .nvmrc
- nvm is not well supported on Windows, but manual nodeJS installation from
.msiwill work.- Do not check build tools with Chocolatey (already installed with Visual Studio, that’s more reliable)
- nvm is not well supported on Windows, but manual nodeJS installation from
- Enable Yarn through npm
- Install Git LFS
- It is imperative that all further commands are run in bash for Windows, not in cmd or powershell!
- Especially, do not run any
yarncommand in a shell other than bash for Windows. If you have done so, deletenode_modulesand start over.
- Especially, do not run any
Setup
- Proceed with the Getting Started instructions in README.
- (except possibly the
nvmstep, depending on your choice)
- (except possibly the
Tips
- Exclude the
trezor-suitefolder from Windows Defender, as it may slow down the build process considerably
Windows Subsystem for Linux
⚠ Using WSL is a more sandboxed way to run the dev env, but note that it is not actively maintained, and not all features may work.
Setup
On Windows:
- Install an Ubuntu WSL2 (must be v2, you may upgrade existing v1 WSL to v2)
- Install USBIPD
In WSL:
- Run
sudo apt-get install build-essential - Install these Electron dependencies for Linux
- Install udev rules as per the Trezor docs
Then proceed with the Getting Started instructions in README.
Connecting USB device
On Windows, run usbipd list, find the bus id of the Trezor device, e.g. 2-1.
Then run:
usbipd bind --busid 2-1
usbipd attach --wsl --busid 2-1
In WSL, run lsusb to confirm the device is visible.
Note: Without udev rules, the device will be visible by lsusb, but not in the app.
Development on Nix
Trezor Suite provides two ways to use Nix: a Nix flake (flake.nix) and a shell.nix for environments without flakes enabled.
Prerequisites
Flakes
- Nix installed with flakes enabled
- Add
experimental-features = nix-command flakesto~/.config/nix/nix.conf
shell.nix
- Nix installed (no extra config needed)
Flake: Available Dev Shells
Default shell (web/desktop development)
Includes Node.js 24, Yarn, Playwright, Electron, and all build dependencies.
nix develop
# or explicitly:
nix develop .#default
Android shell (mobile development)
Includes everything in the default shell plus:
- Java (JDK)
- Android SDK (platforms, build tools, NDK)
- Android Emulator with system images
- A default AVD is auto-created on first run
nix develop .#android
Common Workflows
Web / Desktop development
nix develop
yarn
yarn suite:dev          # Web app at http://localhost:8000
yarn suite:dev:desktop  # Electron desktop app
Mobile (Android) development
nix develop .#android
yarn
yarn native:start       # Start Metro bundler (in one terminal)
yarn a                  # Run on Android (in another terminal)
Running the Android emulator
nix develop .#android
# list available AVDs with:
avdmanager list avd
emulator -avd <avd-name>
emulator -avd Pixel_6_API_34
If you have troubles with your GPU acceleration you can disable it when running emulator like:
emulator -avd Pixel_6_API_34 -gpu swiftshader_indirect
Running tests
nix develop
yarn test:unit
shell.nix
For environments without flakes, use nix-shell with the root shell.nix.
Default (web/desktop)
nix-shell
Android
Pass USE_ANDROID=1 to include the Android SDK, JDK, and emulator:
USE_ANDROID=1 nix-shell
Bluetooth transport development
The packages/transport-bluetooth package has its own shell with a Rust toolchain:
nix-shell packages/transport-bluetooth/shell.nix
Trezor device naming in codebase
Development/Internal name consists of 4 keys
<product_class> <platform> <feature_class> <generation>
product_class-'T'for Trezor hardware walletplatform-'1'for STM32F207,'2'for STM32F42xfeature_class-'B'for Buttons,'T'for Touchgeneration
| Official name | Development name |
|---|---|
| Trezor Model 1 | T1B1 |
| Trezor Model T | T2T1 |
| Trezor Safe 3 | T2B1, T3B1 |
| Trezor Safe 5 | T3T1 |
| Trezor Safe 7 | T3W1 |
- Trezor Safe 3 exists in two variants, depending on its chip. It was upgraded post-release.
Review Process
Same as for Trezor Firmware. Please see here.
Videos in Suite
Videos in Suite can be encoded in .mp4 container however we can also use WebM format which have benefits of smaller data footprint, better color accuracy and they also support transparency.
The designers should always provide .mov file with appropriate quality, pixel dimensions and a alpha channel (if e.g. transparent background is needed).
The following process is tested on MacOS:
Prerequisites
Install encoder
brew install ffmpeg
Encode videos using command line (recommended)
WebM - currently supported by Chrome/Firefox
ffmpeg -i source.mov -pix_fmt yuva420p -an encoded_file.webm
Encode videos using desktop application
Example usage
Encoded video files can be then saved to suite-data and linked using resolveStaticPath() function.
<video loop autoPlay muted>
    <source src={resolveStaticPath(`videos/onboarding/encoded_file.webm`)} type="video/webm" />
</video>
References
How to make HEVC, H265 and VP9 videos with an alpha channel for the web