Onboarding
Incomplete developers guide to Onboarding in Trezor Suite
There are few different ways to trigger the onboarding process:
- Initial run
- Initial run is what we call a state when Suite is launched for the first time. It may also be triggered by clearing the app storage (flag is stored inside a reducer
suite.flags.initialRunand saved to persistent storage). This is stored per device. If Suite detects initial run it’ll automatically launch the onboarding.
- Initial run is what we call a state when Suite is launched for the first time. It may also be triggered by clearing the app storage (flag is stored inside a reducer
- Connecting an uninitialized device (without a seed)
- Suite will automatically launch the onboarding
- Wiping a device from Suite UI and proceeding with device setup
Prerequisites
Button Requests
Each device object inside has its buttonRequests array which gets populated through buttonRequestMiddleware. It it basically a way for a device to request cooperation from the app.
It is used, for example, by firmware update flow for setting correct firmware.status after device requested confirmation on the device:
case SUITE.ADD_BUTTON_REQUEST:
      if (action.payload.code === 'ButtonRequest_FirmwareUpdate') {
          draft.status = 'waiting-for-confirmation';
      }
Another usage is in “Setup Pin” step, where the device, through button request, will let us know if user should enter pin for the first time or 2nd time (for confirmation). It is also leveraged outside of Onboarding every time user needs to enter a PIN. Thanks to these buttons we can reuse the same component that will adjust just based on these button requests.
In onboarding, we clear this array after each step (handled in buttonRequestMiddleware).
Steps
- Welcome
- Firmware
- Note about normal and bootloader mode
- Firmware update or installation
- Device with older firmware installed
- Device with no firmware installed
- State of currently shipped devices, intermediary firmware
- Generating seed
- Backup seed
- PIN Setup
- Suite Settings (enabled coins, custom backends, TOR)
- Final step (device label, homescreen)
Welcome
Before a user connects a device
As a first step we prompt the user to connect his device in normal mode. In this step we handle various invalid device modes and problems with transport layer used to facilitate communication with the device (webUSB, Trezor Bridge).
List of valid states
- Waiting for a device
- We provide some troubleshooting tips and link to download Trezor Bridge as it may happen that user launched Suite for the first time without installing Trezor Bridge (only in Web environment)

- We provide some troubleshooting tips and link to download Trezor Bridge as it may happen that user launched Suite for the first time without installing Trezor Bridge (only in Web environment)
- Device connected in normal mode
- Part of happy path. After the device is connected we proceed to Data analytics (only in initial run) or to Device security (genuinity) check
List of invalid states
Invalid device states:
- Device connected, but in bootloader mode
- Device connected, but unreadable
- Seedless device setup is not supported in Suite (not to be confused with regular device without seed).
Invalid transport states:
- No transport available (Trezor Bridge is not running)
- We need to provide link to download Trezor Bridge (only in Web environment)
Data analytics (only in initial run)
During the initial run we ask users to give their consent to collect and process anonymous data in order to help us improve the user experience.

Device security (genuinity) check
This sub step is adjusted based on a state of the device. We distinguish between device that was already used before (it has a firmware installed) and most likely unused device (no seed, no firmware).
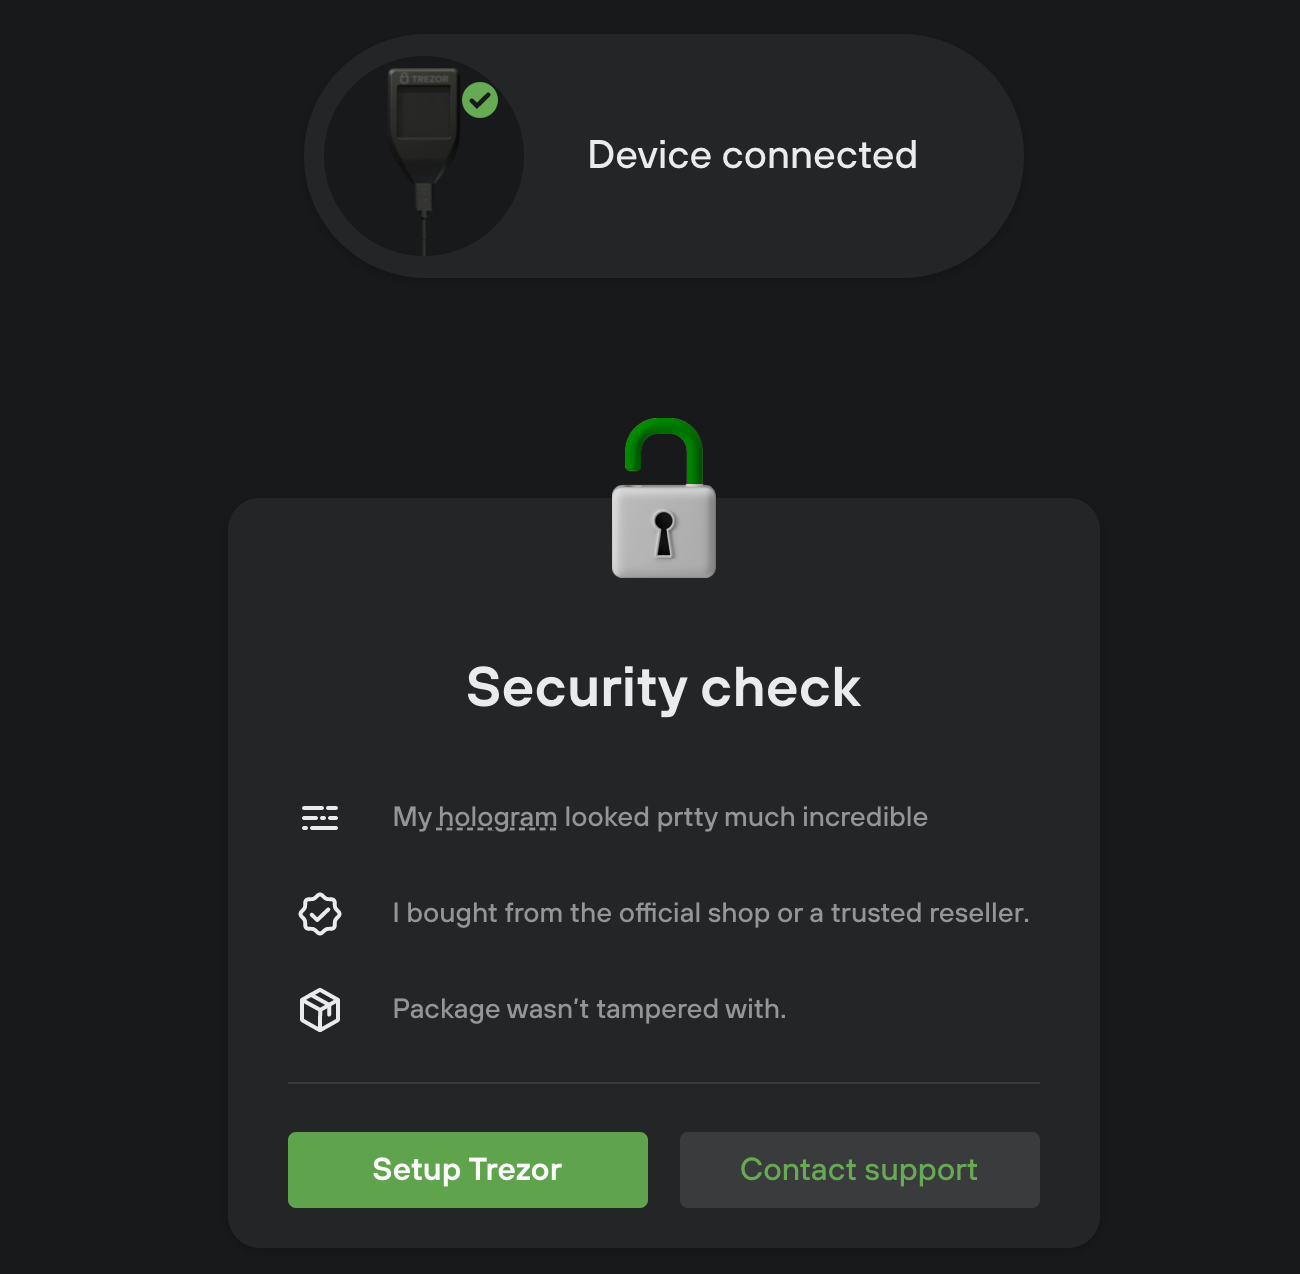
Device without seed, no firmware installed
This should be the most common case in onboarding.
Scenario:
- New device bought from trusted seller
- User wiped the device (and firmware)
Security questions: Check hologram, verify seller, check package…
Primary action: Setup device (starts onboarding)
Secondary action: Contact support
Device without seed, firmware already installed
Scenario:
- User has wiped the device (without erasing a firmware)
- Device has been tampered with
Security questions: Have the user used the device before?
Primary action: Setup device (starts onboarding)
Secondary action: Contact support
Device with seed (thus also a firmware)
Scenario:
- User cleared app storage so the onboarding was started on initial run.
- Device has been tampered with
Security questions: Have the user used the device before?
Primary action: Setup device (starts onboarding)
Secondary action: Contact support
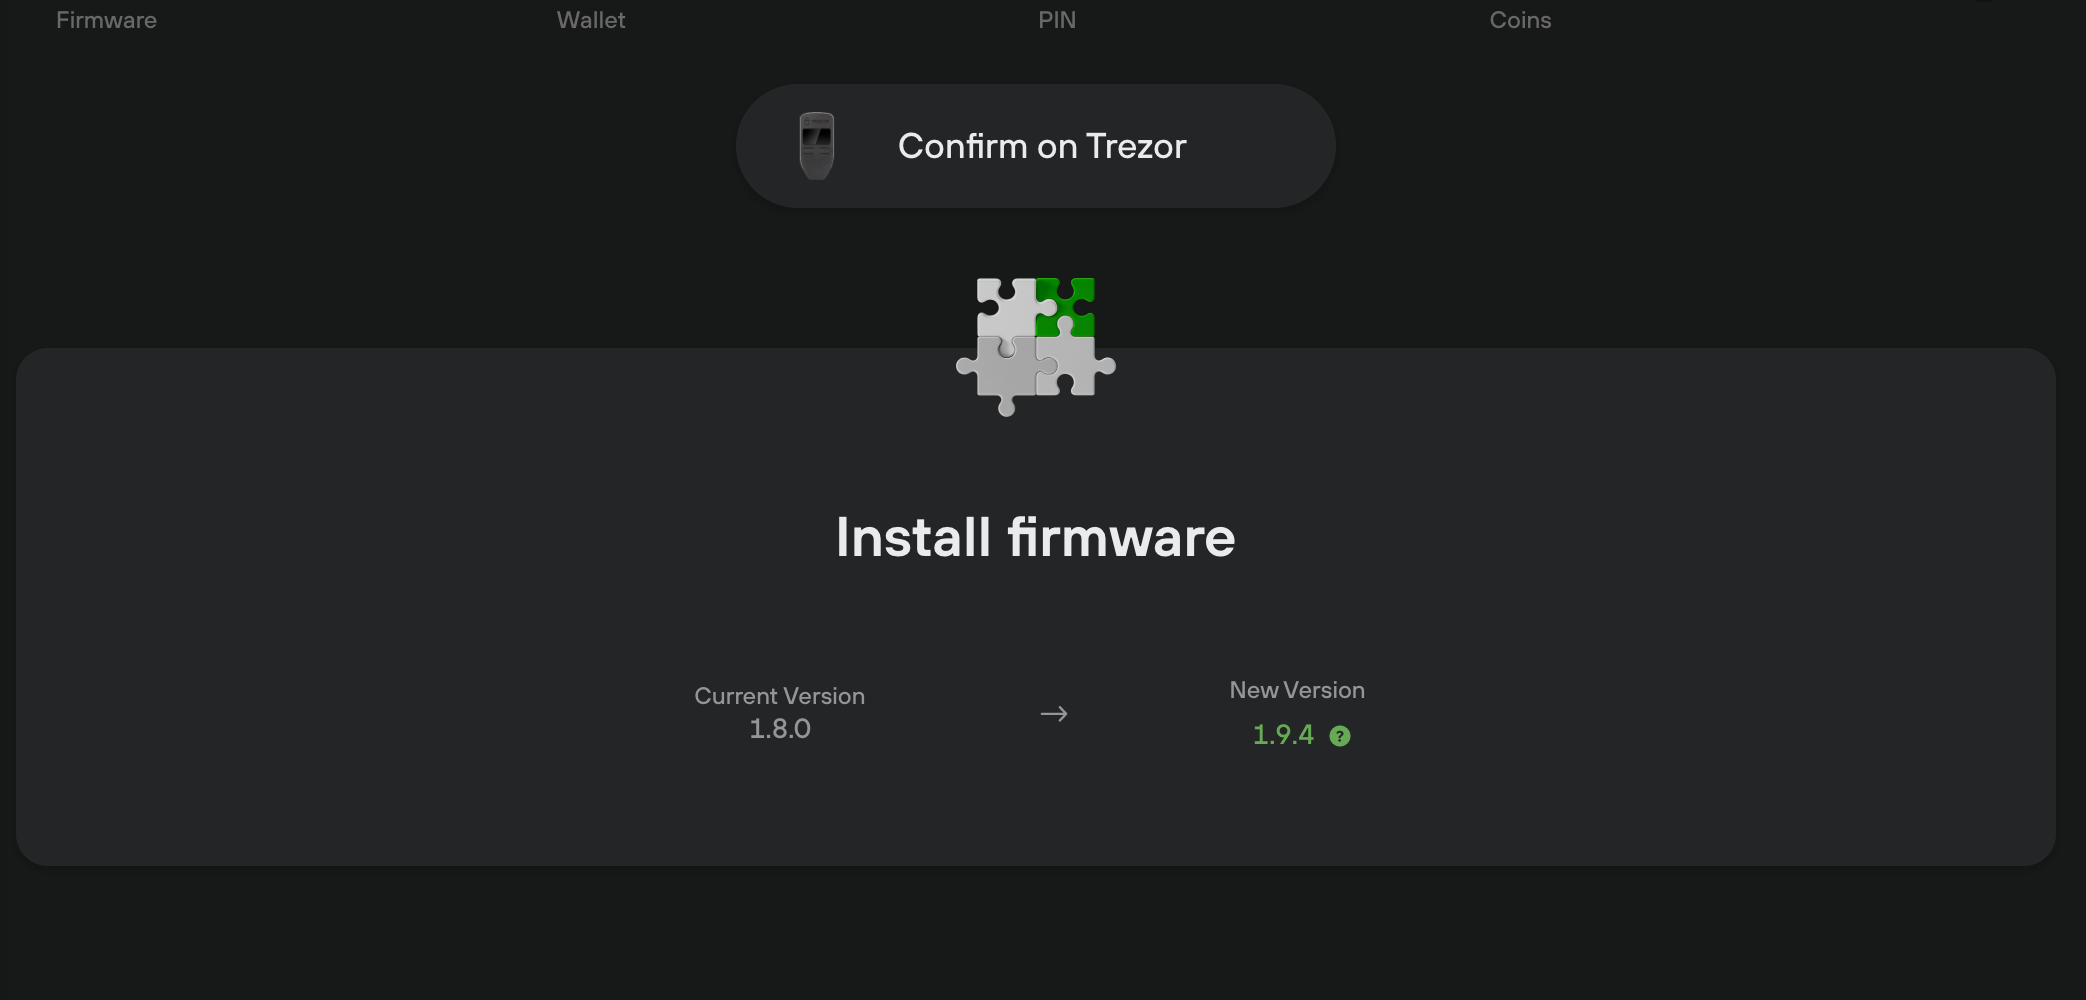
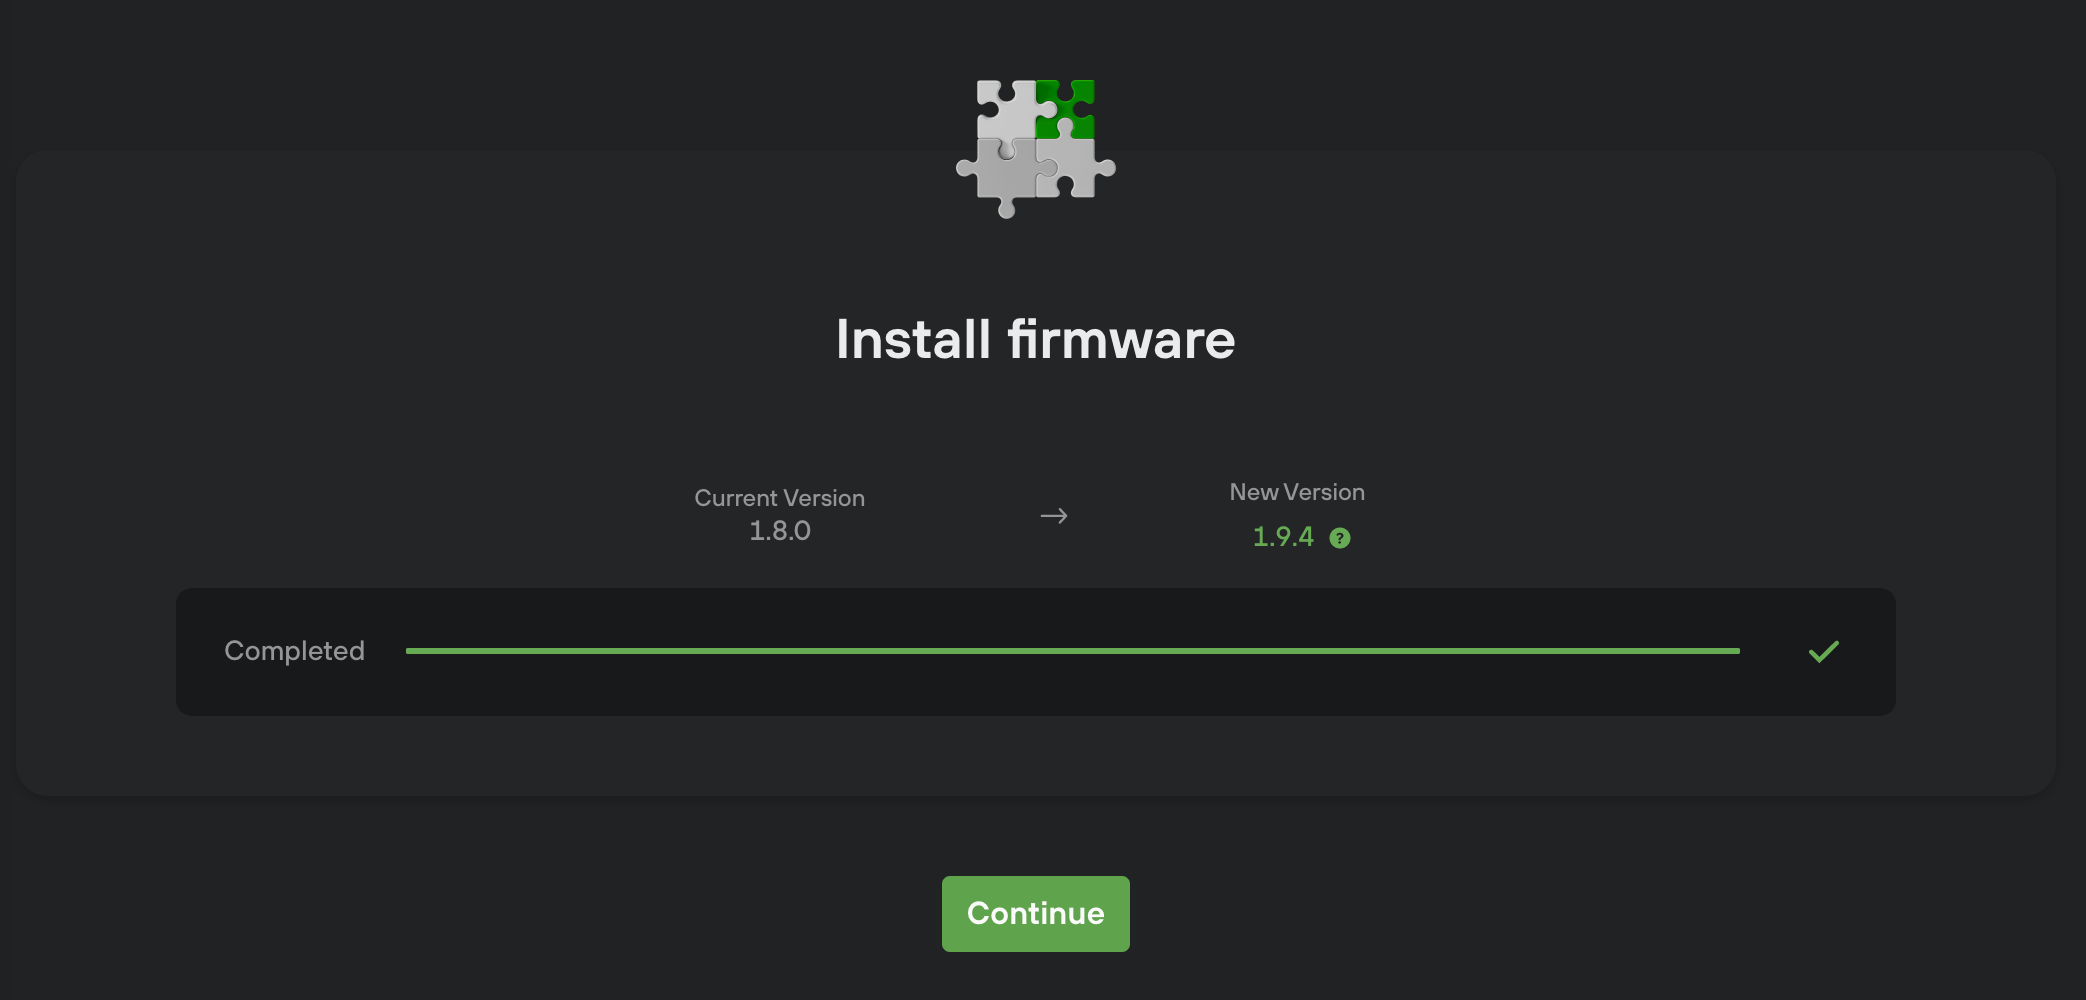
Firmware
To provide good user and dev experience firmware flow has its own reducer. It is shared between firmware flow used in onboarding and standalone modal for firmware update. Both flows,fw installation via onboarding and firmware update via standalone modal, reuse same components.
Active sub step of firmware step is stored in status field. Explanation of each field and sub steps can be found in firmwareReducer.ts.
Note about normal and bootloader mode
Device can be connected in “normal” mode or in “bootloader“ mode which you access by pressing left button (both buttons on old T1B1 fw) or swiping on touchscreen during connecting usb cable to the device. Before starting the installation process, user needs to disconnect the device and reconnect it in bootloader mode.
From the technical perspective, these two modes are seen as 2 different devices and there is no way we can tell that the device, which was reconnected in bootloader mode is indeed the same device which was before connected in normal mode. This basically means that if you are updating a firmware with a device connected via webUSB you will need to do pairing process twice.
When device is in bootloader mode device.features.major_version, device.features.minor_version, device.features.patch_version is version of a bootloader, not a firmware.
Another interesting fact is that a device without installed firmware acts as it is in bootloader mode regardless of buttons you are or you are not pressing (device has always some bootloader installed).
Bootloader mode has another catch, not all device’s features are accessible while a device is in this state. Such inaccessible fields are set to null. For example, device.features.pin_protection is set to null, but that doesn’t mean that device has this feature disabled. After reconnecting the same device in normal mode pin_protection might be set true (or false).
This is the reason why, in Welcome step, we force the user to connect a device in normal mode first. Otherwise we wouldn’t know what firmware version is installed or what firmware update we can offer.
Firmware installation
Device could be in various states when the user enters this step.
- Firmware not installed
- Fresh device (
device.firmwareset tonone) - We don’t need to prompt the user to switch to bootloader mode in this case.
- Fresh device (
- Firmware already installed and:
- Update available: It can be optional (skip button is present) or mandatory. Be aware that a device, while in bootloader mode, doesn’t report its fw version, only version of bootloader.
- Latest firmware already installed (just wiped seed)
Possible error states:
- Generic firmware installation fail
- User cancelled installation on a device
- Device disconnected during the process
- Some unexpected error
- Device is connected in bootloader mode from the start
- We will prompt the user to connect device in normal mode
- This won’t happen in Onboarding so much, but it is handled as this firmware flow is used in standalone firmware update modal which can be triggered from Suite
- Device disconnected before firmware installation starts
- Prompt the user to reconnect the device
- Device disconnected after firmware installation starts
- Installation will fail with generic error
- This could happen when a cable is not connected properly and the device will disconnect during the process
Device with older firmware installed

If device is connected in normal mode and user proceeds by clicking “install firmware” we will ask the user to disconnect the device
and reconnect it in bootloader mode (via a small modal popup).
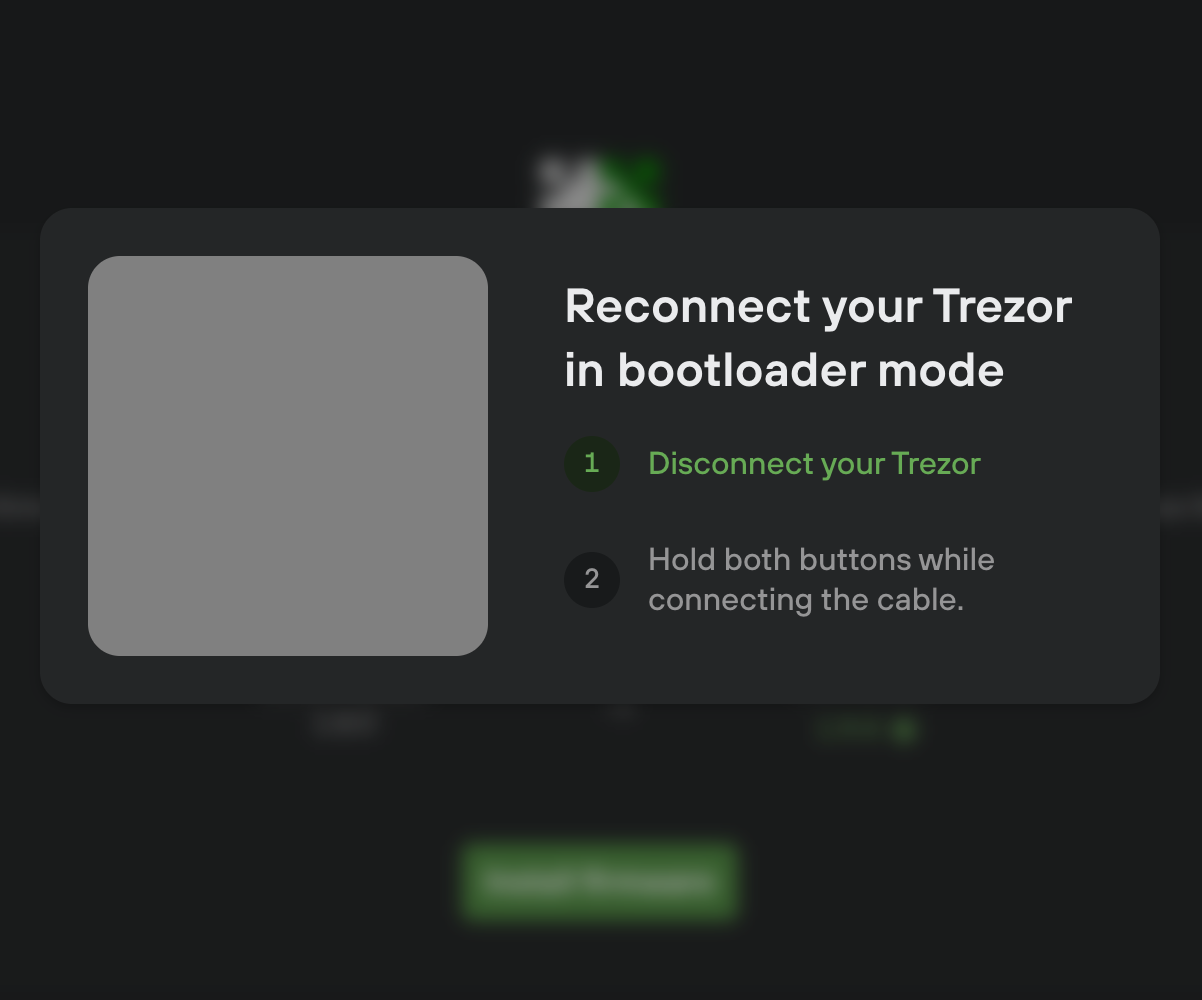
After the device is reconnected we show a button to trigger an update process. Then the device will request a confirmation from the user. Only after the user confirms it the installation begins.
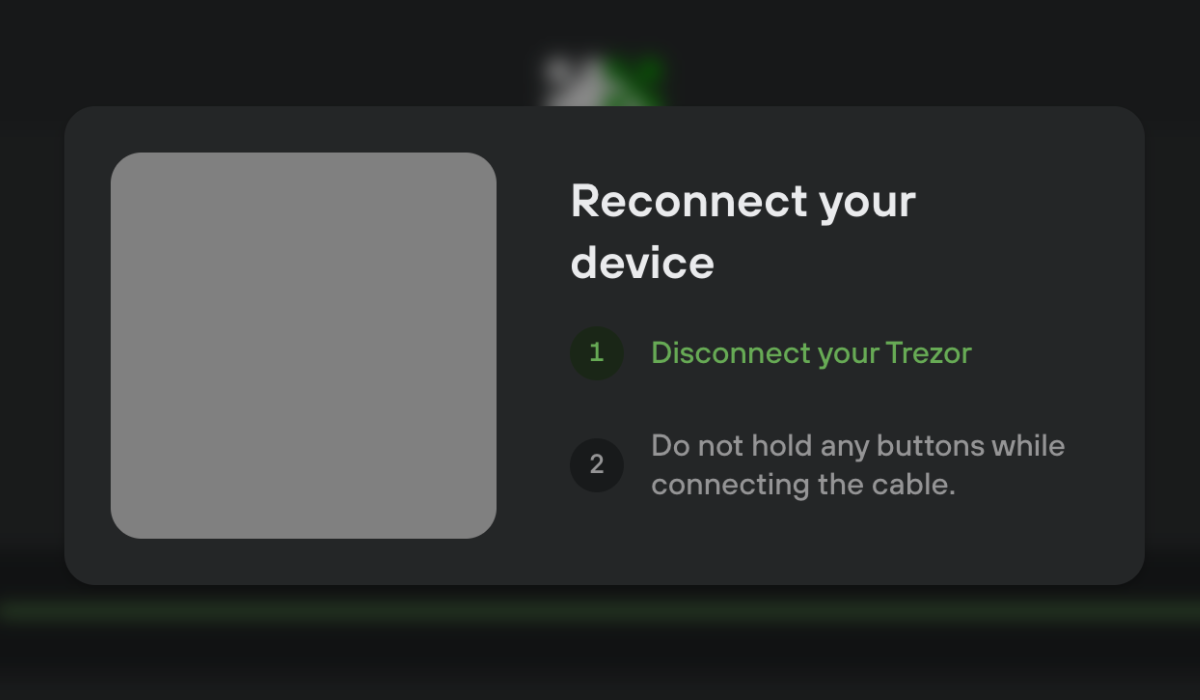
Device with no firmware installed
User proceeds by clicking “Install firmware” CTA. Since the device without firmware is always in bootloader mode we don’t need any cooperation from the user. Device doesn’t ask for confirming the installation of the fw. User of T1B1 is prompted to disconnect the device and reconnect it in normal mode. Newer device models automatically restart. Then we continue to the next step, (Generating seed)
State of currently shipped devices
Intermediary firmware
T1B1 devices with old bootloader cannot be upgraded to latest firmware directly. First we’ll install so called intermediary firmware, which will bump bootloader to newer version. After installation is completed, the user will be asked to reconnect the device. Because intermediary firmware only bumps bootloader and doesn’t install any firmware, device will be in bootloader mode regardless of how the user reconnects it (whether they press a button or not). Then it triggers an installation of subsequent firmware, which will be the latest firmware available. It will follow basically the same flow as with the first installation.
WebUSB
Support for the WebUSB came pretty late for T1B1 (bootloader 1.6.0 bundled with FW 1.7.1). Currently shipped devices won’t support WebUSB out of-the-box and user won’t be able to pair such device. In this case user needs to install Trezor Bridge. After finishing fw upgrade WebUSB support will be available.
Caveats
UI.FIRMWARE_PROGRESS
- Devices won’t dispatch any event after the user confirms the installation on a device. We only detect that the installation has started when we receive
UI.FIRMWARE_PROGRESSwhich is triggered about 10 seconds too late on T1B1.
Remembered wallet, multiple devices
The onboarding inherited few bugs from its predecessor. After the installation of a firmware user is asked to reconnect his device (T1B1) or the device is auto restarted. To prevent Suite from selecting another device while the one we use was disconnected, we force remembering the device (and storing it to persistent storage). However this doesn’t work in case of freshly unpacked device (or device with wiped fw), which are in bootloader mode from the start and cannot be “remembered”.
When this happens Suite will try to select another available device, which will be the other connected device or remembered wallet and there is no way ho to switch the device back unless you restart the app/refresh the page.
To work around this in suiteActions.onHandleDisconnect, before selecting the next active device, we check if we are in Onboarding (or standalone firmware update flow) and if so we won’t allow switching selected device to different one.
Generating seed
User chooses between generating a new seed or seed recovery.
Generating new seed
- Single seed
- Shamir (not available on T1B1)
At first it might seem that both options are doing exactly the same, real difference between these two will present itself in Backup seed step
Recovery from mnemonic
T2T1 or newer
The entire process is done on device. All we need to do in Suite UI is to show generic “Confirm on your Trezor” bubble.
T1B1
For T1B1 there are two things the user needs to decide:
- Does the user want to recover from 12, 28 or 24 words?
- Does the user want to enter the seed by selecting words in Suite UI (Standard recovery) or he/she wants the most secure environment and will enter the words via keyboard matrix shown on the device (advanced recovery)?
Backup seed
User needs to confirm that the seed will be safe, there will be no digital copy of it. Then he can start the process on a device.
T2T1 or newer
The entire process is done on device. All we need to do in Suite UI is to show generic “Confirm on your Trezor” bubble.
T1B1
Process consists of clicking “Next” button too many times and writing down words displayed on a trusty seed card. During this process we will display “Confirm on Trezor” prompt and instructions.
This step is optional and can be skipped and finished later from Suite settings.
PIN Setup
After the user hits CTA button “Create PIN” we need to show confirmation prompt. It is handled by checking device.buttonRequests to see if there is ButtonRequest_Other (T1B1) or ButtonRequest_ProtectCall. Yes, it is hacky. But thanks to clearing buttonRequests array in each step of the onboarding it should be safe and presence of these requests should indeed indicate that a device is asking for a confirmation.
When the user hits cancel on a device, @SUITE/lock-device is fired, buttonRequestsMiddleware will intercept it and fire removeButtonRequests action which clears the array resulting in cancelling confirmation prompt in the Onboarding UI.
Entering PIN
T1B1
After the user confirms setting new PIN on the device we’ll receive UI.REQUEST_PIN, which will be stored in modal reducer (as every other request coming from a device). Based on this we display PIN matrix.
The user enters PIN twice, if there is a mismatch, process is stopped and an error shown with a button to try again.
T2T1 or newer
The entire process is done on device (including handling of mismatched pins). All we need to do in Suite UI is to show generic “Confirm on your Trezor” bubble.
Be aware that after the PIN is set, device auto-lock functionality gets activated (starting from some firmware version). Thus if it’s taking the user too long to finish the onboarding process, the device will get auto locked. If in the final step, where the user can change device label and/or homescreen, the device is locked and will respond with a request to show a PIN matrix. This is handled globally, in UnexpectedStates component, for the whole onboarding flow.
Suite Settings
User can choose what coins should be enabled right from the start. There is also an option to enable TOR and set custom Blockbook backends. These settings mirror what is already set in Suite. If a user has used Suite before and changed its setting he/she will see these changed settings here as we don’t want to reset user’s settings just because he/she goes through onboarding process with another (or wiped) device.
Final step
The last step which contains basic device setup such as changing its label and homescreen.